Visualizzazione post con etichetta Christmas. Mostra tutti i post

martedì 28 luglio 2026

Thinking About Christmas

Hi crafty friends!

I'm here today to share with you another Christmas card featuring Alex Syberia Designs  products!

I think you have understood I'm waiting for that time of the year and that why I am so inspired !
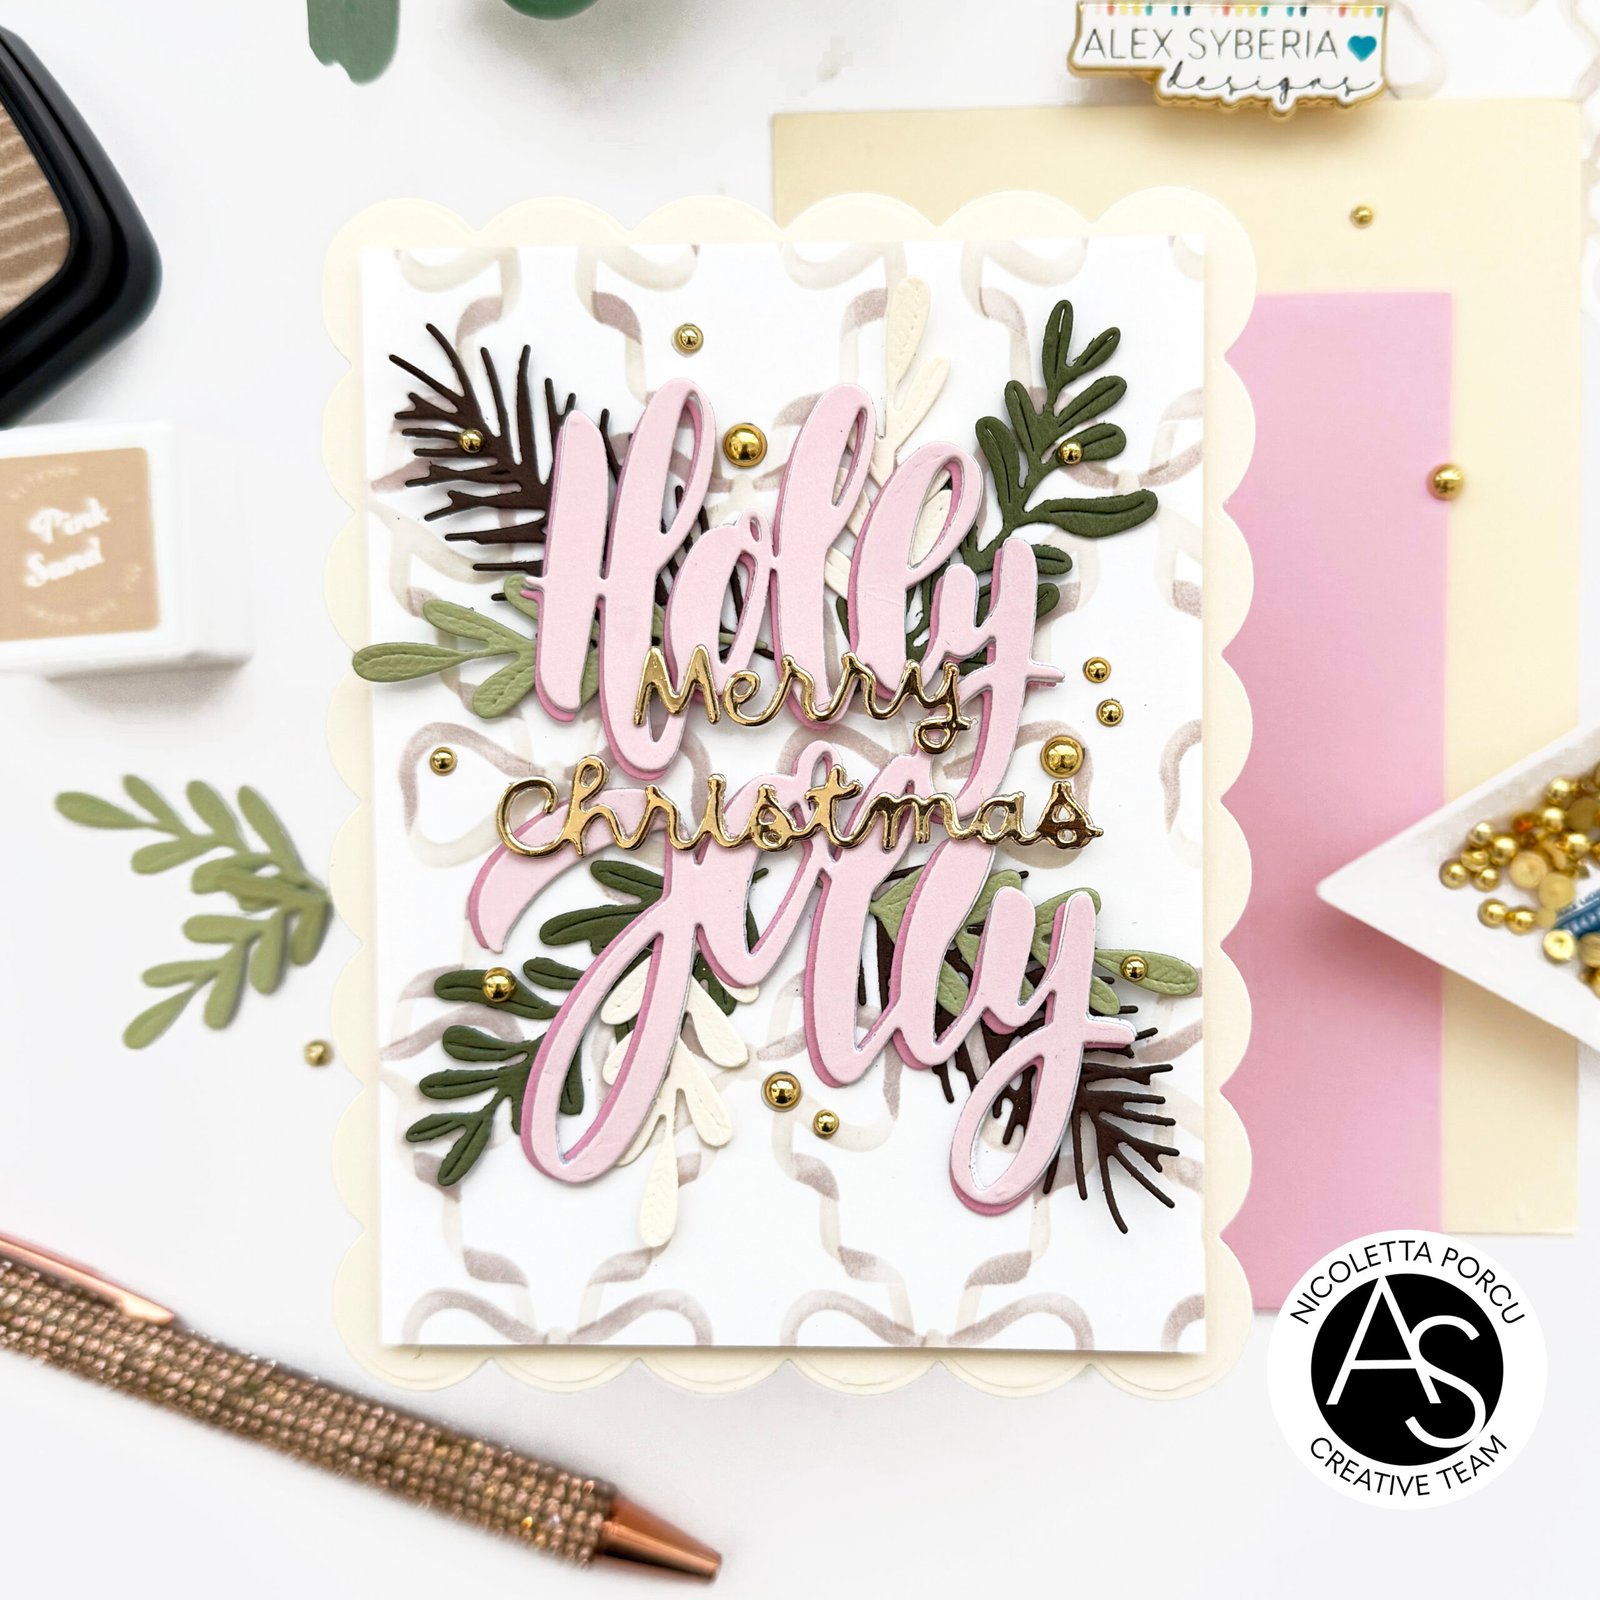
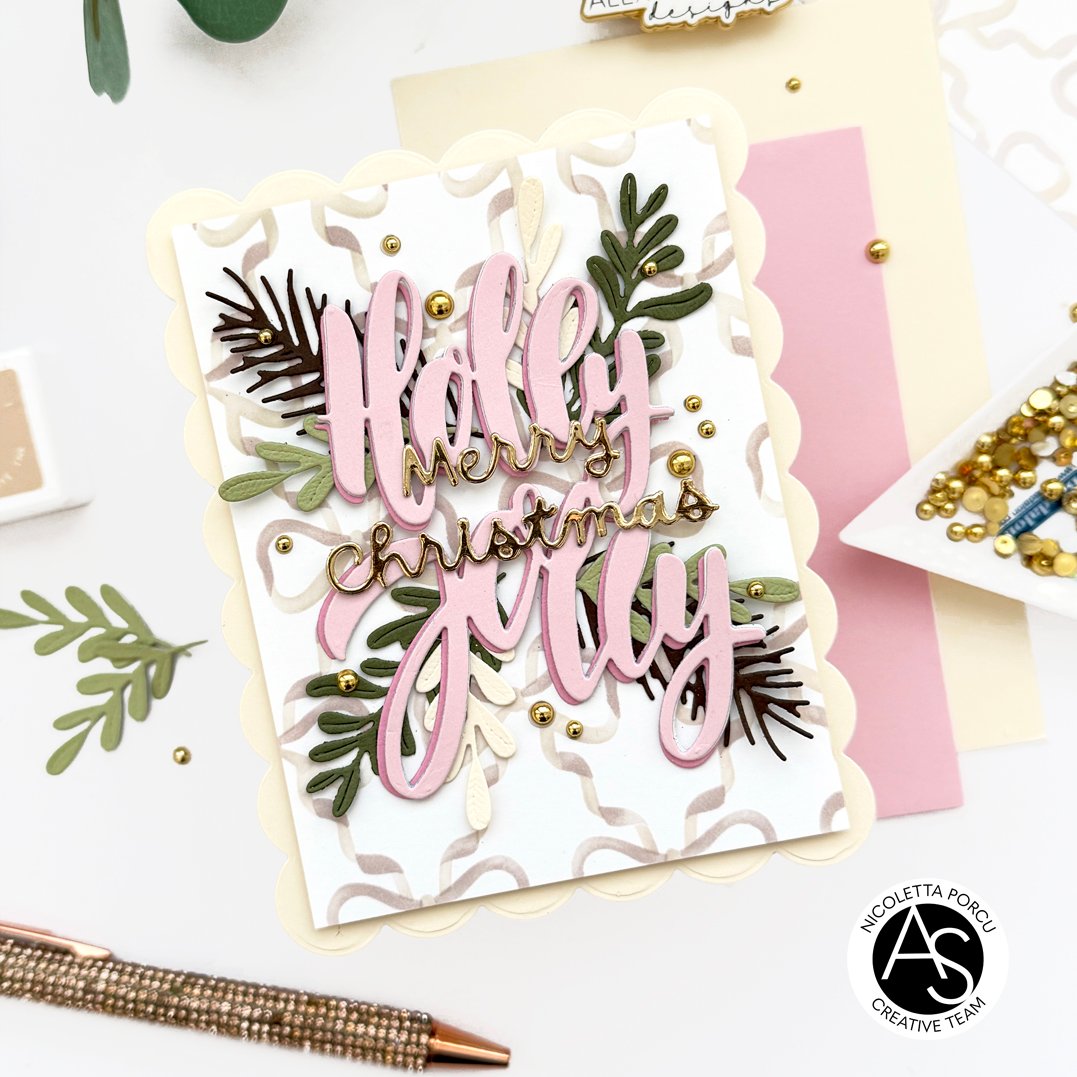
To make my card I started by stencil the Chic Bows Stencil set  on a piece of Neenah Paper using the Sand Dune Versafine Claire ink and the Pink Sand Fresh Dye ink by Altenew. Then I die cut it into a dotted rectangle using a frame from the Nested Scalloped Frames die set .

I outlined it with a cream scalloped frame and I glued al on my base card.

Than I die cut the big sentiment using the Holly Jolly die;


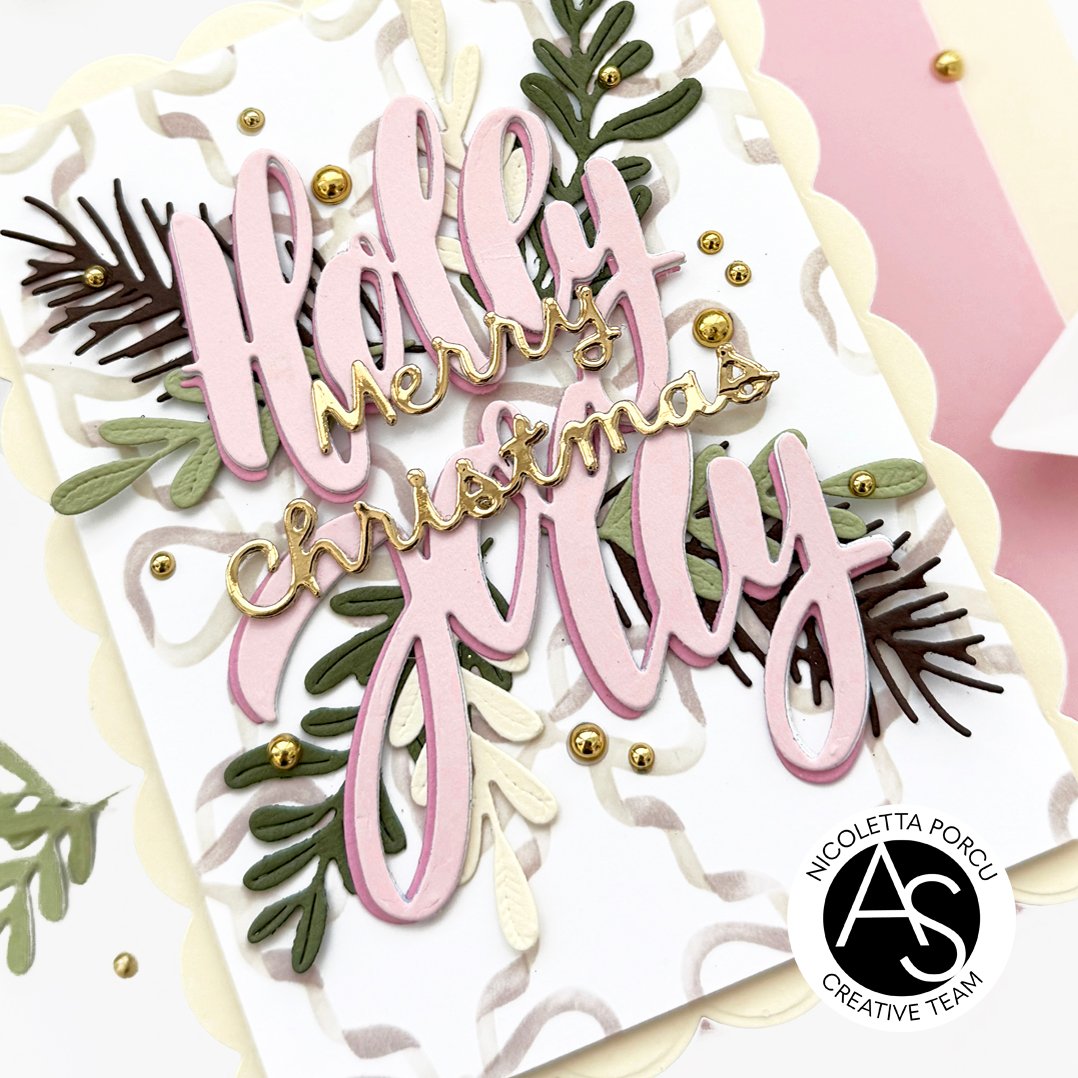
I die cut many layers  of it in light pink cardstock and another layer in a darker one;  I glued  the lighter ones  all together to add dimension and then the darker one slightly staggered to create and ombre effect.

I added the sentiment on the card's center and under it I glued some foliage I die cut using the  and Winter Foliage die setand the Jingle Bell Joy die set;

On the pink big sentiment I added a gold Merry Christmas die cut I made using a die from the Bow Ho Ho Frame die setand as a last thing I added some gold beads all over the card.
I listed below all products I used:

Chic Bows Stencil set

Holly Jolly die

Jingle Bell Joy die set

Winter Foliage die set

Bow Ho Ho Frame die set

Nested Scalloped Frames die set

Spellbinders New & Improved Platinum SIX Die Cutting & Embossing machine

You could find all of them on Alex Syberia Design UK shop and on the  US Alex Syberia Design shop  for the American friends.  for the American friends.

Also Canadian friends  can now  order from the US store!!
 

I  hope you like my card and I gave you some inspiration!

Thank you for stopping by!

See you soon!

Ciao ciao

martedì 21 luglio 2026

Jingle Bell Joy

Hi crafty friends!

I'm here today to share my latest card  with you!

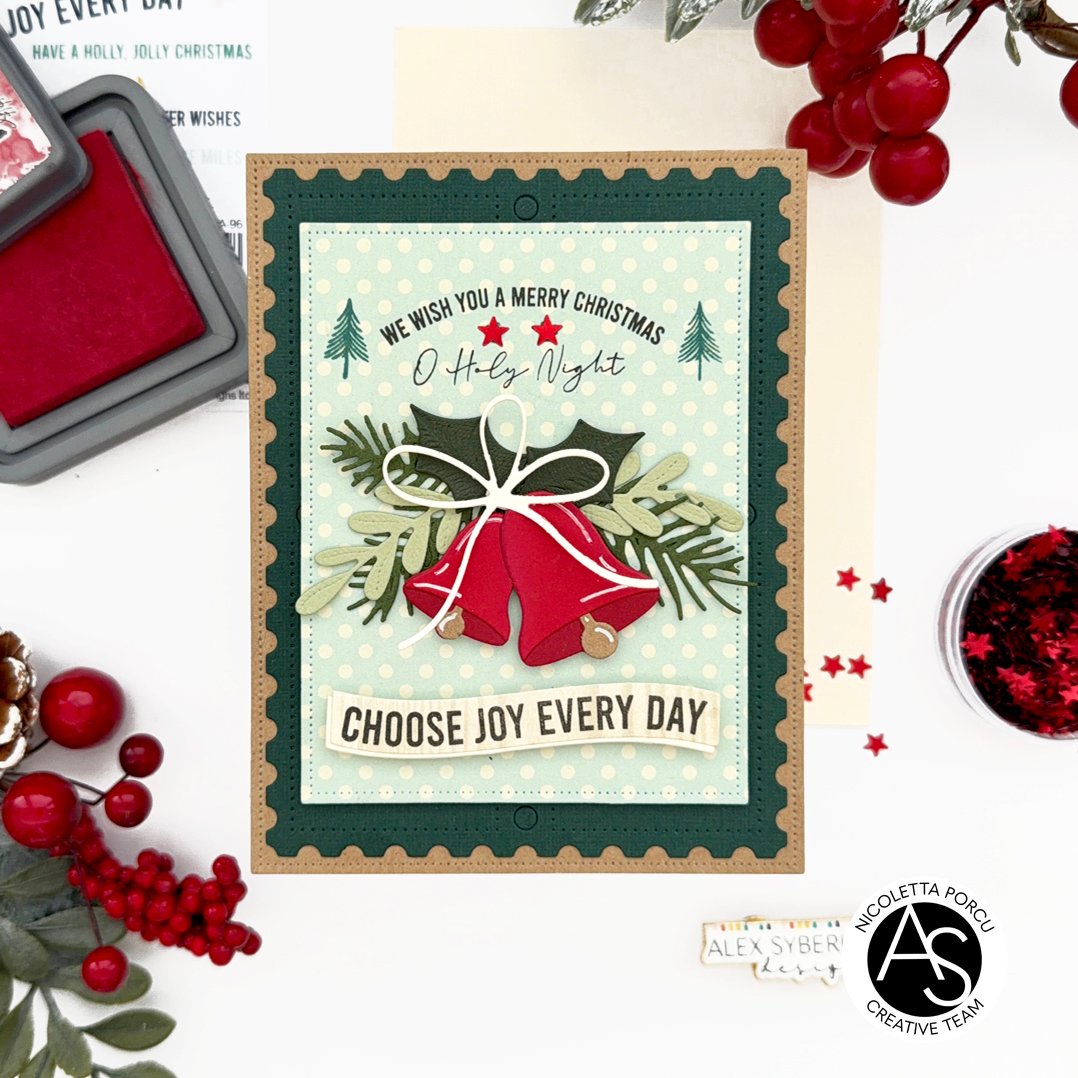
Since here we are suffering a weather with very hight temperature I'm already dreaming about Christmas so I show you my "Christmas in July" card made using Alex Syberia Designs  products!

Hope you like it

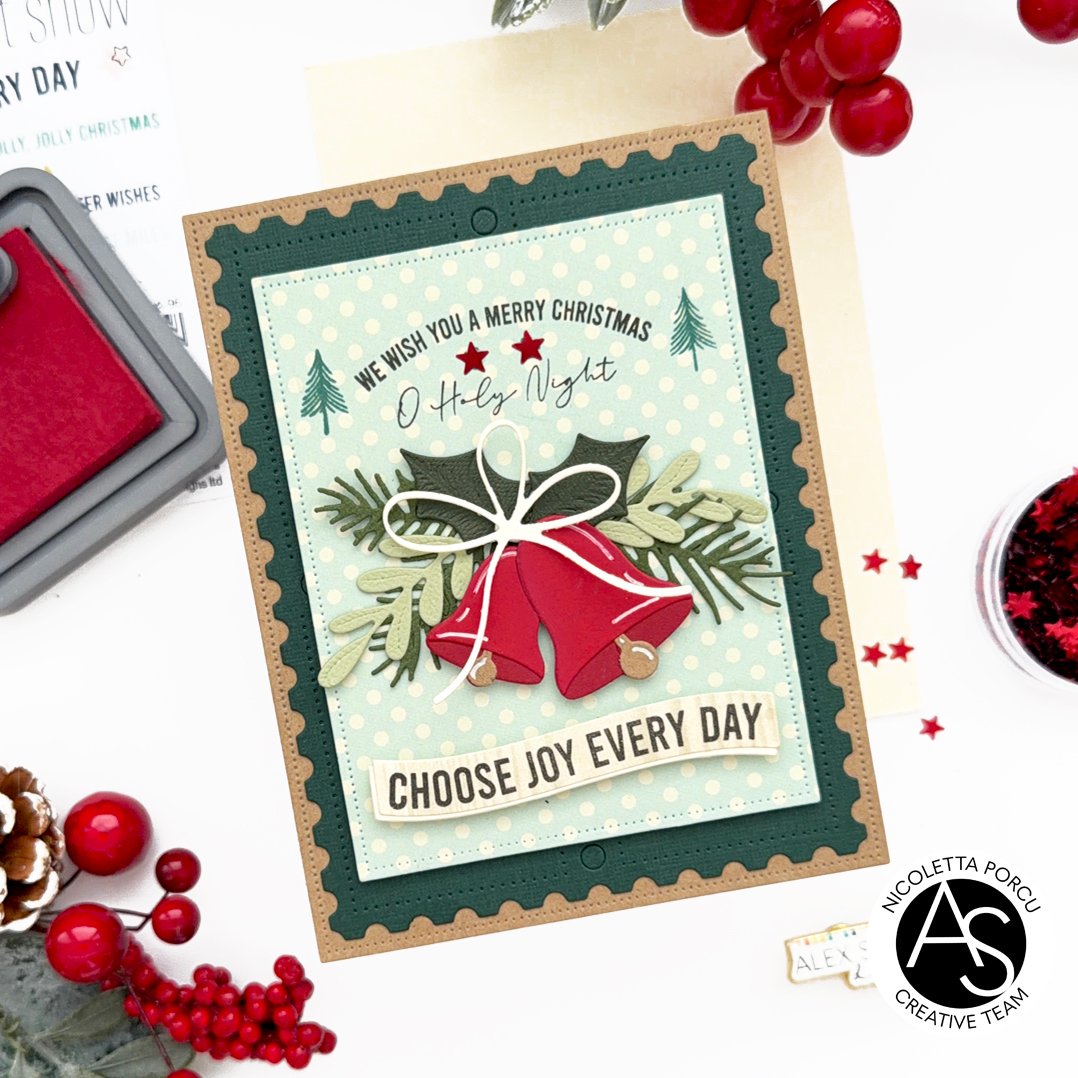
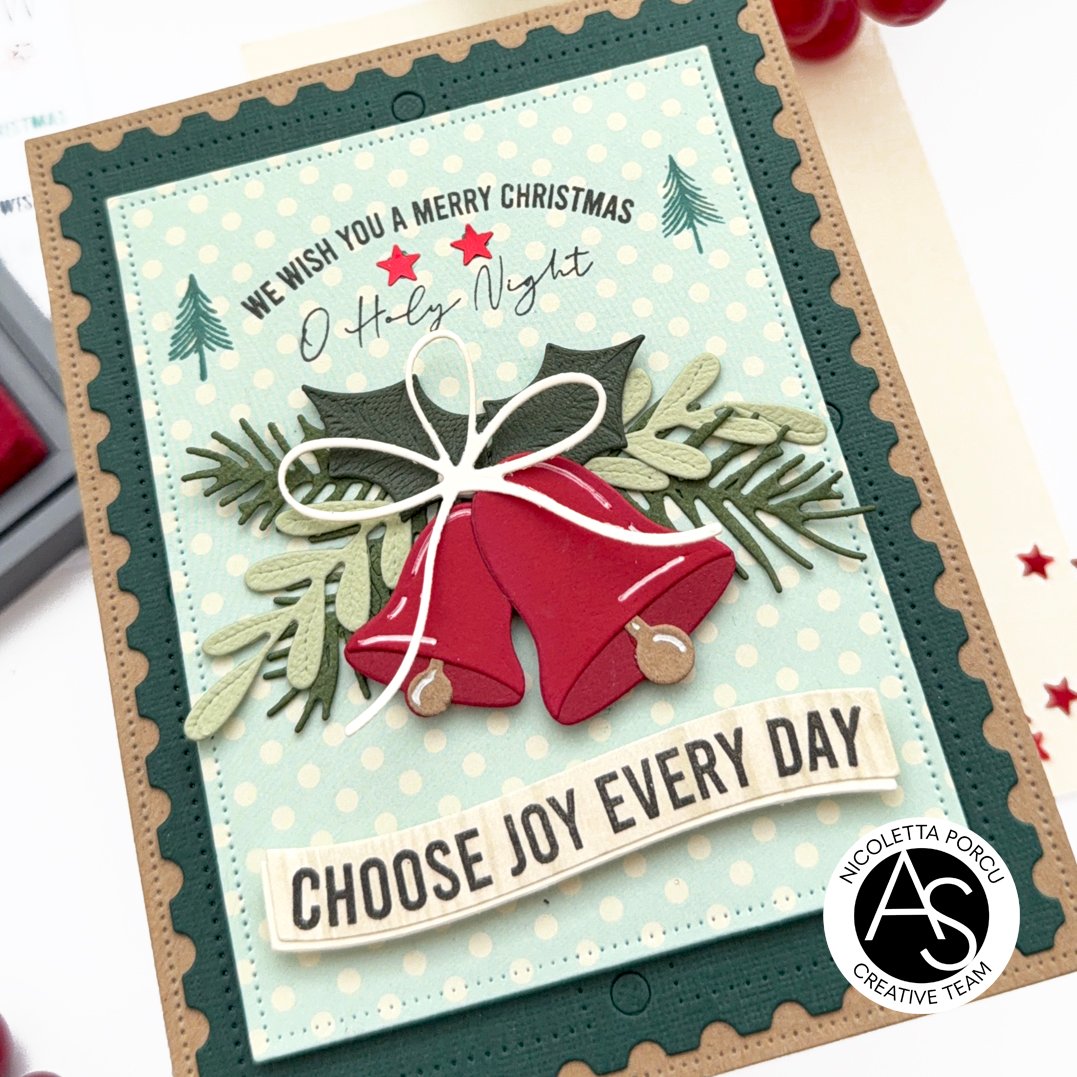
To make the card I started by die cutting the rectangle  top panel from a dotted patterned paper, using a die from the Nested Scalloped Frames die set

I stamped over  it the sentiments and the little trees using the Christmas Sentiments stamp set and then I die cut all the elements from the Jingle Bell Joy die set. I used red cardstocks for the bells and green ones for the leaves! I assembled and glued everything under the stamped sentiment  and I added the cream Pretty Bow die on the bells.


Next up I added on the bottom of my panel the banner sentiment relized using the Christmas Sentiments stamp set and  Christmas Sentiments die set ; I glued it using foam pads to add dimension.

At that point I die cut a the Postage Stamp cover die in a dark green and I glued it over a craft base card, I added the decorated top paned using and heavy cardstock between the layers to add a little bit of dimension and as a last thing I added two little metallic red stars to give a touch of color  between the stamped sentiments.

That's it!!

I listed below all products I used:

Christmas Sentiments stamp set

Christmas Sentiments die set

Jingle Bell Joy die set

Pretty Bow die set

Postage Stamp cover die

Nested Scalloped Frames die set

Spellbinders New & Improved Platinum SIX Die Cutting & Embossing machine

You could find all of them on Alex Syberia Design UK shop and on the  US Alex Syberia Design shop  for the American friends.  for the American friends.

Also Canadian friends  can now  order from the US store!!


I  hope you like my card and I gave you some inspiration!

Thank you for stopping by!

See you soon!

Ciao ciao

martedì 2 dicembre 2025

Oh Christmas Tree!

Hi crafty friends!

I'm here to share  with you a new card featuring the new  ASD Christmas release!

Today, it's the time for the Christmas Cracker die set  mixed with many other products I will link below.  Hope you like the result!

To make my card I started by hot foiling in gold  the Brilliant Burst Hot Foil Plate  on a Millerighe paper, die cutting it using the big dotted rectangle from the Nested Scalloped Frames die set and gluing it over a white card base.

Next up I die cut nine little trees from Christmas Cracker die set. in different colors and in white, I glued the colored ones over the white one a little bit staggered. Then I added all of them on a millrighe  rectangle. I outlined it with gold cardstock  from the Royal Elegance Mix Cardstock 27 pack and I added all to the hot foiled background.

As a last thing I added the Joy sentiment  with the Joy die and the string one I made using the Christmas Sentiments stamp set  and  Christmas Sentiments die set.

Below a recap of all products I used:

Christmas Cracker die set

Brilliant Burst Hot Foil Plate

Nested Scalloped Frames die set

Joy die

Christmas Sentiments stamp set

Christmas Sentiments die set

Royal Elegance Mix Cardstock 27 pack

Spellbinders New & Improved Platinum Six Die Cut and Embossing machine

Spellbinders New & Improved Glimmer Hot Foil System Platinum


You could find all of them on Alex Syberia Design UK shop and on the  US Alex Syberia Design shop   for the American friends.

Thank you for stopping by!
 
Ciao Ciao
 

martedì 25 novembre 2025

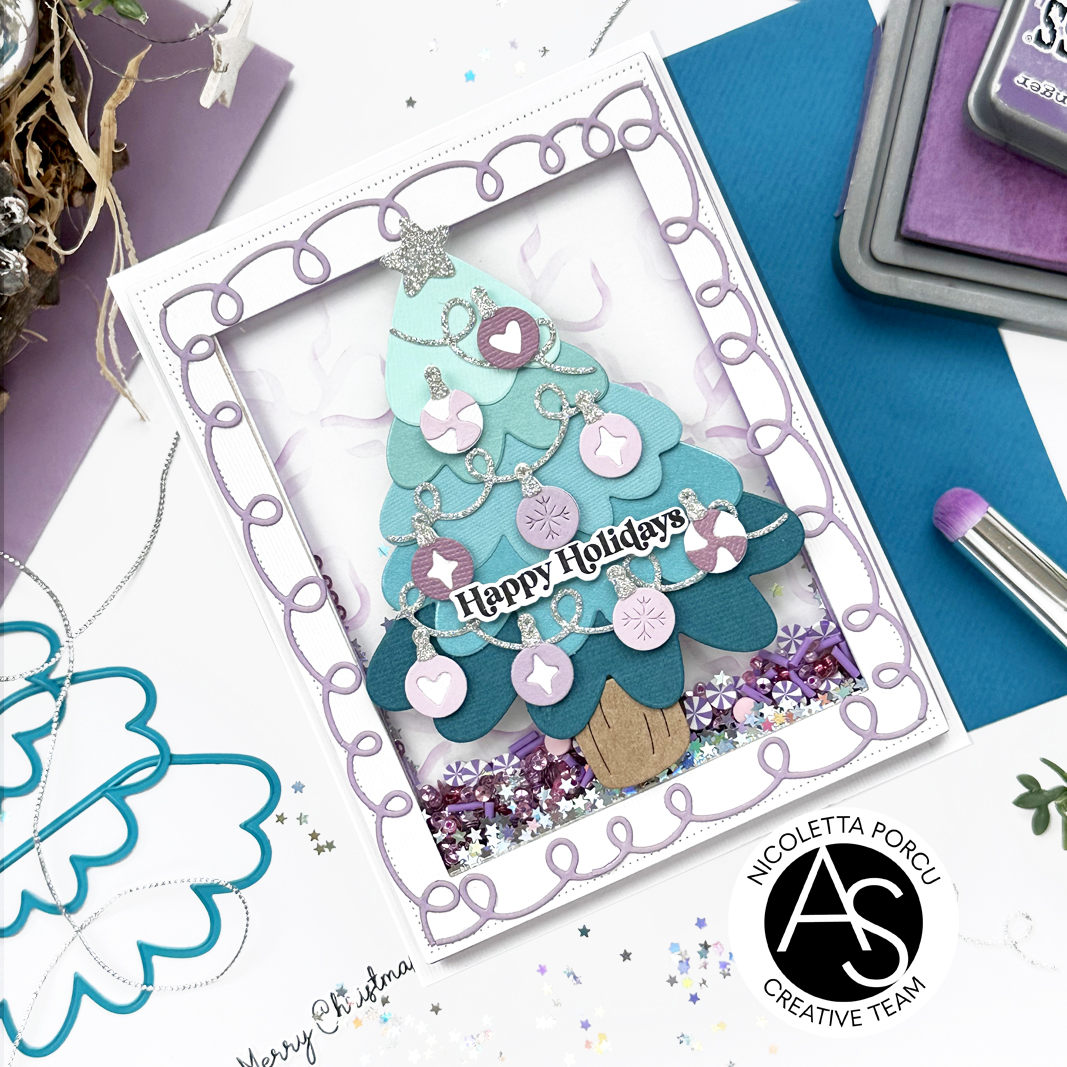
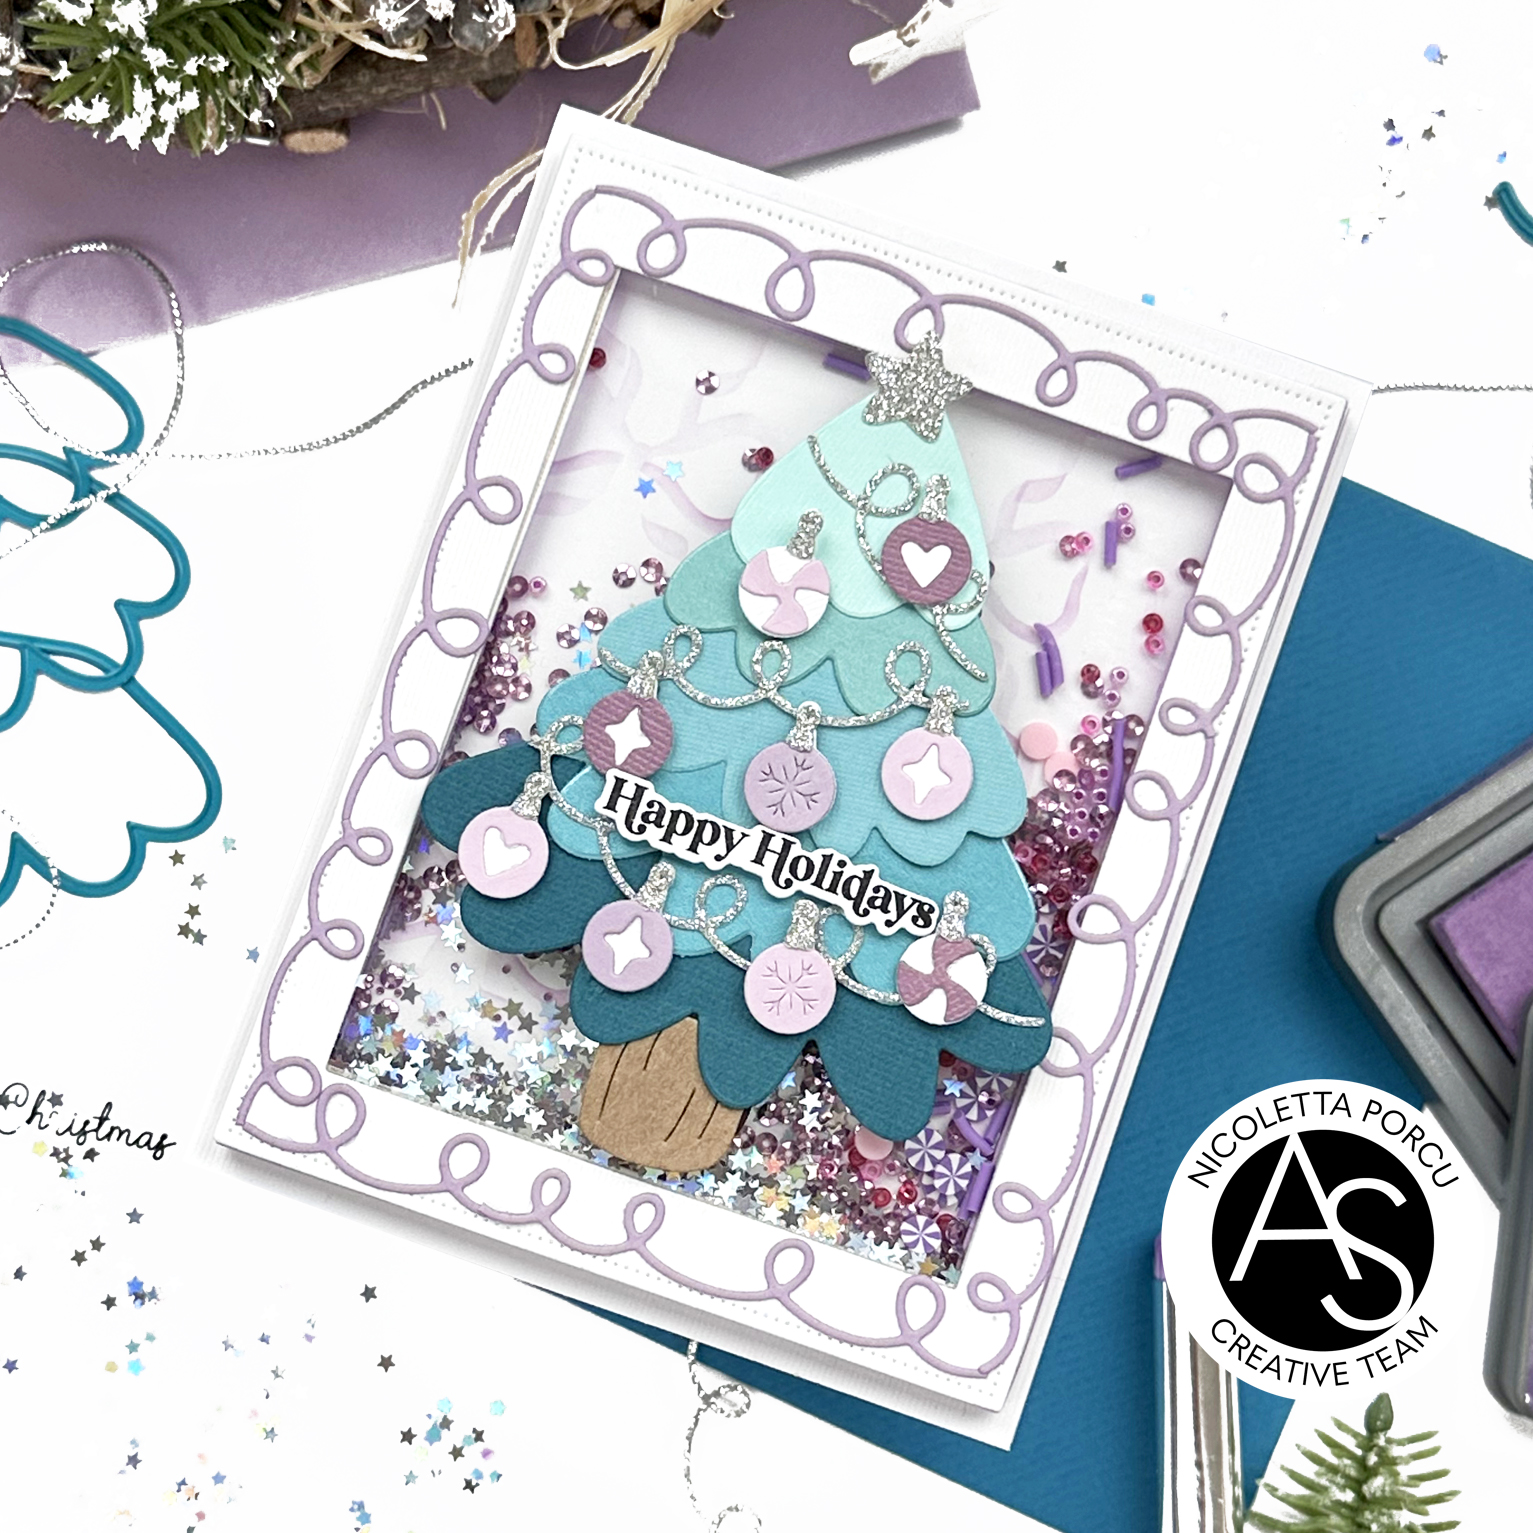
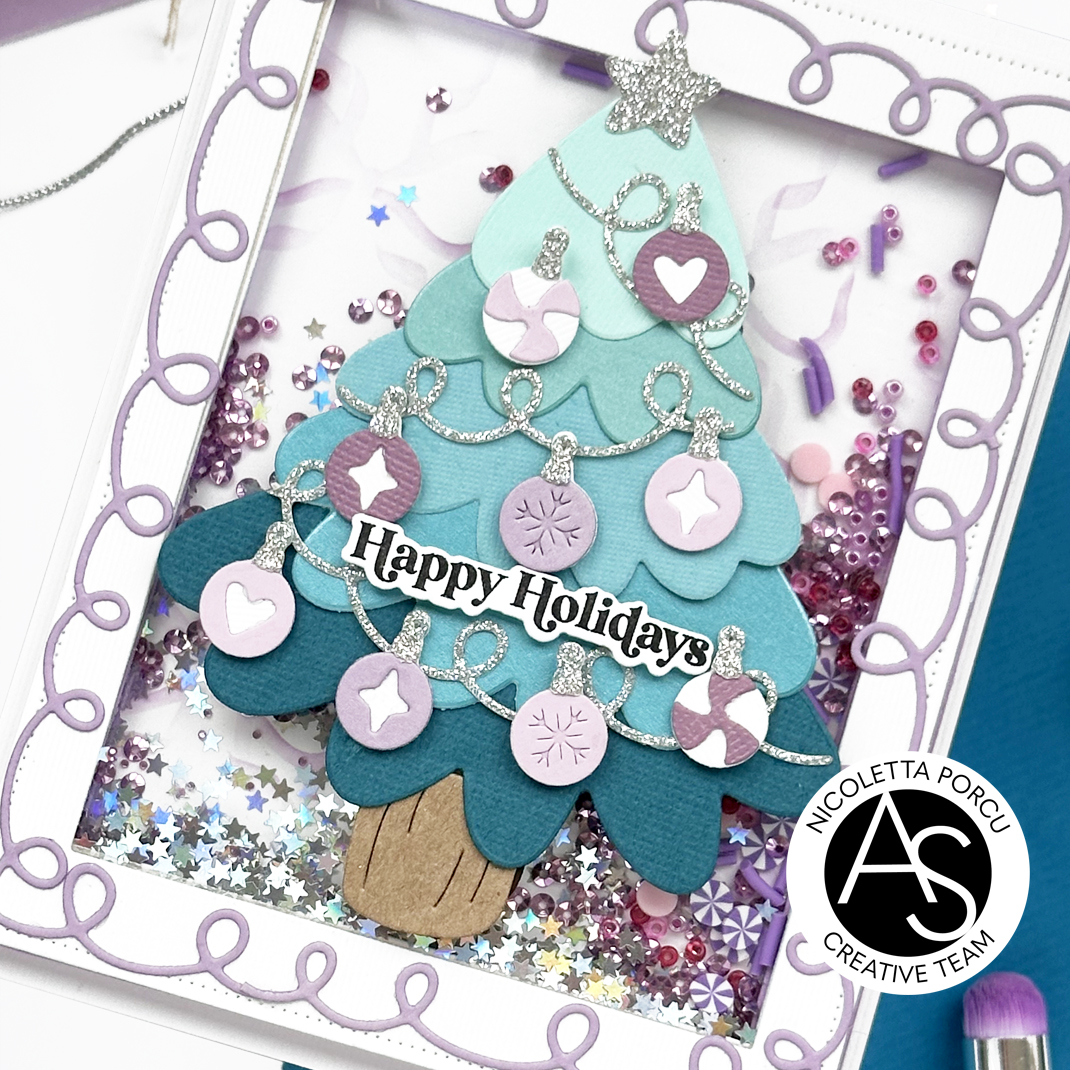
Happy Holidays Shaker Card for My Instagram Giveaway

Hi crafty friends!

Today I'm sharing with you a new card featuring the new  ASD Christmas release!

With  this card I'd like to  celebrate the Black Friday Week with a Instagram giveaway to give you the chance to win fab prizes sponsored by Alex Syberia Designs.

So I'm waiting for you on my IG account:-) @nicolettaporcu.design

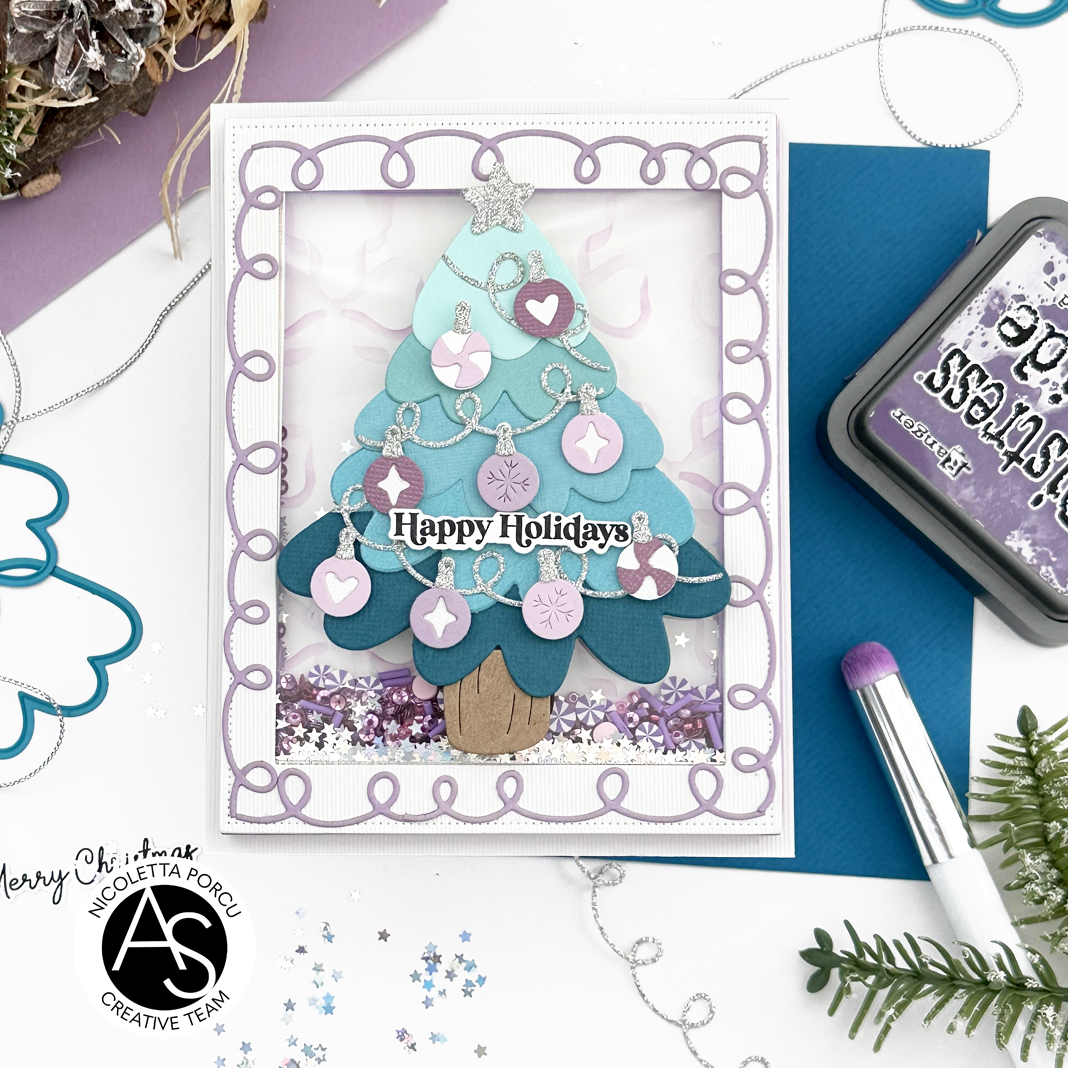
But now let me talk about this card focused on  the Mini Ornaments die set and  on the  Festive Tree & Wreath die set.

Hope you like the result!

To make my card I started  by stencilling the Chic Bow Stencil set  on a piece of Neenah paper using the Dusty Concord Distress Oxide Ink. Next up I die cut it into a rectangle using the Nested Scalloped Frames die set.


Then I continued making the shaker frame using two dotted  rectangle dies from the Nested Scalloped Frames die set : I first die cut two white frame and a rectangle clear acetate and I glued it between the two white frames; then I glued it over two lilac mousse frames.

I put into the frame the shaker embellismnts and I cover it with the stencilled rectangle.


At that point I added the skaker on a white base card and I then I made the Christmas tree using the Festive Tree & Wreath die set, the Mini Ornaments die setthe Golden Turquoise Mix Cardstock 27 packthe Black & Silver Mix Cardstock 27 pack and others turquoise cardstocks.

As a last things I added the  lilac ribbon die cut all around the frame and the string  sentiment in the middle of the Christmas tree; I made it using the Merry Mail stamp set  and the coordinate Merry Mail die set.

Below a recap of all products I used:

Festive Tree & Wreath die set

Mini Ornaments die set

Chic Bow Stencil set

Nested Scalloped Frames die set

Golden Turquoise Mix Cardstock 27 pack

Black & Silver Mix Cardstock 27 pack

Merry Mail stamp set

Merry Mail die set

Spellbinders New & Improved Platinum Six Die Cut and Embossing machine

You could find all of them on Alex Syberia Design UK shop and on the  US Alex Syberia Design shop   for the American friends.

Thank you for stopping by!
 
Ciao Ciao
 

martedì 18 novembre 2025

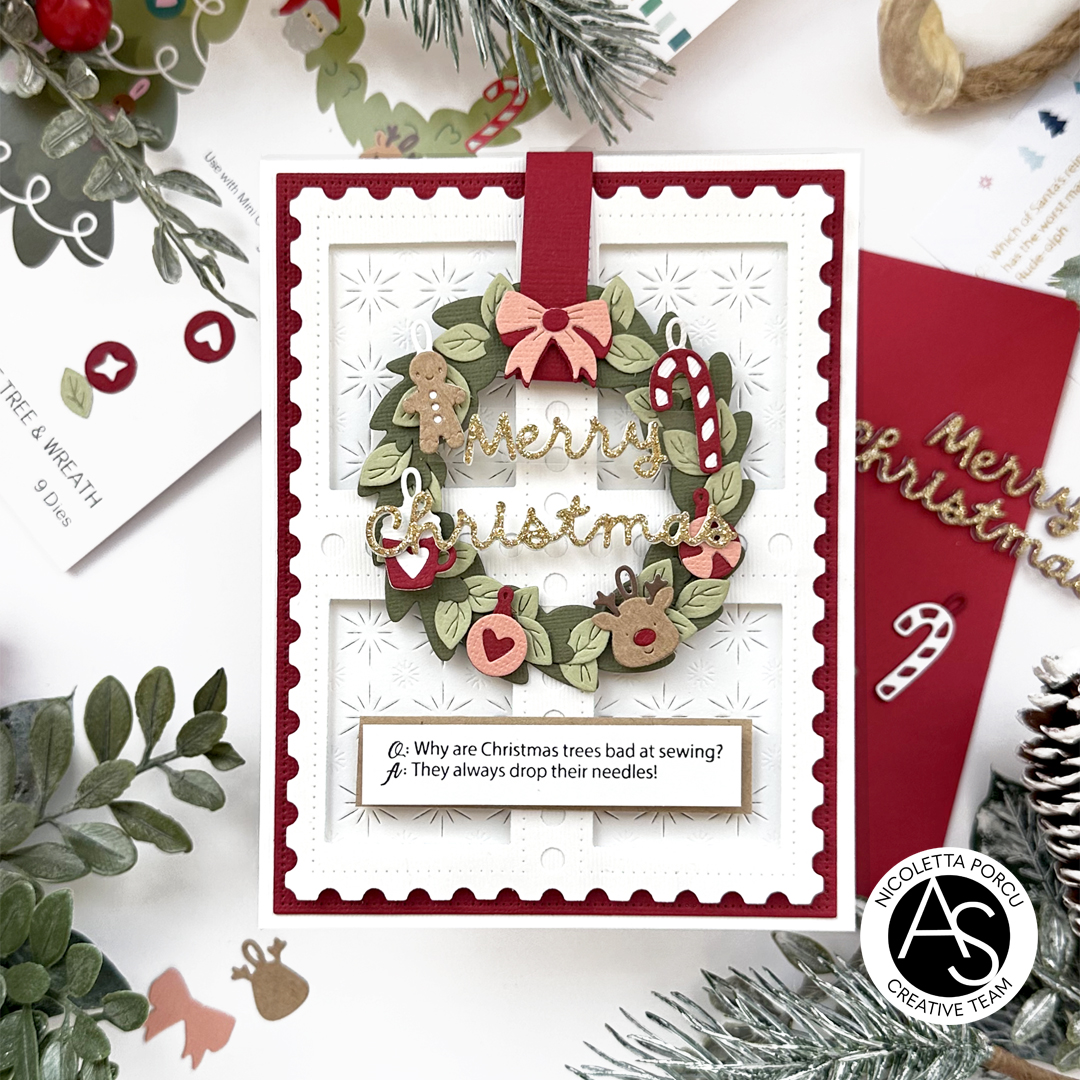
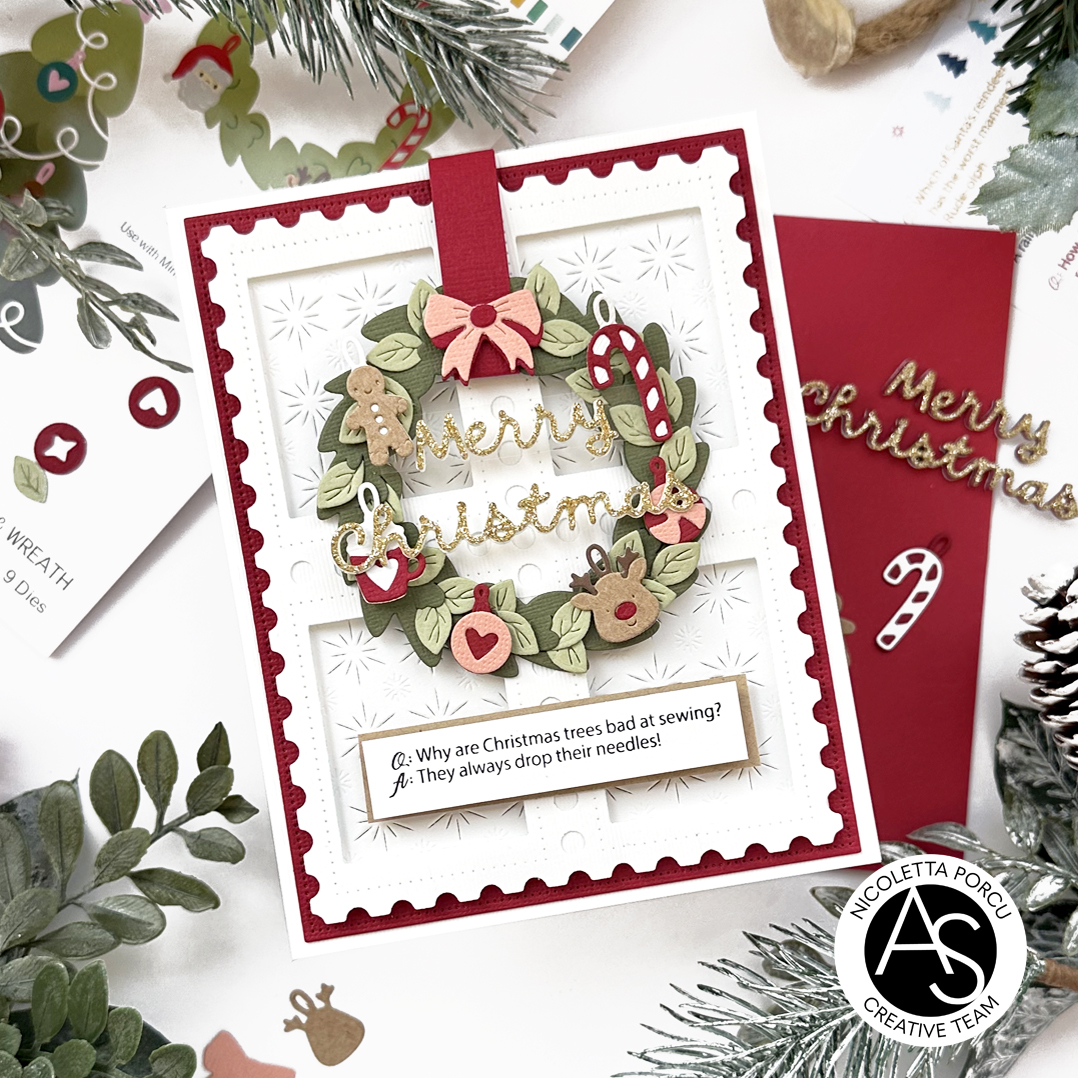
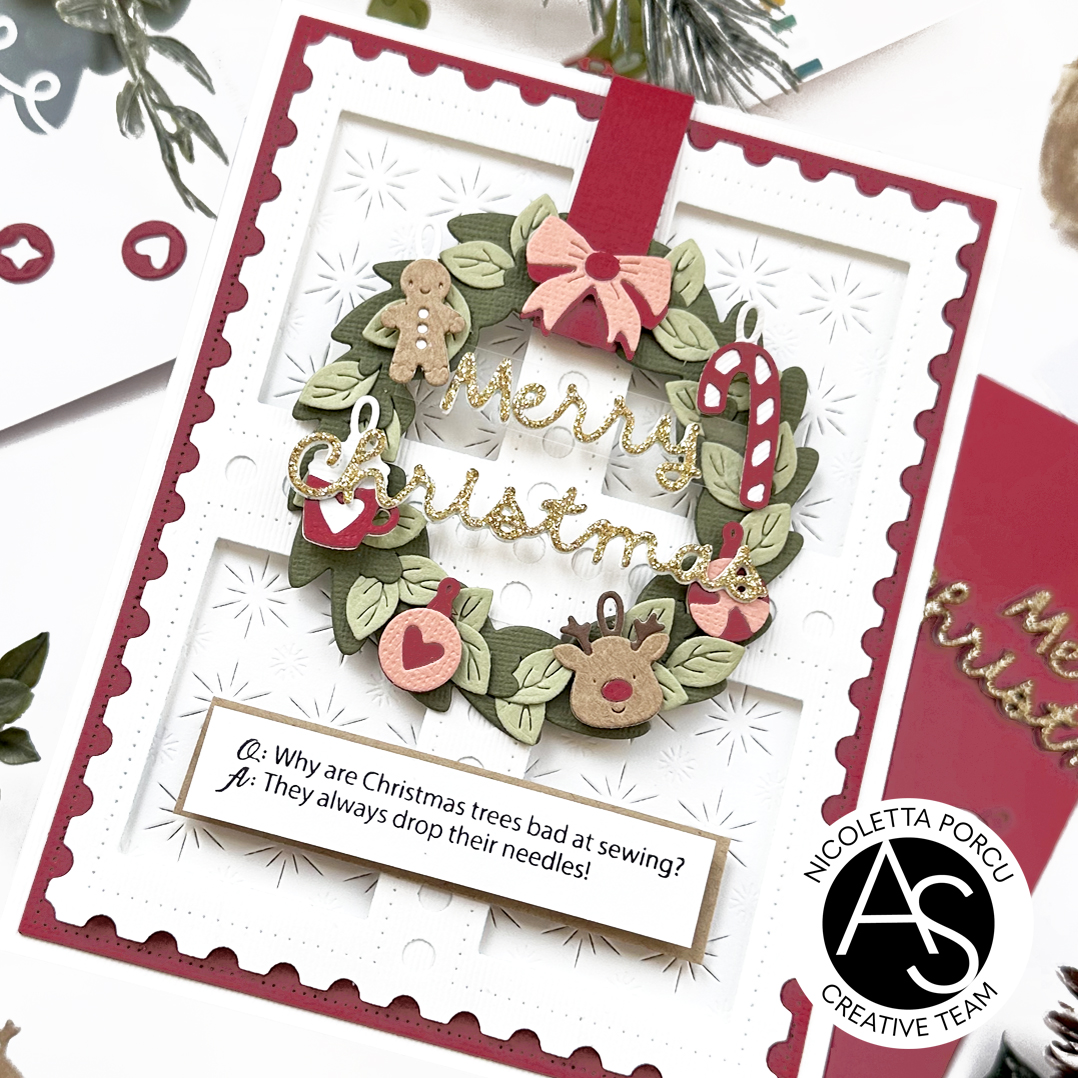
Christmas Wreath

Hi crafty friends!

Today I'm sharing with you a new card featuring the new  ASD Christmas release!

Today, it's the time for the Mini Ornaments die set and for Festive Tree & Wreath die set mixed with many other products I will link below.  Hope you like the result!

To make my card I started by die cutting in white the Postage Stamp Cover die and the  Sparkly Flakes Cover die . I coverd in white  the holes of the Postage Stamp Cover die cut  and , using mouse stripes to add dimension, I added  it over the Postage Stamp Cover die cut ( I adapted  before cutting the exceeding parts).

I outlined the frame with red rectangle I made using the Nested Scalloped Frames die set and I glue everything over a white card base.

Next up I die cut two green wreaths using the Nested Scalloped Frames die set and all the ornaments I needed from the Mini Ornaments die set. I started by inserting  some leaves  in the cuts of  the wreath and then gluing it on another wreath to fix all the leaves.

At that point  I placed the wreath on the card  using a red stripe carsick to anchor ir to the base card.  I added all the mini ornaments  and then the sentiments I realised using the Merry Christmas die from the Bow Ho Ho Frame die set. I die cut the base part in 3 white layers and the top one in gold glittered cardstok from the Christmas Sparkle Mix Cardstock 27 Pack. I glued all together and I added it in the wreath's center. To make the merry word strands on the wreath I used a little acetate stripe.

As a last thing I added the bottom sentiment I stamped from the Christmas Jokes stam set.

Below a recap of all products I used:

Mini Ornaments die set

Postage Stamp Cover die

Festive Tree & Wreath die set

Christmas Jokes stam set

Bow Ho Ho Frame die set

Nested Scalloped Frames die set

Sparkly Flakes Cover die

Christmas Sparkle Mix Cardstock 27 Pack

Spellbinders New & Improved Platinum Six Die Cut and Embossing machine

You could find all of them on Alex Syberia Design UK shop and on the  US Alex Syberia Design shop   for the American friends.

Thank you for stopping by!
 
Ciao Ciao
 

martedì 11 novembre 2025

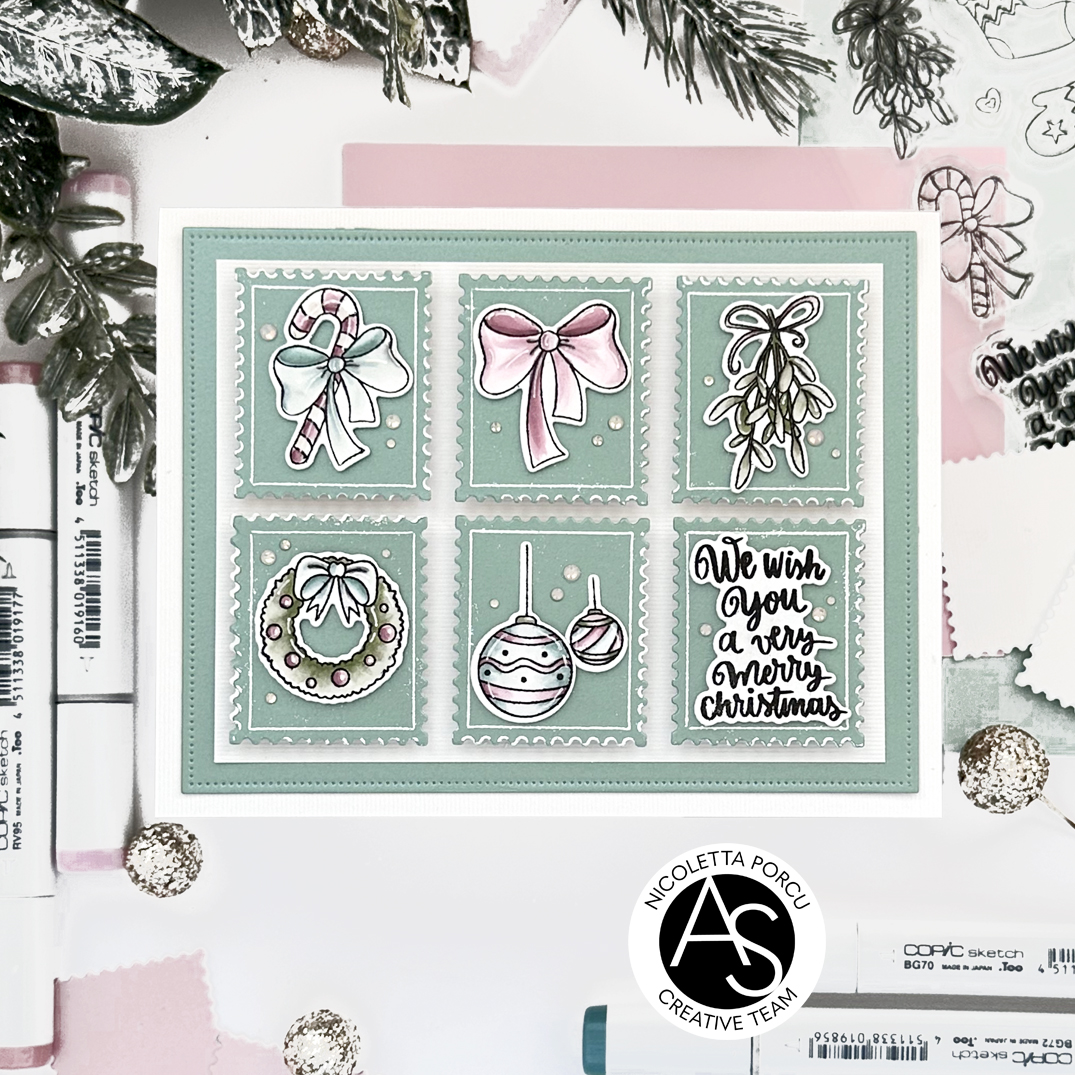
Merry Mail

Hi crafty Friends!

I'm here to share with you a new card featuring the new  ASD Christmas release!

Today, it's the time for the Merry Mail stamp e die set! Hope you like the result!

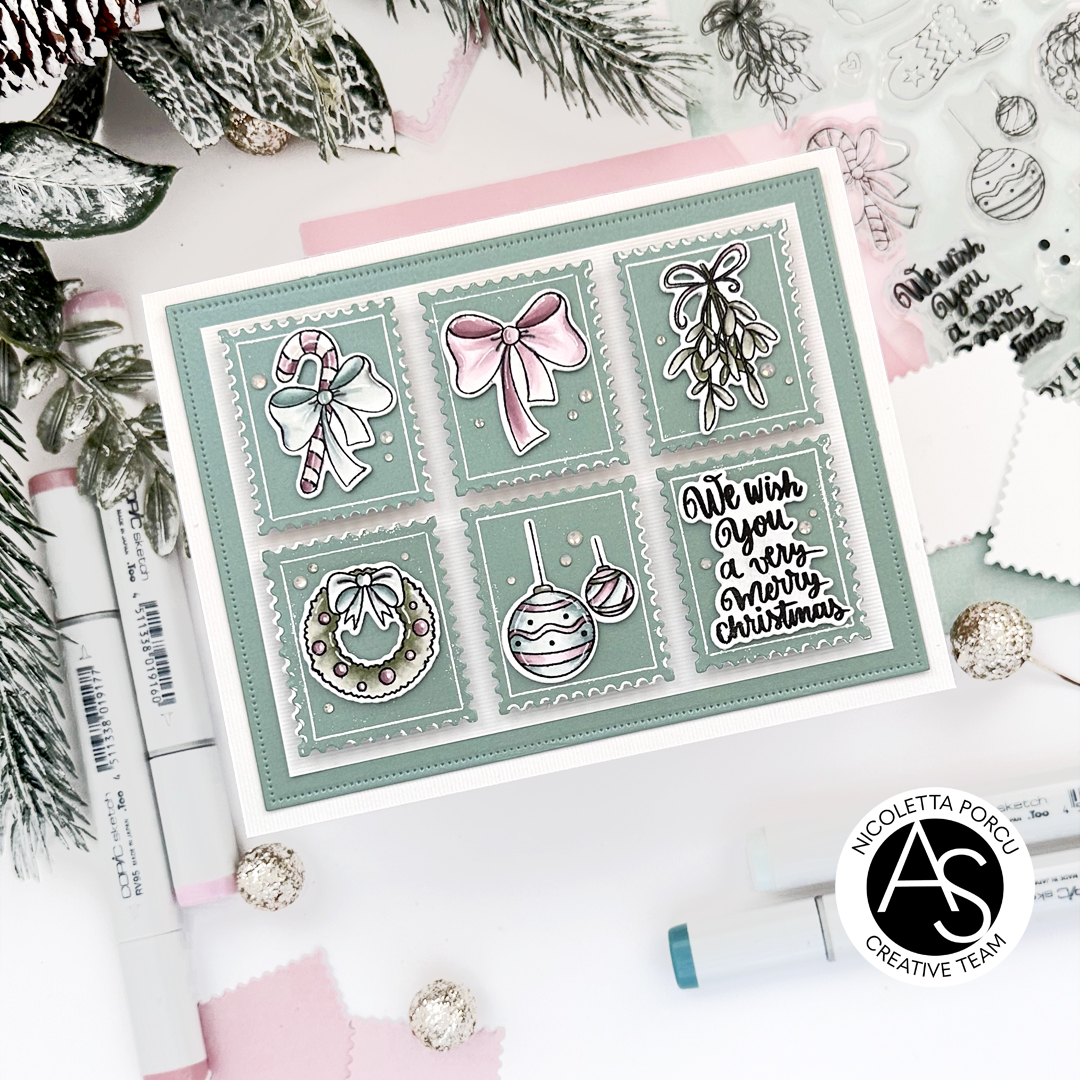
To make my card I started by stamping and embossing in white six  stamp frames from the Merry Mail stamp set over the Pearl Sage Green cardstock from the Mystic Garden Mix Cardstock 27 pack. Then I die cut all the frames use the coordinate die form the Merry Mail die set. and my Spellbinders New & Improved Platinum Six Die Cut and Embossing machine.


Next up I glued all the stamp die cuts over a 5"x3 1/2" white cardstock  using adhesive foam pad to add dimension and then I glued it over a Sage Green  dotted rectangle I die cut using the largest die from the Nested Scalloped Frames die set.

At that point I stamped the decors  I needed from the Merry Mail stamp set,  I colored them using my Copic markers, and I die cut all of them using the coordinate dies Merry Mail die set.

I added all the decors and the sentiment over the frames using some thin mousse pads to make  them pop out and I glued the front card over a white bas card.

As a last thing I added some clear rhinestones all over the card and that's it!

Below a recap of all products I used:

Merry Mail stamp set

Merry Mail die set

Nested Scalloped Frames die set

Spellbinders New & Improved Platinum Six Die Cut and Embossing machine

Mystic Garden Mix Cardstock 27 pack


Copic markers I used: 

RV95/RV93/RV91/RV000

BG93/BG90/BG72/BG70/G94/0


You could find all of them on Alex Syberia Design UK shop and on the  US Alex Syberia Design shop   for the American friends.

Thank you for stopping by!
 
Ciao Ciao
 

martedì 21 ottobre 2025

A Christmas Bouquet For You

Hi crafty friends!

I'm here today sharing with you the card I made using products from the new Bow Ho Ho  Alex Syberia Design release.

Today is the time for the Christmas Bouquet die set.

A very simple card made using the Christmas Bouquet die set.elements from the  adding only a string sentiment and some embellishments.

I started by die cutting all the elements from the Christmas Bouquet die set in different colors. I assembled the bouquet and I glued it over a white card base.


Next up I die cut the Joy word in  five layers;  four in cream cardstock and the top one in copper metallic cardstock. I glued all layers together and I glued  it over the bouquet.

I added a little string sentiment made using the Christmas Sentiments stamp set and coordinate dies.

As a last touch I added some copper rineshotnes and that's it

You could find all of them on Alex Syberia Design UK shop and on the  US Alex Syberia Design shop   for the American friends.

Hope you like my card!

Thank you for stopping by!
 
Ciao Ciao
 

martedì 9 settembre 2025

It's Never Too Early To Think About Christmas

Hi crafty friends!

I'm  here, today,  with a new card to share with you!

To make my card I started by stencilling the Sunrays Stencil set   on Neenah paper, using some Altenew Fresh  ink as sowed in the pictures.

Than I die cut it in a smaller rectangle using the Nested Scalloped Frames die set and I glued it over a white base card.

Next up I stamped the two sentiments from the Merry Christmice Stamp set , using the Chianti Versafine Clair ink for the bigger one and the Versafine black ink for the smaller one. I die cut them using the coordinate dies, the Merry Christmice die set, and I glued them on card's center, using some adhesive Musse pads to add dimension.


I continued by stamping the images I needed from the Merry Christmice Stamp set, I colored them with Copic markers and then I die cut everything using the coordinate dies, the Merry Christmice die set .

As a last thing I added on the sentiments my colored images and that's it.

Products I used

Sunrays Stencil set 

Christams Sentiments stamp set

Christams Sentiments die set

Merry Christmice Stamp set

Merry Christmice die set

Nested Scalloped Frames die set

You could find all of them on Alex Syberia Design UK shop and on the  US Alex Syberia Design shop   for the American friends.

 
Thank you for stopping by!
 
Ciao Ciao

martedì 17 dicembre 2024

Merry Christmas and Happy New Year

Hi crafty friends, Nicoletta back today with a new festive card to share with you!

I'm having so much fun using not  Christmas products to create  festive cards and this time I played with the  Carnival Party stencil and die set.  Hope you like the results!

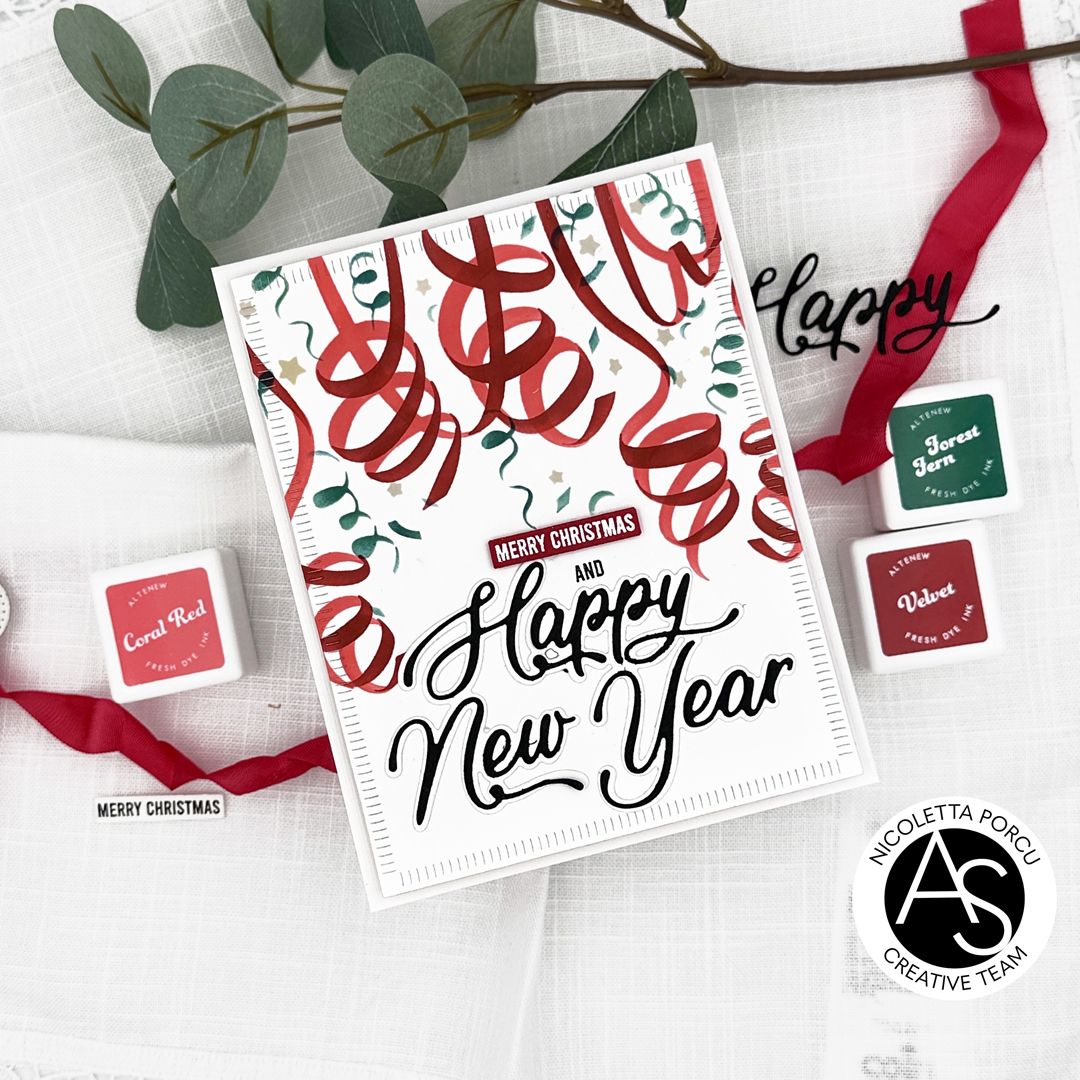
To make my card I started by stencilling the Carnival Party stencil and die set   on a Neenah Paper using Coral Red and Velvet fresh inks By Altenew. I continued stencilling some green  and  sand  confetti using  the Confetti stencil set.


Next up I die cut the stencilled paper  using the Good Day Quilted Rectangles die set and I glued it over a white base card using foam tape to add dimension.

At that point I only add the sentiment to finish my card: I used the Happy New year die set,  and the Christmas sentiments stamp set  and the coordinate dies for the  red  Merry Christmas string .

And that's that!

Hope you I give you some inspirations!

Thank you for stopping by.

Ciao Ciao

martedì 10 dicembre 2024

Sending Blessings

Hi crafty friends!

I'm here today with a new Christmas card to share with you! hope you like it!


To make my card I started by die cutting the Sparkly Flakes Cover die over a white cardstock and gluing it on a white card base using foam tape to add dimension.

Next up I stamped the lovely dog  from the Falala Friends stamp set on a X-Press blending paper  and I colored it and his red hat with Copic markers. I die cut it using the coordinate dies Falala Friends die set and I put it aside.


I continued by die cutting a white circle using the Nested Stitched Circle die set  and stamping on it some music note and the black sentiment from the Christmas Sentiments stamp set-


I glued the circle over the Sparely flakes background and I added the lovely dog I previously colored , the Falala die and some leaves and berries die cut I obtained using the Jingle Bell Joy die set.

As a last thing I added some indigo enamel dots.


Here all products I used :

Sparkly Flakes Cover die

Nested Stitched Circle die set

Falala die

Falala Friends stamp set

Falala Friends die set

Christmas Sentiments stamp set

Jingle Bell Joy die set


Hope I give you some inspiration ti create a Christmas card using Alex Syberia Designs products.

Thank you for stopping by!

Ciao ciao


linktwin

Related Posts with Thumbnails

ShareThis