Hi crafty friends!
Today I'm sharing with you my latest card with you!
As I saw the new Alex Syberia Designs collection the Urban Blooms die attract me and I tested it immediately on a white cardstock and saw the beautiful results .
So this time I picked up that test and I made my card! Hope you like it!
But now let me share some making process info:
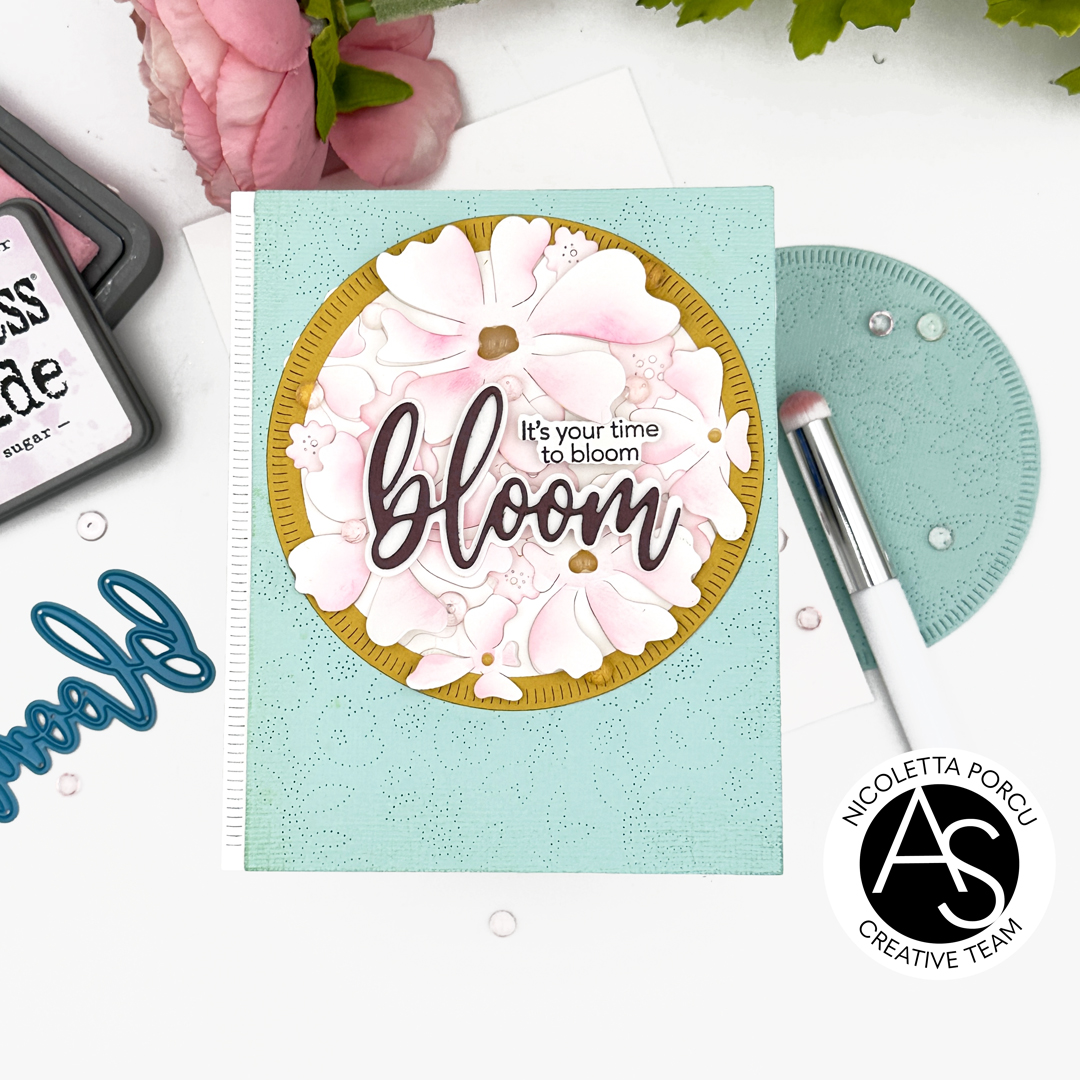
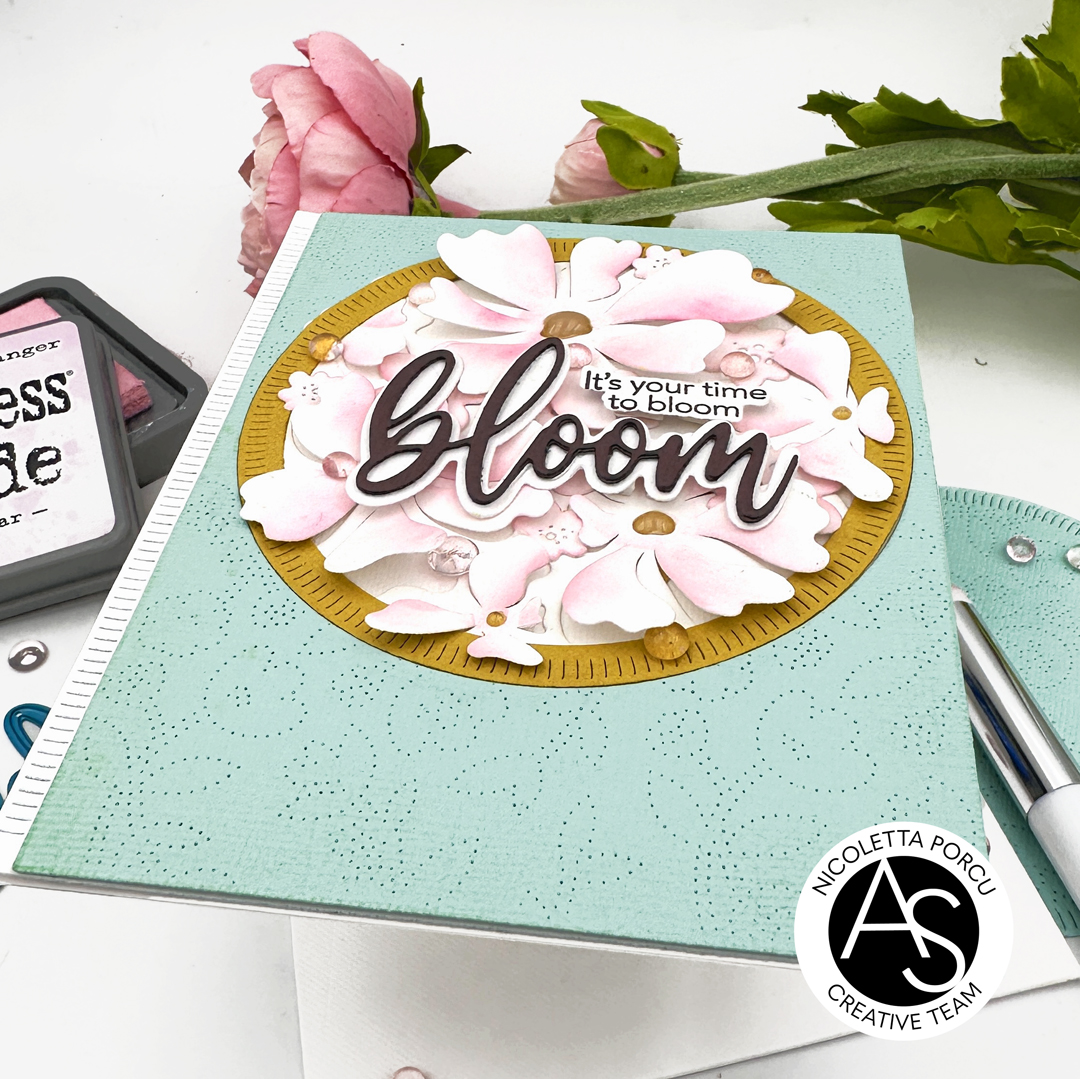
As a last thing I used the Urban Blooms die on a white cardstock and wit a small blender brush I colored in pink all the flowers and in the back I glued some pieces of yellow cardstock under the flowers' center corrisponda,
Next up I embossed and die cut my acqua background using the Meadow Cover die, I cut out a circle in the top of it using the Nested Circle Stitched die set and I placed it to frame the Urban Blooms making the flowers pop up from it.
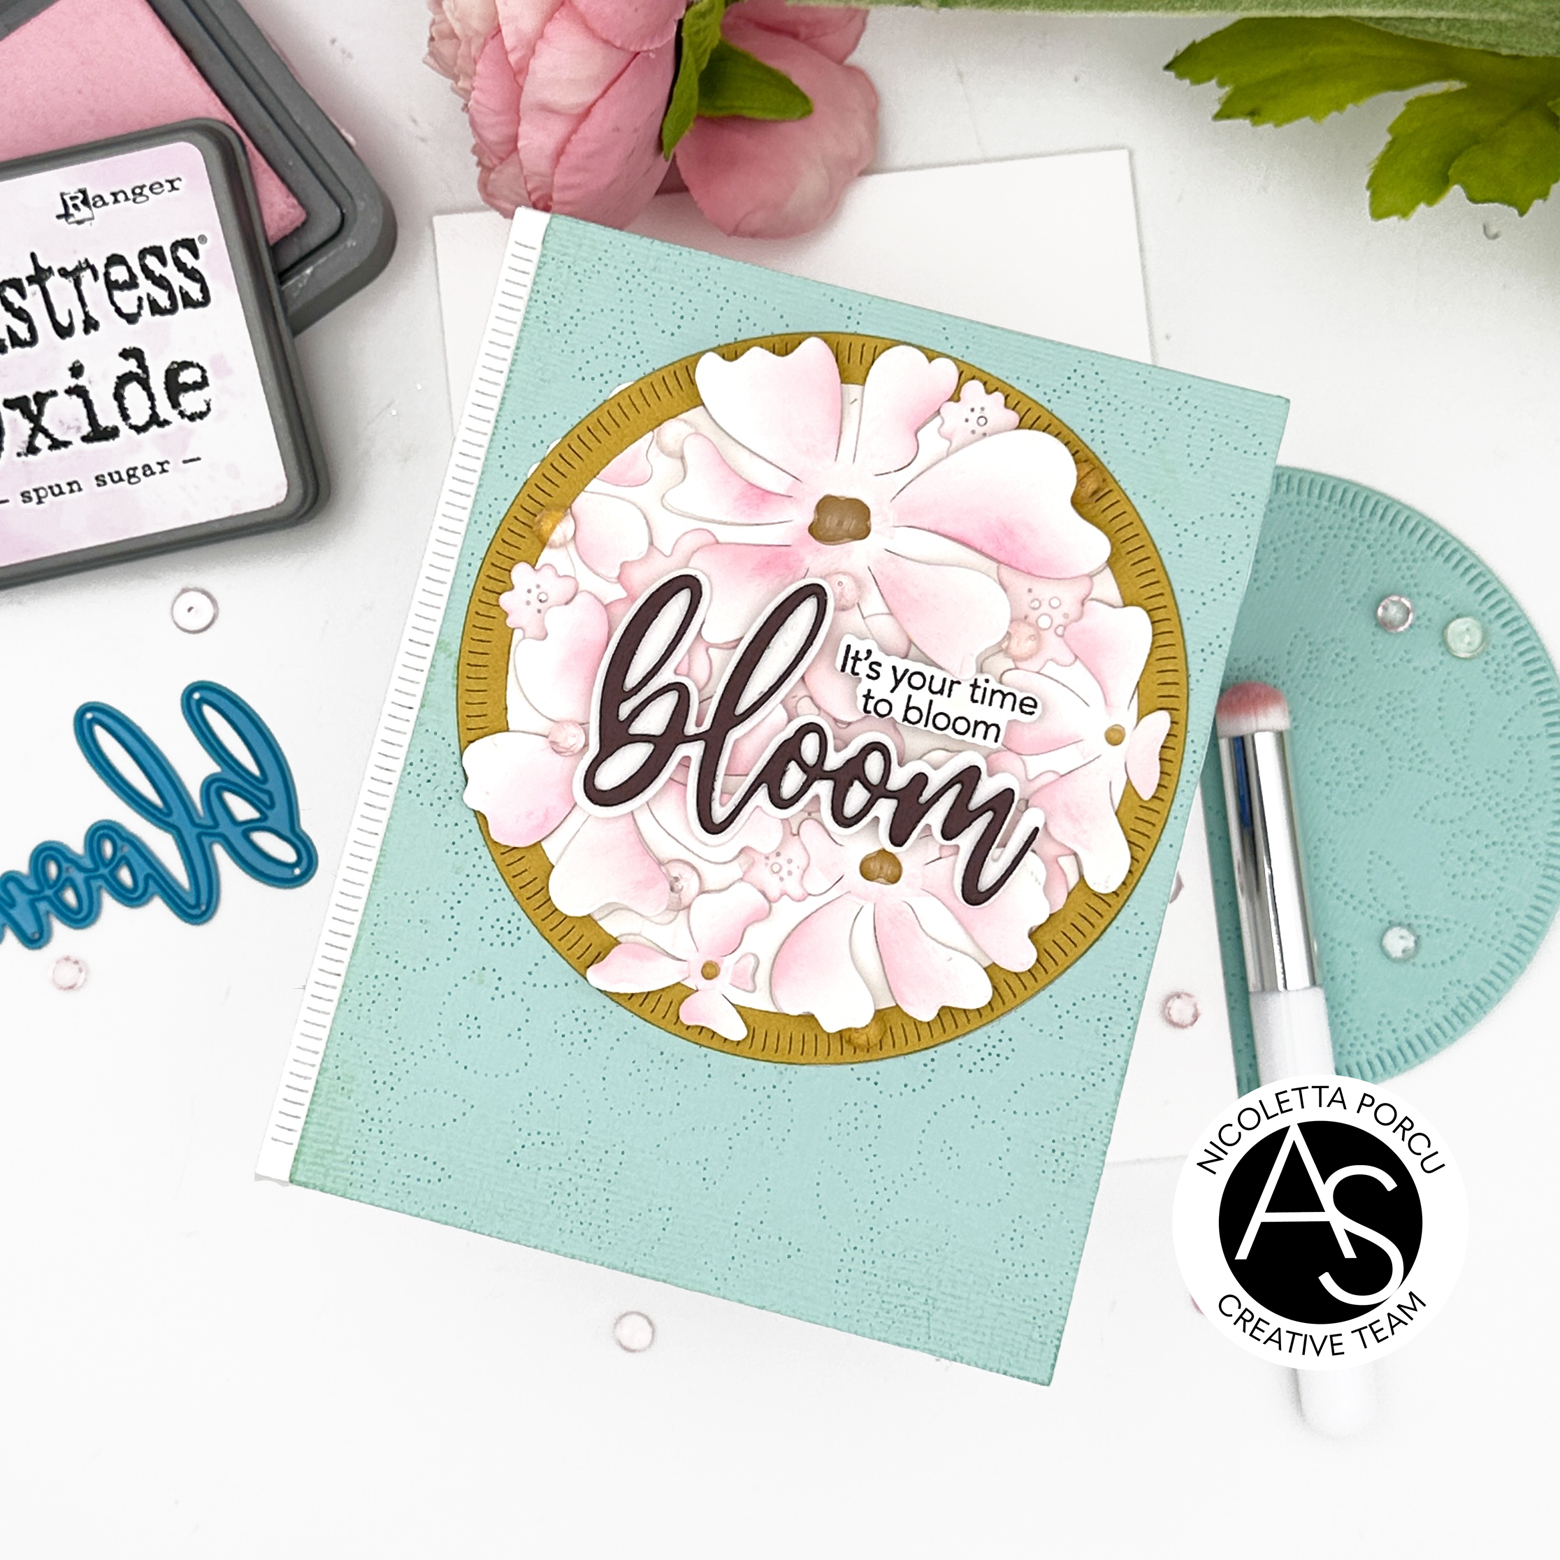
At that point I die cute a white quilted rectangle using the the biggest die from the Good Day Quilted Rectangles die set
and i glued it slightly offset, under the acqua rectangle, in a way that's in the left of the rectangle all the pierced part was visible.
I continued by adding a yellow frame on the flowers circle spot; I obtained it using the two circle dies from the Nested Circle Stitched die set.
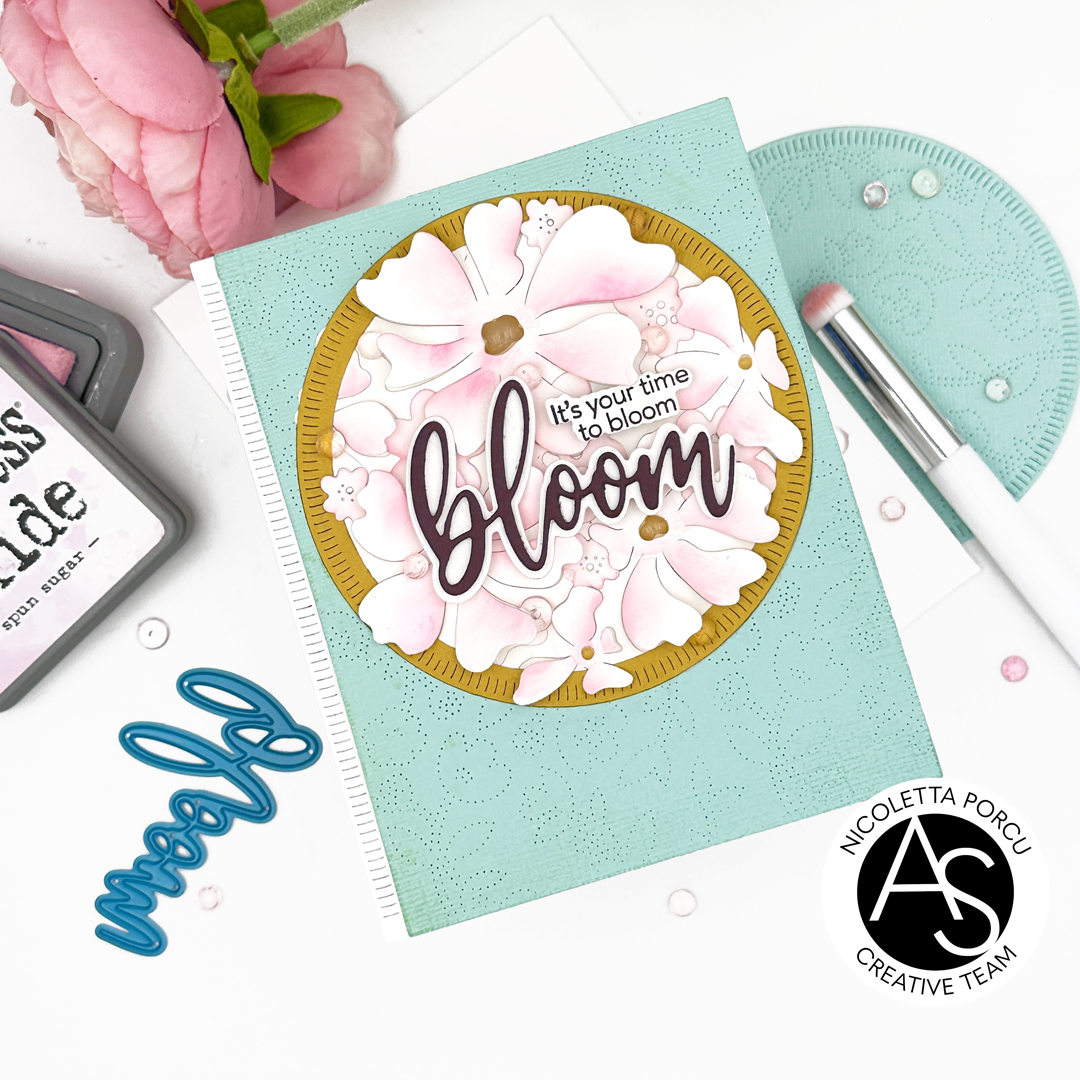
I wanted more flowers in the circle spot so I die cut some using the Meadow Cover die; first I blended them with Spun Sugar Distress Oxide and then I added them all around the big flowers.
Before adding the last thing I glued the top card obtained on a white cardstock base.
At that point I added the sentiments ; the big Bloom die cut (the top part in dark brown and the outlined one in white) and the little sentiment from the Grateful For You stamp set I die cut using the coordinate die Grateful For You die set.
As last touched I added Glossy accents on the yellow flowers spots and some clear rain drops.
Here all products I used:
Urban Blooms die
Bloom die
Good Day Quilted Rectangles die set
Nested Circle Stitched die set
Meadow Cover die
Grateful For You stamp set
Grateful For You die set
Floral Splendor Cover die
Clear Rain Drops
As you can see at the appearance seems a simple card the it needed some time to get finished.
I really enjoy the the time spent making it and I it could inspire you to create your own artwork using these products.
Thank you for stopping by.
See you soon!
Ciao Ciao


.png)


.png)


