Hi crafty friends!
I'm here today to share with you another Christmas card featuring Alex Syberia Designs products!
I think you have understood I'm waiting for that time of the year and that why I am so inspired !
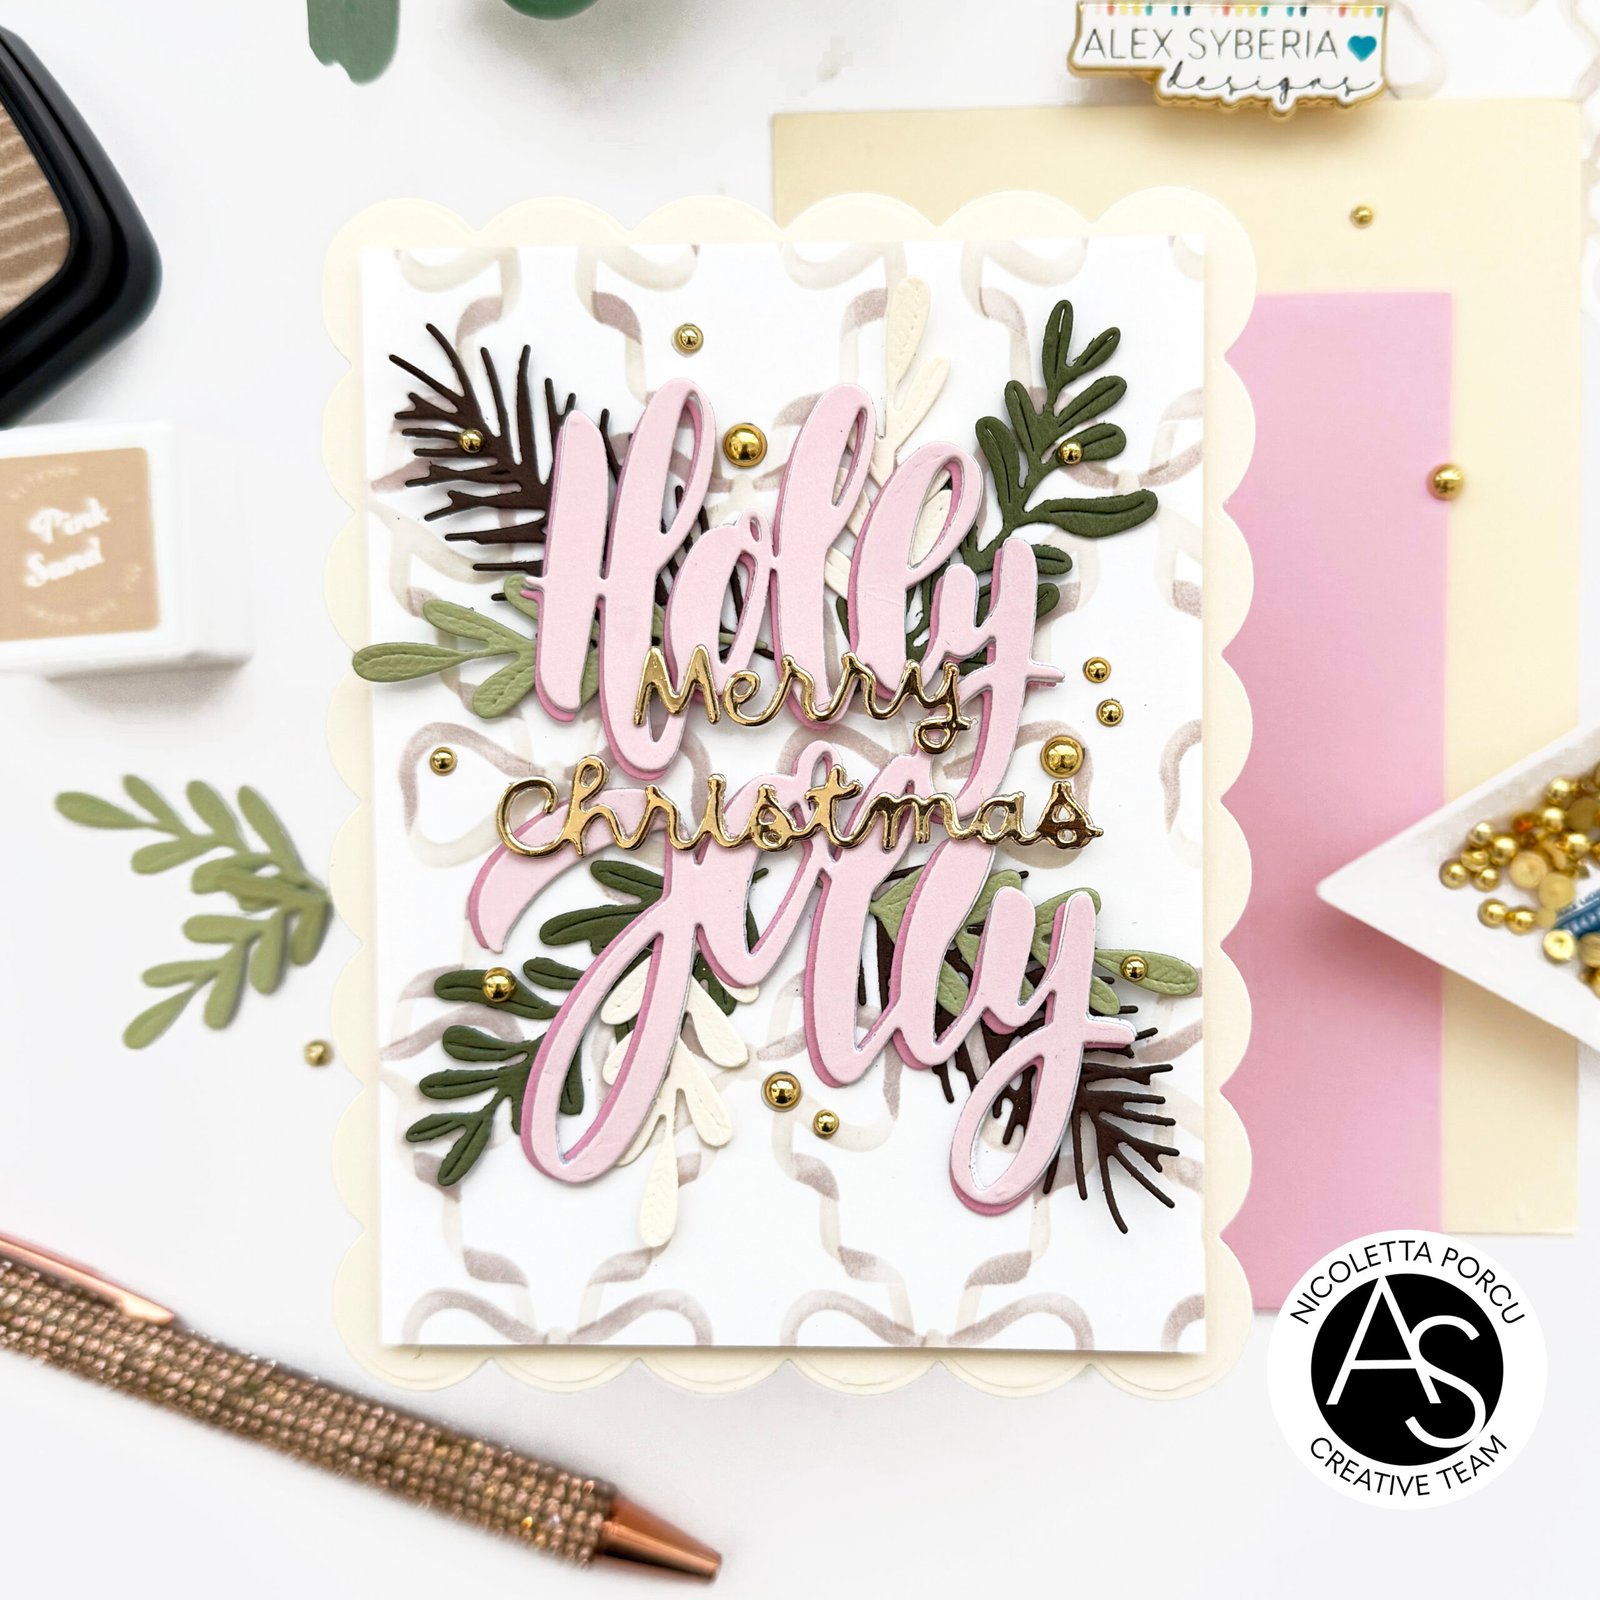
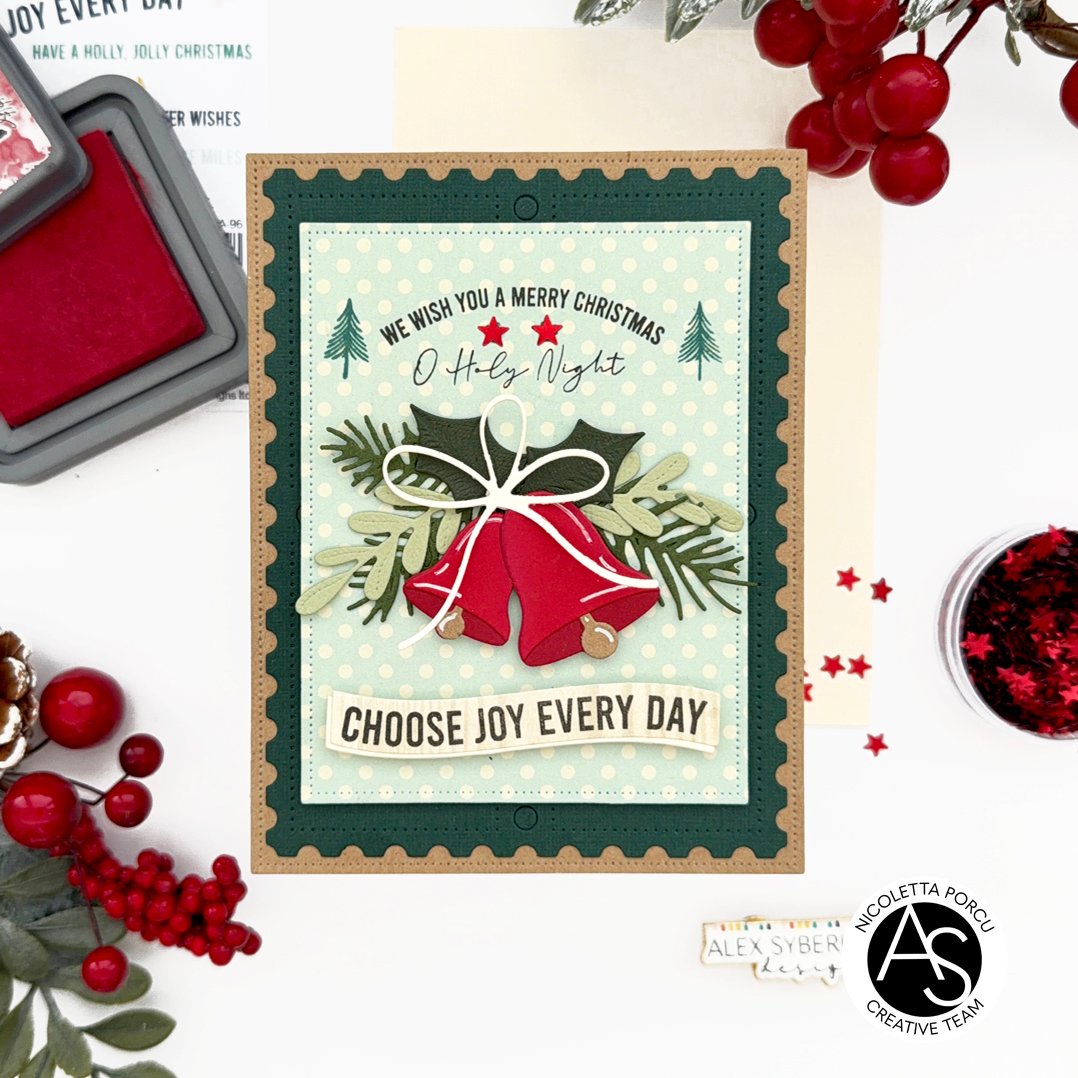
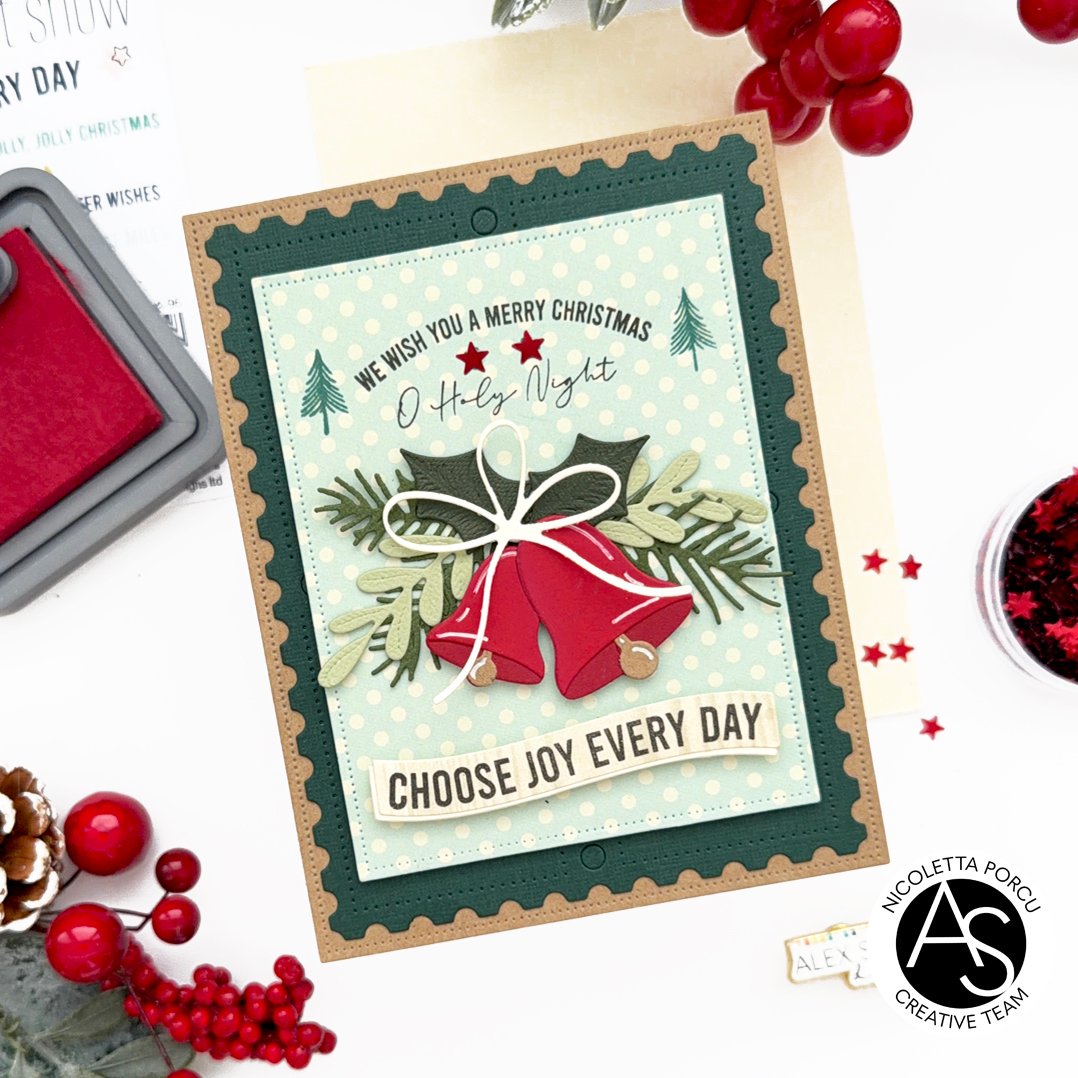
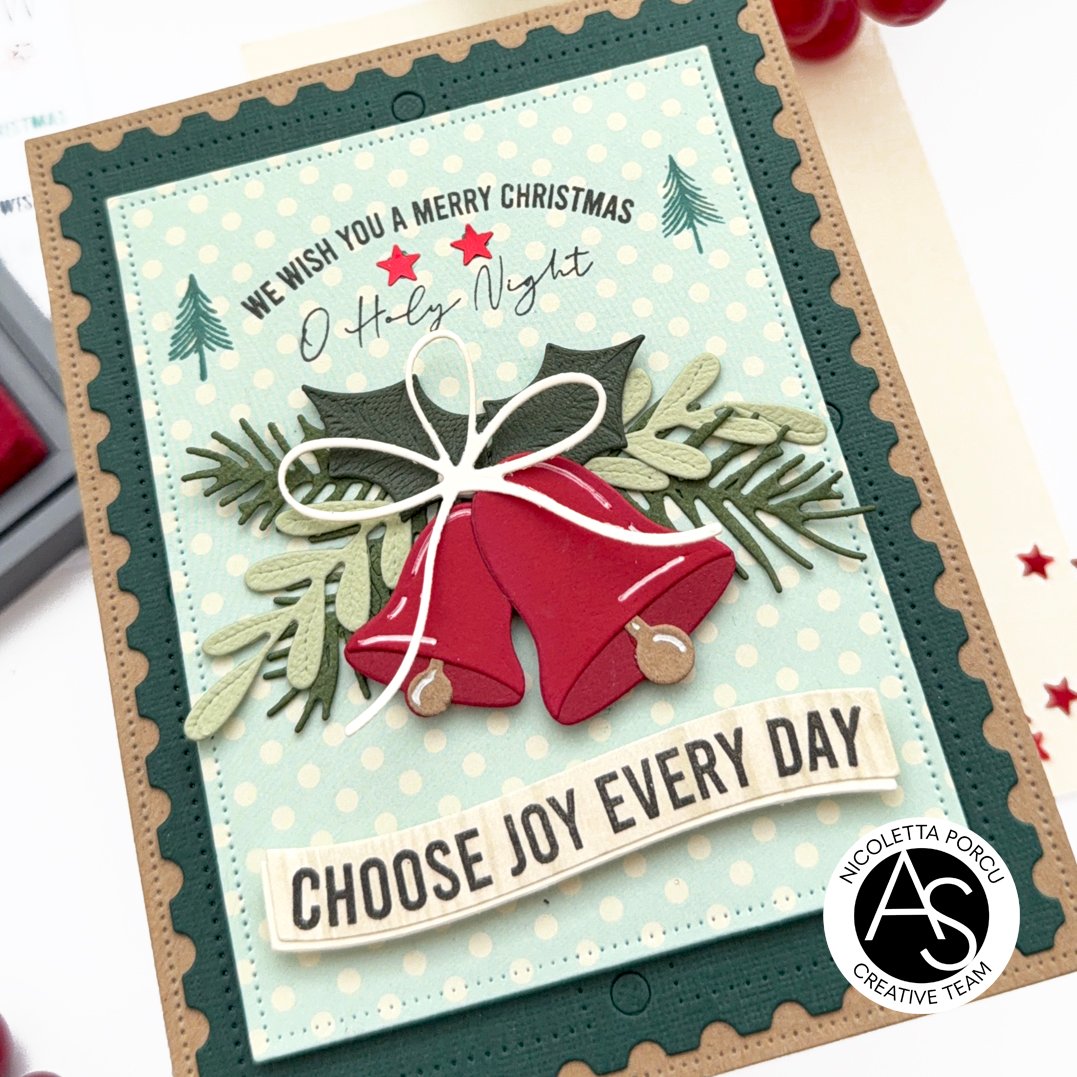
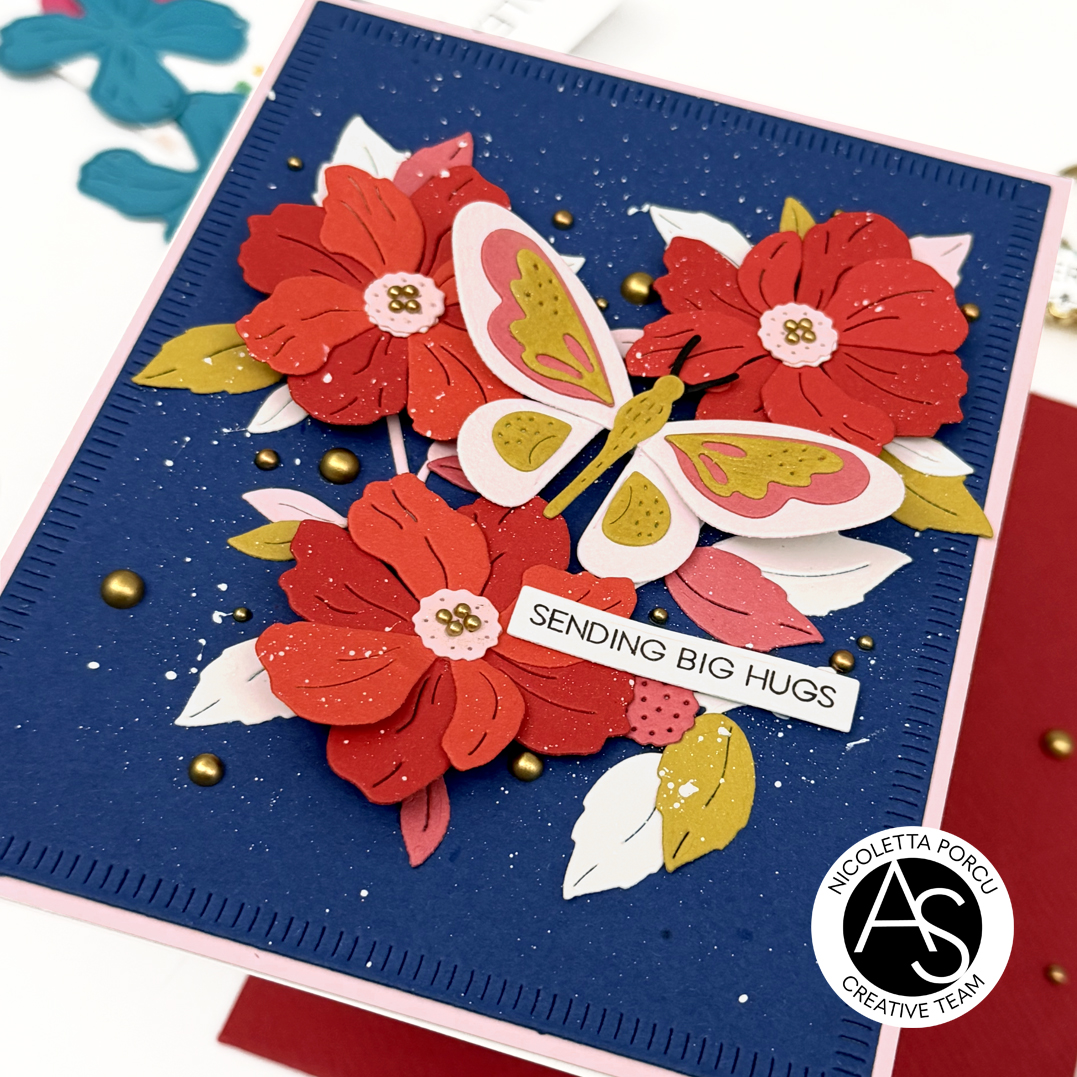
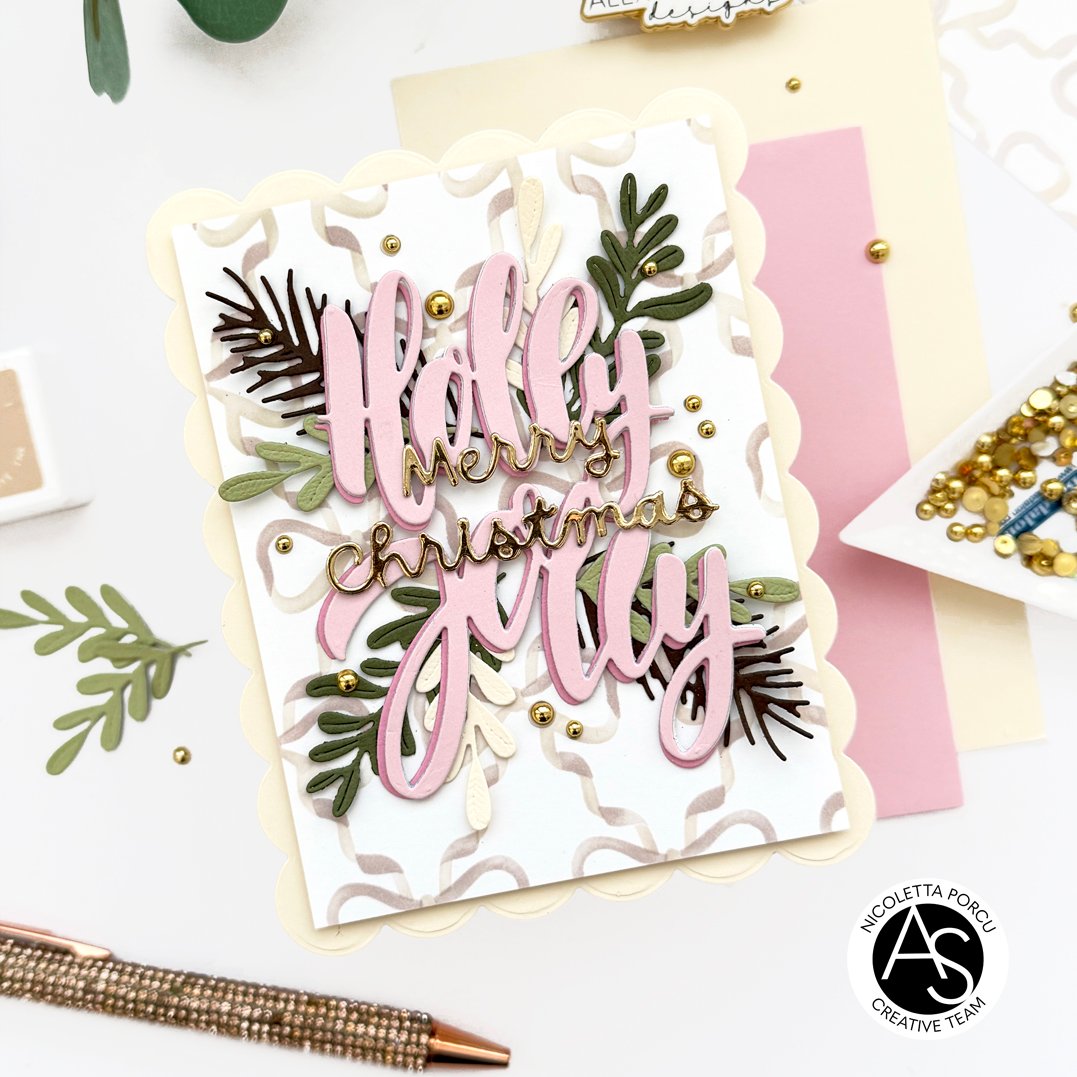
To make my card I started by stencil the Chic Bows Stencil set on a piece of Neenah Paper using the Sand Dune Versafine Claire ink and the Pink Sand Fresh Dye ink by Altenew. Then I die cut it into a dotted rectangle using a frame from the Nested Scalloped Frames die set .
I outlined it with a cream scalloped frame and I glued al on my base card.
Than I die cut the big sentiment using the Holly Jolly die;

I die cut many layers of it in light pink cardstock and another layer in a darker one; I glued the lighter ones all together to add dimension and then the darker one slightly staggered to create and ombre effect.
I added the sentiment on the card's center and under it I glued some foliage I die cut using the and Winter Foliage die setand the Jingle Bell Joy die set;
On the pink big sentiment I added a gold Merry Christmas die cut I made using a die from the Bow Ho Ho Frame die setand as a last thing I added some gold beads all over the card.
I listed below all products I used:
Nested Scalloped Frames die set
Spellbinders New & Improved Platinum SIX Die Cutting & Embossing machine
You could find all of them on Alex Syberia Design UK shop and on the US Alex Syberia Design shop for the American friends. for the American friends.
Also Canadian friends can now order from the US store!!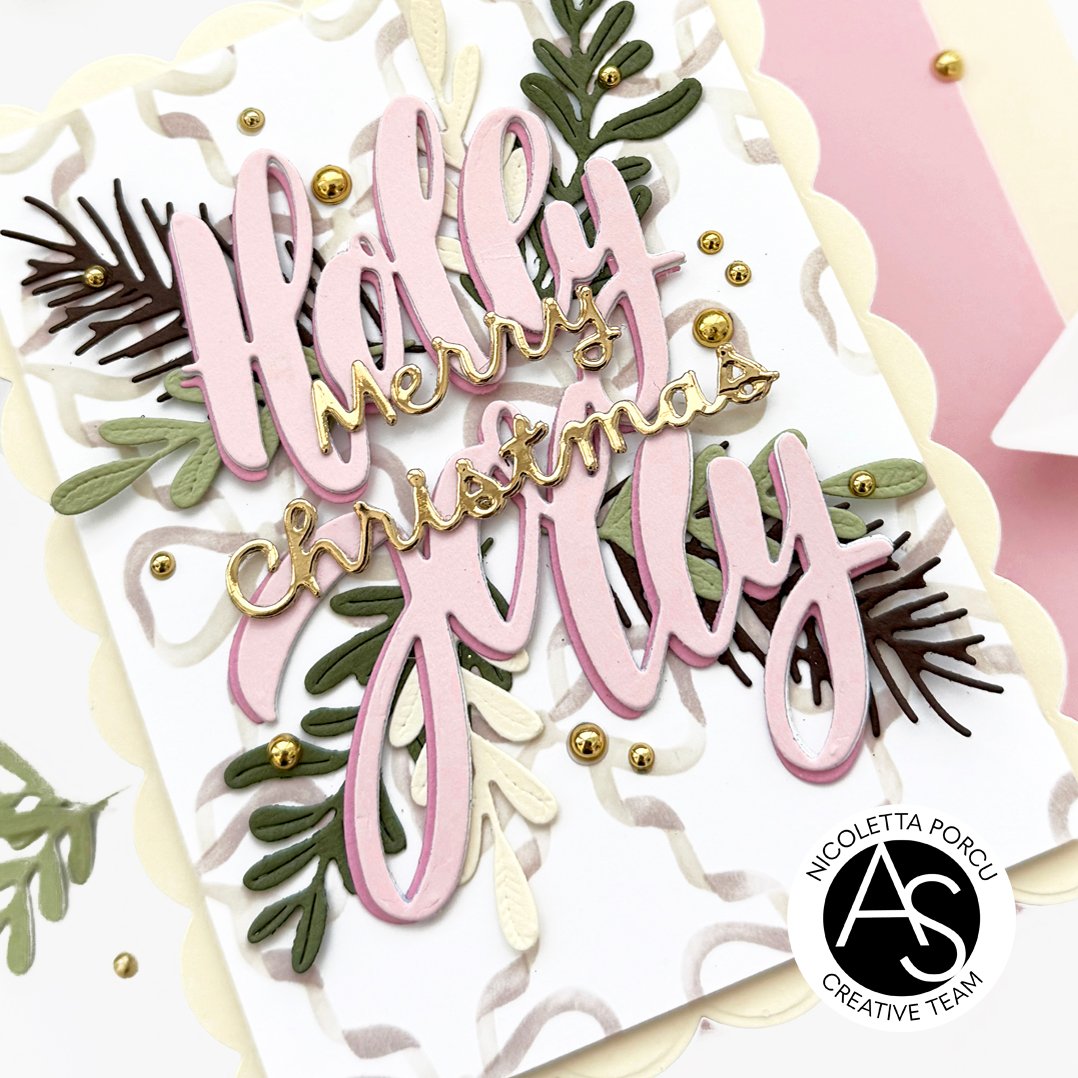
I hope you like my card and I gave you some inspiration!
Thank you for stopping by!
See you soon!
Ciao ciao