mercoledì 26 giugno 2024

Delicate Heartfelt Blossom

Hi crafty friends!

Nicoletta here today sharing my latest card featuring the new collection by Alex Syberia Designs.

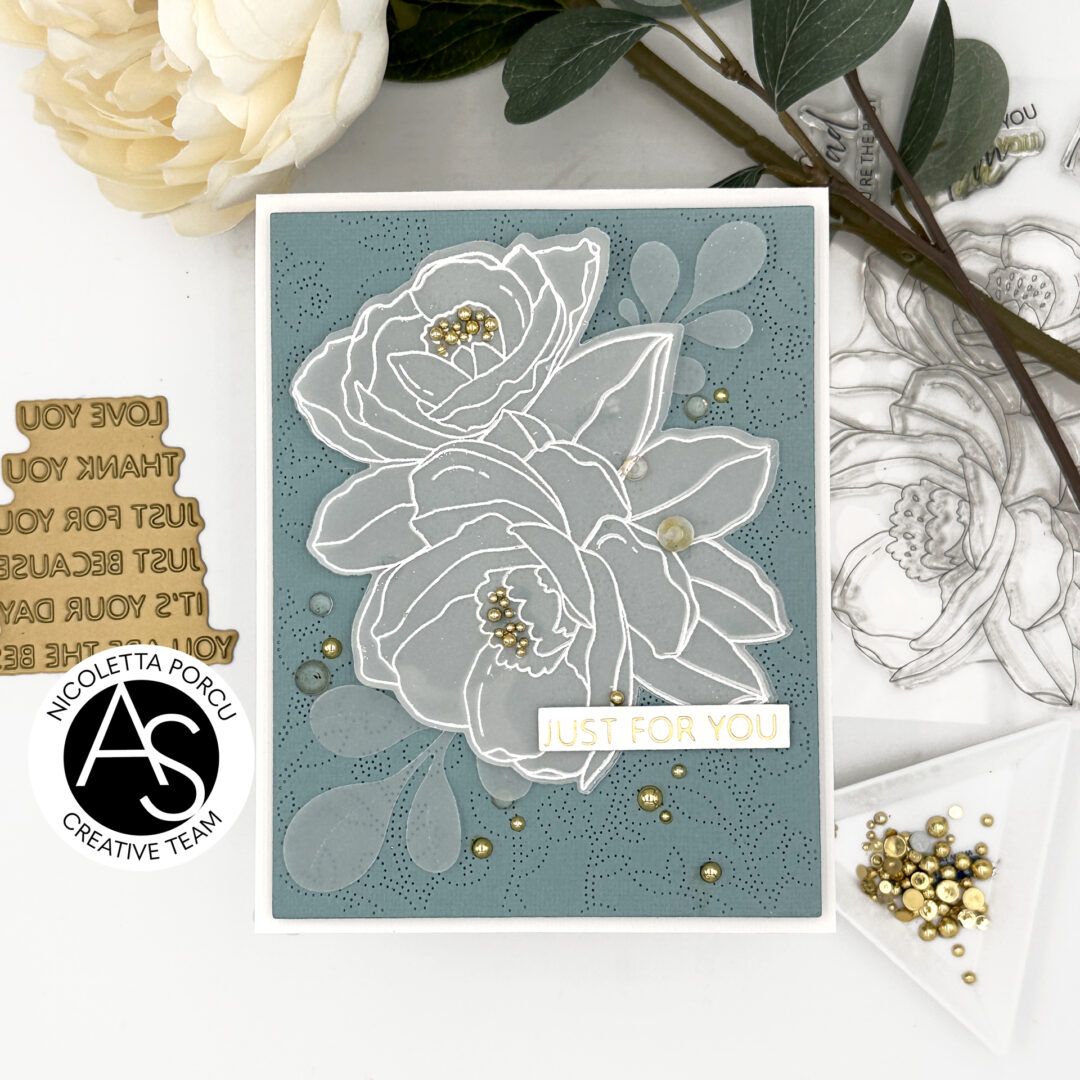
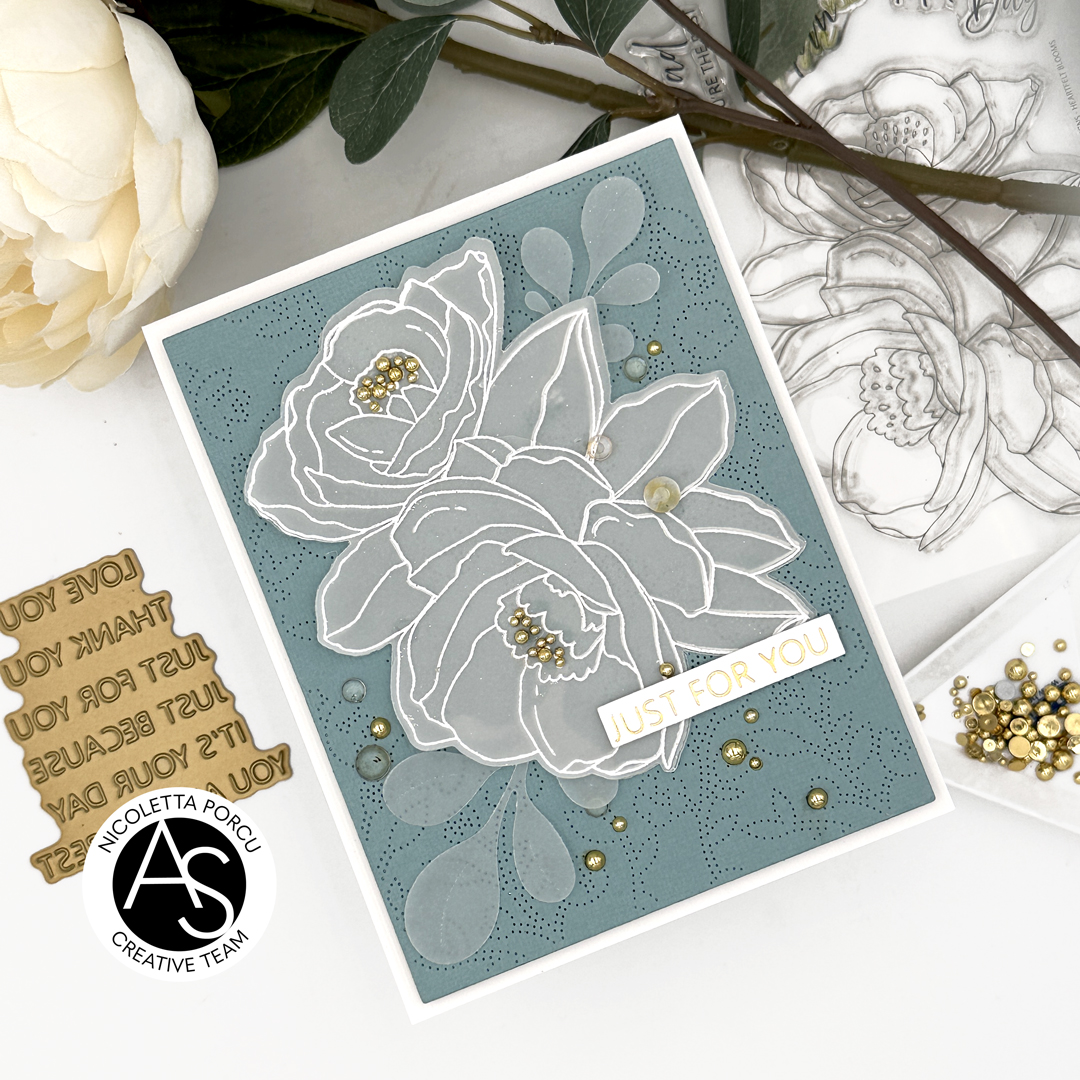
This time I tried to make a very delicate card using vellum for stamping and embossing! here is what came up!!


Let me say something about the making process!

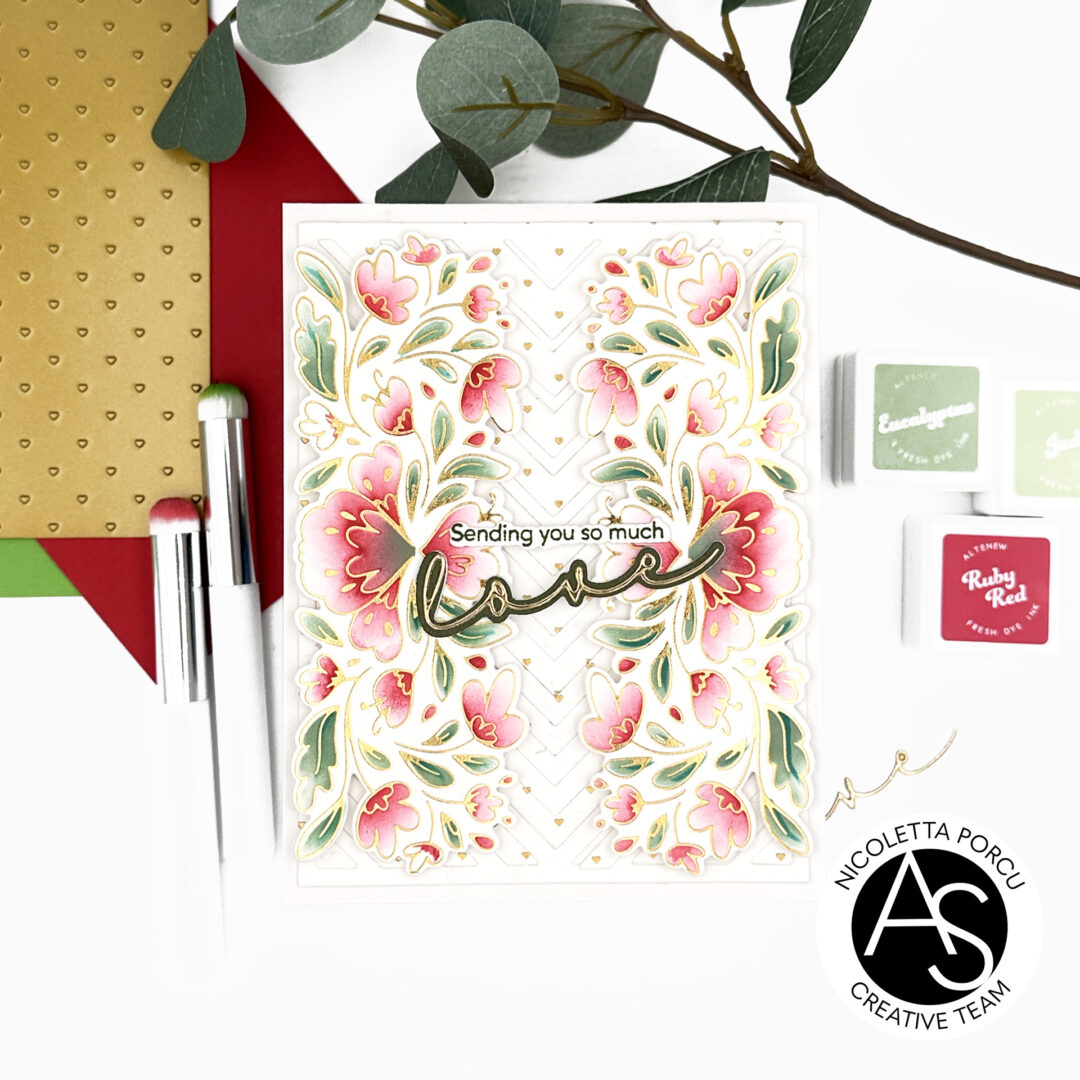
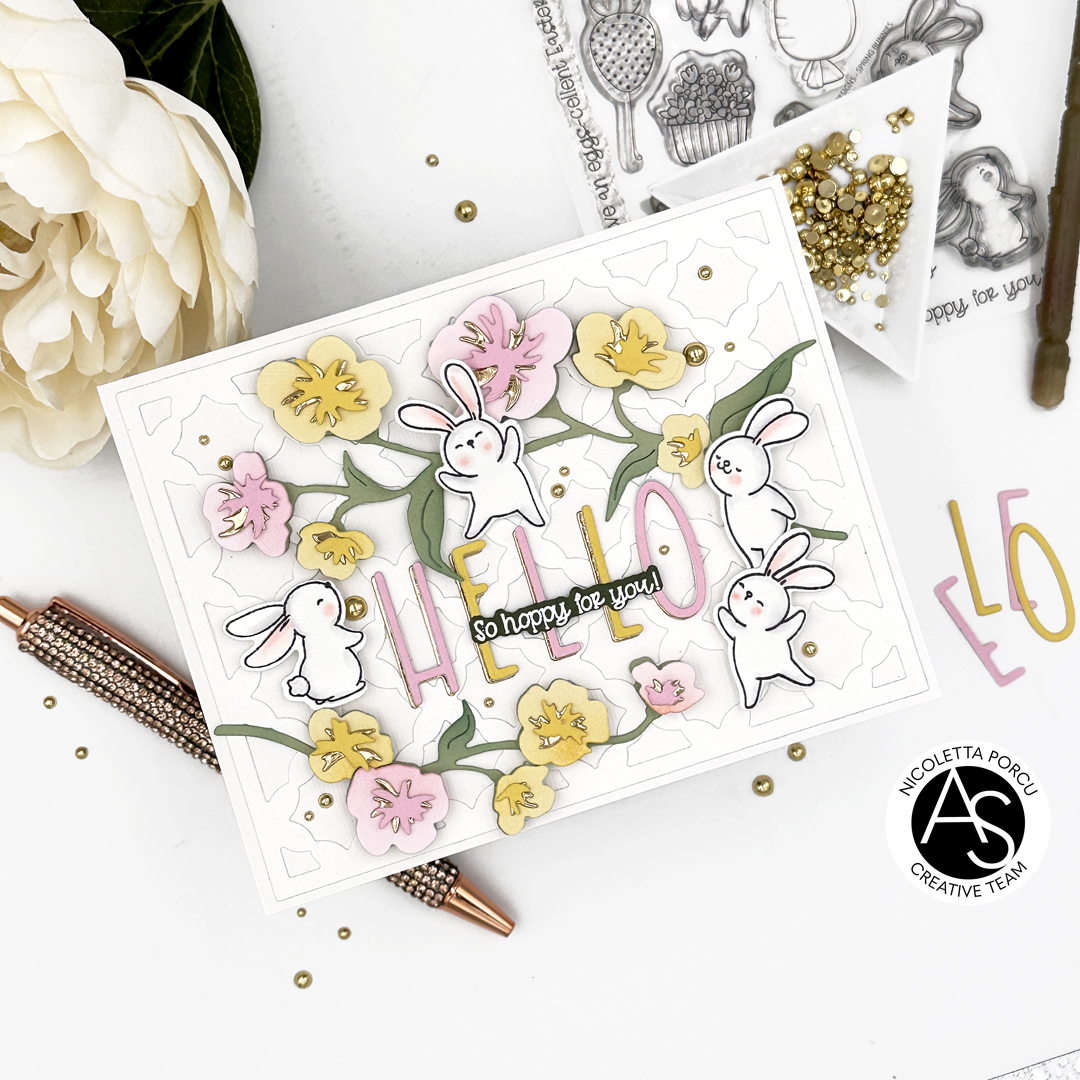
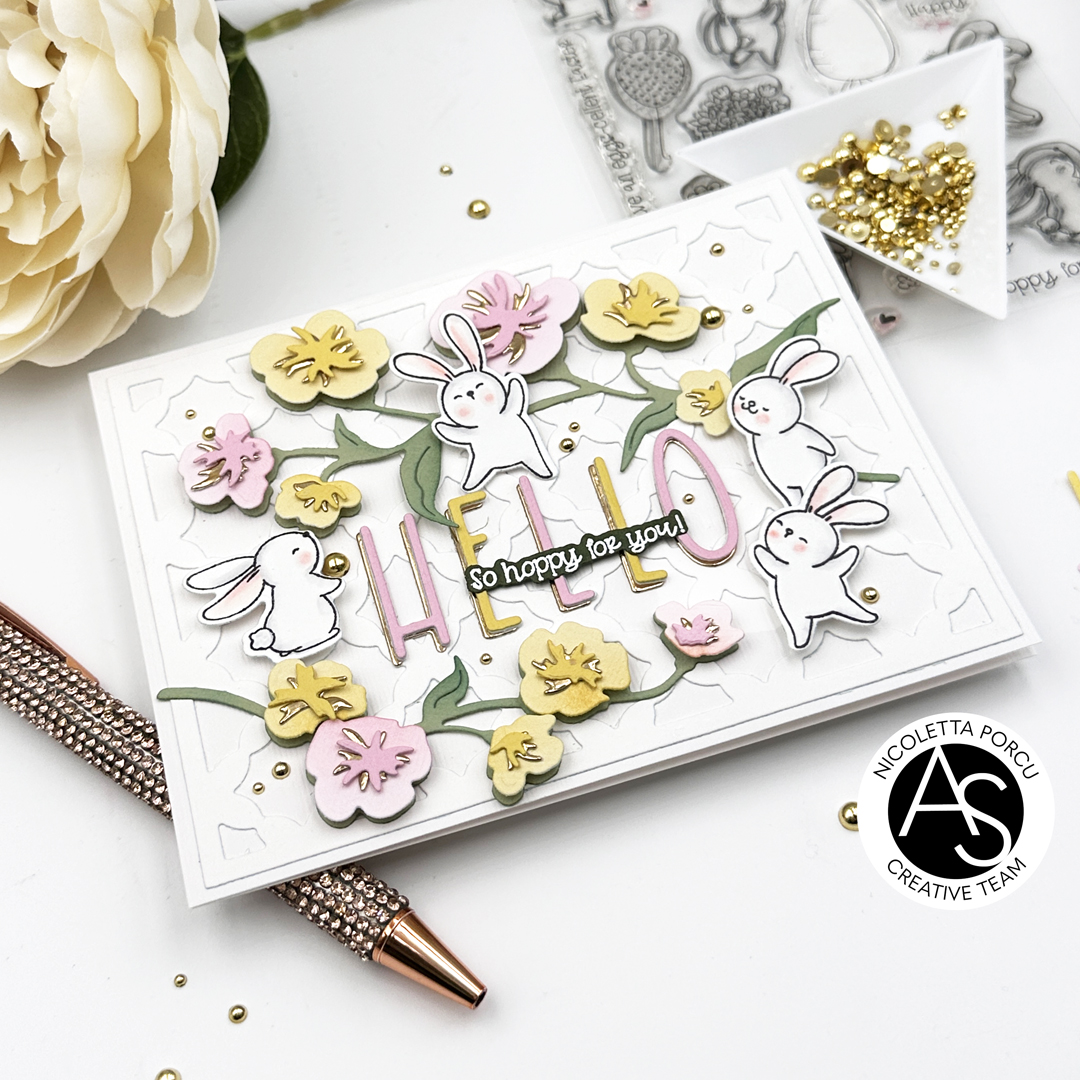
As a first thing I used the Meadow Magic Cover die  on a colored sugar paper and then I glued it over a white base card using the foam tape to add dimension.

Next up I stamped on vellum the Heartfelt Blossom stamp set using Versamark ink and I embossed in white the flowers and I die cut them using the coordinate Heartfelt Blossom die set.


I stamped, embossed and die cute  the image twice and I glued them on my colored sugar paper background.

To avoid you don't see any glue I used clear glue dots.

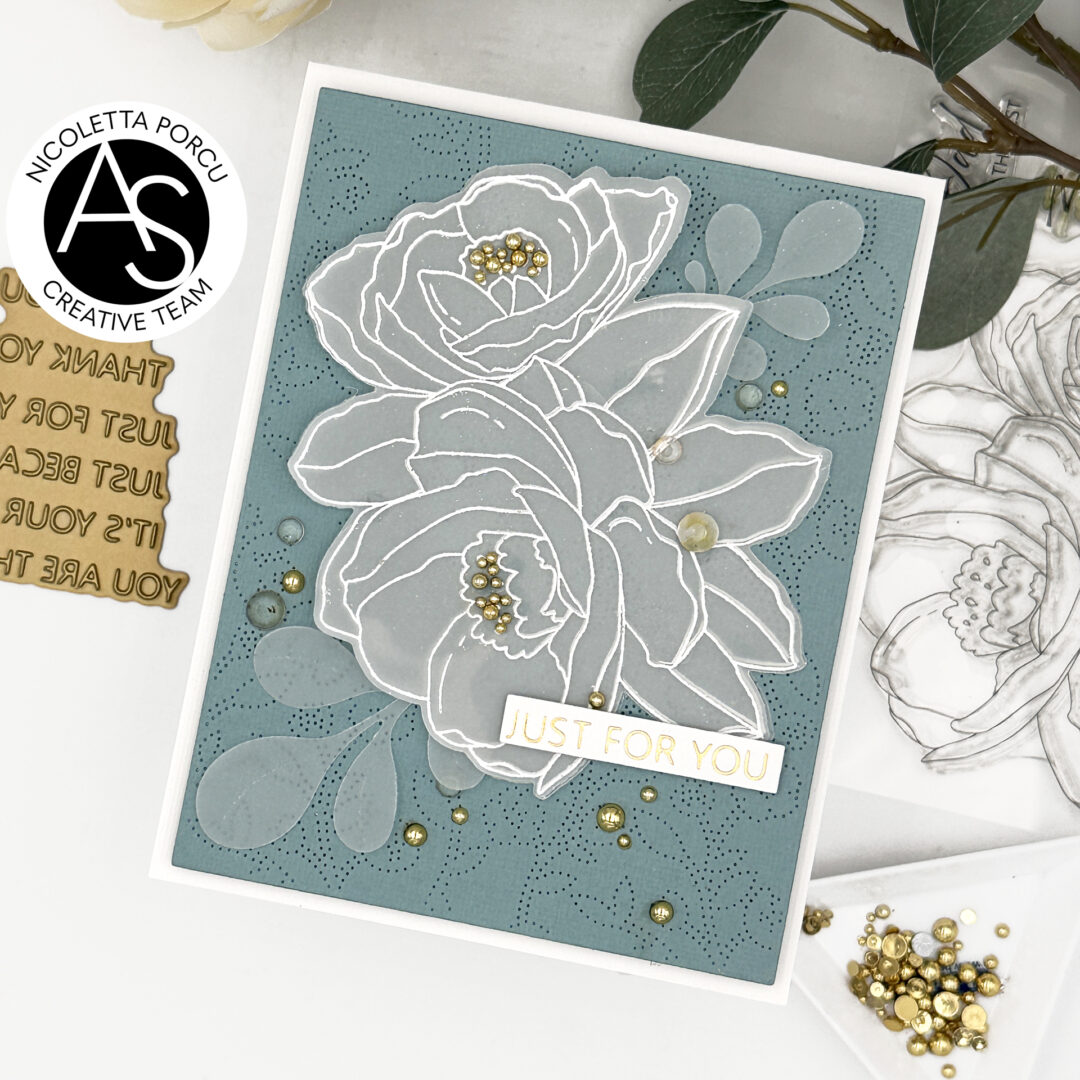
 To complete my flower composition I added some leaves I die cut in vellum using the Leafy Duo die set and on the bottom right I added the gold hot foiled  string sentiment I made using the Just Because Hot foil and die set.

As a last thing I added gold and clear rhineshones.

Really so simple to make ! what do you think about?

hope you like it !

Thank you for stopping by!

Ciao ciao


venerdì 21 giugno 2024

Sweet Friend

Hi crafty friends!
I'm here with a new card featuring some new Alex Syberia Designs products.
Hope you like it!
To make the card I started by preparing the base and background card.
As a first thing I die cut a white rectangle using the Nested Scalloped Frames die set  and I blended it using some Distress inks: Picked Raspberry, Dried Marigold , Ripe Parsimmon and Scattered Straw. After that I spayed some water on the paper!
The result is a very colourful background! I glued it on white card base and then I hot foiled in gold the Tiny Hearts Hot foil plate, I die cut a rectangle and I used the Quirky Hearts die set to cut out a rectangle.
I glued it on the colorful background using foam pads to add dimension and I glued in the heart space a  stencilled yellow clouds paper.
Next up I die cut many  heart shapes using the largest heart die from the Quirky Hearts die set,  I glued them all together putting on the top the one I  previously die cut  from the hot foiled rectangle and blended in the same colors I used for the background; with it I framed my cloudy heart.


At that moment all I needed to do was add the top elements to complete the card.
 
I stamped the lovely mices and the tiny trio harts from the Sweet Friend stamp set, I colored them with Copic markers , die cut them using the coordinate die , and glued them on the card.

 
As a last thing I added the little sentiments  who are a part of the Sweet Friend stamp set and that's that.
What do you think about? Aren't these mice so so cute?
I really love them!
 
Thank you for stopping by!
Ciao ciao

giovedì 13 giugno 2024

Sending you so much love

Hi crafty friends!

Nicoletta here today sharing my latest card featuring the new collection by Alex Syberia Designs.

I really can't say what is my favourite product but guys!! the Beautiful Day set is absolutely amazing!

To make my card I started creating the background: I hot foiled in gold the Tiny Hearts hot foil plate on a white cardstock ,  then I die cut it using the Chevron chic Cover die and I glued the positive  and negative die cuts onto a white base card.

Next up I hot foiled  in gold the Beautiful Day Hot Foil Plate onto a White Neenah Paper , I stencilled them using the Beautiful Day Stencil set and I die cut them using the coordinate die.


At that point I glued the two floral die cuts on the background using foam tape to add dimension and as a last thing I added the sentiment : the string one is a stamp from the Beautiful Day stamp set die cut with the coordinate die and the love word is another  die cut.

That's that for today !

Hope you like my inspiration!

Thank you for stopping by!

Ciao Ciao

mercoledì 5 giugno 2024

Love you Mom

Hi crafty friends!

here today with a new inpiration to share with you! I'd t a clean and simple card I made using some products of the newest ASD release!

To make this card I started creating my background, I used the Chevron Chic Cover die as an embossing folder on a white paper.

To avoid the paper scratched I sprayed water on the paper before the embossing process.  I cut out a rectangle from the embossed paper and I glued it on  white card base,


Then I hot foil  in gold the Heartfelt Blooms Horfoil Plate and I stencilled it using the Heartfelt Blooms Stencil set.

I used many  shades of yellow  and pink inks   for petals and   green shades  for leaves.

At that point I die cut the flowers using the Heartfelt Blooms die set and I added the flowers on the embossed background using foam pads to add dimension.

To make the little sentiment I used the quote from the Heartfelt Blooms stamps set; I stamped it  in green and die cutting it using the coordinate die 

I glued the little sentiment on the  right bottom of the booms and as a last touch I added some yellow enamel dots.


And that's that for today!

thanks for stopping by !


mercoledì 29 maggio 2024

Bouquet of Blessings for a friend

Hi crafty friends!

I'm  here today with a new inpiration to share with you!

I'm in love with the Bouquet of Blessings stamp set so I wanted to make a card I had in my mind for a while.

I'm white happy about it turned out and you you can apprecciate it too.

Let me say something about the making process.

As a first thing I stamped the Bouquet of Blessings on a Neenah White paper, in various colors, light pink, pink, green, blue-green and with the Bouquet of Blessings  stencil set  I lightly blended them using the same color ink I used for the outlines.

Next up I die cut them with the coordinate dies and I glued all the die cuts by overlying them over a white base card.


At that point I added the sentiment: the Friend word using the Friend die and the stamped black sentence using a stamp from the Bouquet of Blessings stamp set, die cut with the coordinate dies.

As a last thing I added a lot of gold pearl all over the card.


And that's that!

Hope you like it!

You could fine all the products I used on the ASD Shop.

Thank you for stopping by and reading me.

Ciao Ciao

giovedì 23 maggio 2024

Elegant Peony - Alex Syberia Designs Instagram Hop

Hi crafty friends!
here again  to share with you the card I made  cot celebrate the Alex Syberia Designs' new release and her reopening shop!!
We organised a fun Instagram hop and you have de all day, until midnight, to join us!
You could find all details on our accounts
Be sure to follow the hop list and the rules for the chance to win amazing prizes included the entire May release!
Now let me show the card I made for the event using the amazing Elegant Peony die set.


I'm really in love with these products so it was a very inspirited creative process!
I started by die cutting a craft rectangle using Nested Scalloped Frames die set, and gluing it over a white A2 card base.

Next up I used the Charming Flora Cover die to create a white rectangle layer. I matted  it in black and I glued  it over the kraft background.

Once the card structure was finshed I die cut the  Elegant Peony .
I used many shades of reds for the petals gluing them with adhesive mousse pads to give dimension.
For the leaves I used two shades of green; I glued the flower over the card and then I added the sentiment:
I made the  black and white Love word  using the Love die and the string sentiment using the Bouquet of Blessing stamp set and the coordinate dies.


As a final touch I added some clear rain drops!

And that's that!
Hope you like my card! I will wait for you on my Instagram account to join us at our IG hop.
Good luck to everyone!

Ciao Ciao

giovedì 16 maggio 2024

Alex Syberia Designs May Release Blog Hop & Giveaway


Hello crafty friends!!!
It's a very special day form me! After a long break due to some health issue , finally In the the last days I came back to my craft room for a very great occasion!!
Today, indeed,  we are celebrating the launch of  Alex Syberia Designs new release  and the shop reopening with  a fun blog hop!!
The Sweet Friend' May  release   is amazing and includes  clear stamps, hot foil plates,  dies and stencils.
I'm sure  there's something for everyone to love!
Joining with us  will see many inspiration projects made by the AS design team in the ASD blog post so you could appreciate the amazing collection. 

Let me share with you the card I made for the event, using some of the brand new products:


A very simple card but I love how it turned out. 
I started by stamping the Bouquet of Blessings stamp set and stencilling  it with the  Bouquet of Blessings stencil set.  Then I die cut the flowers using the coordinate die.

Next up I started with the background card panel.
First I blended some violet inks on a  rectangle white paper, and I glued it on a white card base. 
Over I added the white die cute I got using the  Chevron Chic Cover die.
At this point I added in the left side card  the Bouquet of Blessing  using adhesive foam pads to add dimension and adding some light pink parts in the center of the flowers.


I completed the card by adding the big  pink sentiment "Mom" I got from using the "Mom Horfoil and die set" ,  and the string sentiment that is still part of the  Bouquet of Blessings stamp set 


Alex Syberia Designs is giving away a whole May release for one lucky winner, as well as $15 gift cards for 3 additional winners.

Open internationally. All winners will be drawn from the entrants who have participated in this Blog Hop by midnight EDT on May 23rd, 2024. Winners will be announced on the Alex Syberia Designs blog 'Giveaway Winners' page on May 24th, 2024

Previous stop: Natasha
Next StopRaquel

Blog Hop Order:

Have fun joining us with this blog hop
I'm sure you will love the entire collection and the DT inspirations as much as I do!

Ciao ciao
xx

venerdì 1 marzo 2024

You are in my thoughts

Hi crafty friends!

today I have to share with you a new card!

I like how it turned out and hope you like it too!


To make my card I started by hotfoiling  in gold the Timeless Blooms Celebration Hot foil plate over a white  and a green cardstock! I colored the white one with Copic Markers and I then I added the red and green details over the flowers and leaves using the Timeless Blooms Celebration stamp set.

Next up I die cut a  dotted rectangle from the green cardstock using Nested Scalloped Framed dies set and I continued by cutting  out a hert shape from the hot foiled part.


I continued by assembling the card... I glued the copic colored floral image over a white base card and over it I added the green one gluing it with foam pads to add dimension.

As a last thing I added the sentiment!

I die cut the love word  using the Love and Hugs  die set. The outlined part in metallic gold cardstock and the top one in two layers (pink and green) I glued  lightly staggered.

The string sentiment is stamped and embossed in gold over a dark green base and I glued it with foam pads.

And that's that


Hope you like my inspiration!

Thank you for stopping by.

venerdì 2 febbraio 2024

Hello Spring!

Hi crafty friends!!

I'm back today with a new card to share with you!

It' all about spring and delicate blooms and cuties! hope you like it!

To make my card I started by die cutting the Floral Lattice die cover from a white cardstock and gluing it over an A2 base card.


Next up I die cut the Hello sentiment using the Foxtrot Alphabet die set, in the  pink, yellow and gold colors. I die cut them in many layers I glued together to create them  dimension doubling them in gold. In the same colors I die cut all the lovely tiny  flowers using the Petit Periwinkles die set. Once they are assembled I glued them over the background being careful to leave in the center  the right space for the Hello sentiment.

I continued by stamping and die cutting the lovely bunnies using the Spring Bunnies clear stamp set and the coordinate dies. 

I colored them very lightly with Copic markers and I added them over the card using the mousse pads.

Next up I stamped end embossed in white the string sentiment I glued over the big hello sentiment and as a last thing  I added some gold beads.

And that's that!

Hope you like my inspiration card!

Thank you for stopping by!!

Ciao Ciao


linktwin

Related Posts with Thumbnails

ShareThis