giovedì 27 aprile 2023

Petit periwinkles sending love

Hi crafty friends! Nicoletta here to share another card using products from the last and amazing release "Time to Choose Magic"!


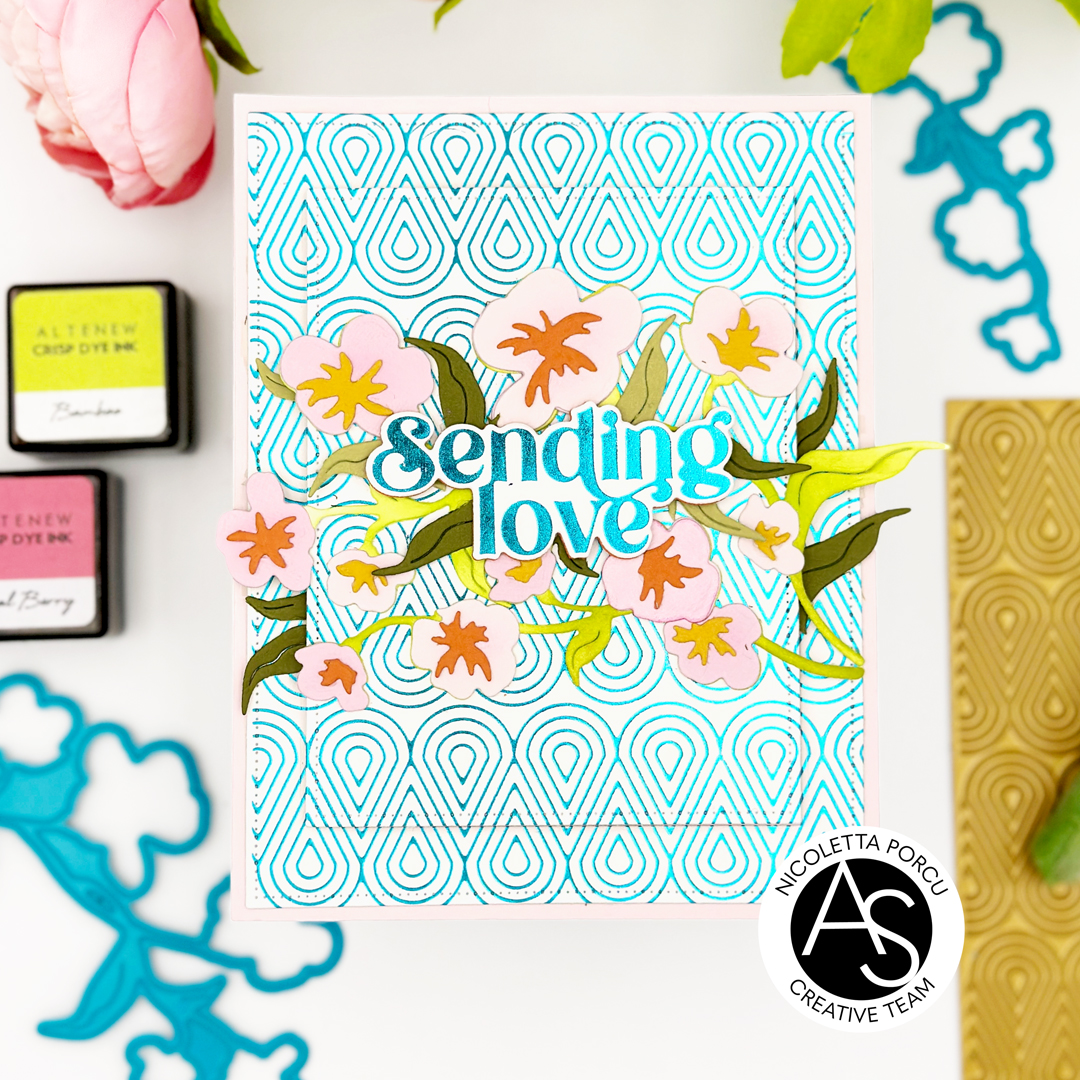
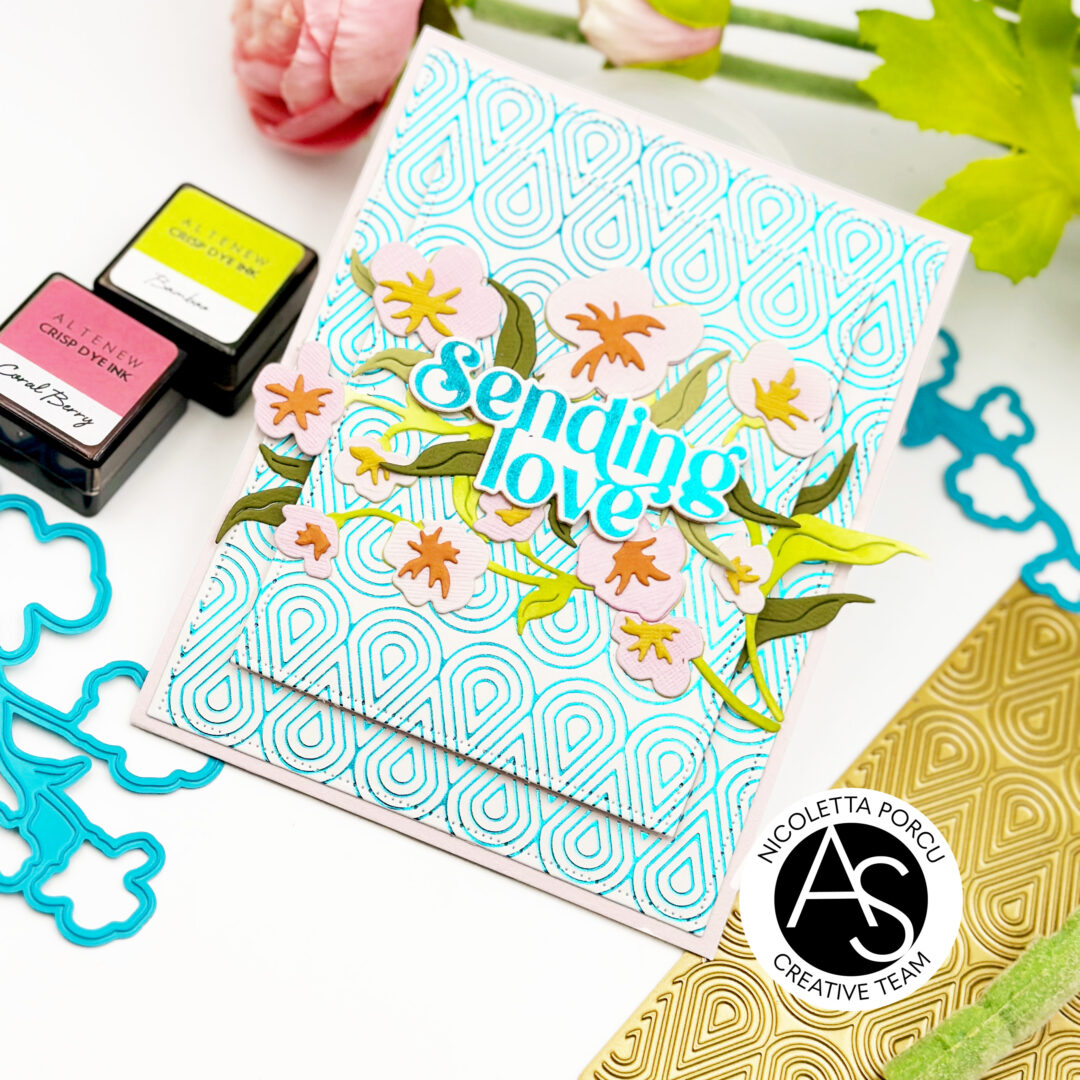
I started  hot foiling the background of my card  using the Glowing Geometry Hot Foil Plate and a teal foil. Next up I used one of the rectangle dies from the Nested Scallop frame Die Set to cut out the background panel and  from it an other rectangle out of the foiled panel and then I glued both of them on a light rose card base. I used the adhesive mousse pads for the make the smallest rectangle pops.    

I continued ie cutting the little flowers and leaved using Petit Periwinkles Die Set and I glued everything over the card. Next up I foiled the sentiment  using the For Her sentiments Hotfoil plate and die cutting it in many layers with the For Her sentiments die set. Once I glued the layers together I add it on the flowers composition.


And that's it! Hope you like my card! Thank you for your time.

giovedì 20 aprile 2023

Alex Syberia Designs "Time To Choose Magic" April Release Blog Hop and Giveaway

Hello crafty friends
Today, we are celebrating the launch of Alex Syberia Designs'   new release  of physical products with  a fun blog hop!!
The new release  includes  clear stamps, dies, stencils and  hot foil plates.
I'm sure  there's something for everyone to love!

Joining with us  will see many inspiration projects made by the AS design team in the ASD blog post so you could appreciate the amazing collection.

Let me share with you the card I made for the event, using some of the brand new products: the Quirky Rainbow die set  the  Bright and Bubbly die set and the Nested Scalloped Frames die set.


I started die cutting  a rectangle from a white paper using a frame from the Nested Scalloped Frames die set.  In this rectangle I die cut many shapes of a rainbow using the  Quirky Rainbow die set. From the same die cut set I obtained many rainbows from yellow, soft pink, light blue and teal cardstock.

Then I glued the rectangle frames over a white card base and in the rainbow shapes I previously die cut I compose the colored rainbows.

Once all rainbows was completed I die cut some hearts (from the Quirky Rainbow die set) from a glittered champagne cardstock and I glued them over the card.
Ad a last thing I stamped  in black the little sentiment "you are a star!" using a stamp from Always be yourself  stamp set and added  the big sentiment " Shine" from the Bright and Bubbly die set . To add dimension I  die cut the Shine sentiment in many layers...one of them in glittered Champagne cardstock and I glued it  a little staggered to create a shadow and add interest at the card.


Alex Syberia Designs is giving away the full release bundle, valued at £397 ($493) in total, to one very lucky winner!
The winner will be announced on the ASD Release Blog Hop post on May 1st.

Alex Syberia Designs will pick the winner to receive the prize from the comments left on each designer’s blog on the blog hop list below.

Blog Hop Order:


Have fun joining us with this blog hop
I'm sure you will love the entire collection and the DT inspirations as much as I do!

Ciao ciao
xx

giovedì 13 aprile 2023

It's been too long...since I made embossing with stencils


Hi crafty friends!

I'm here today with a new card that I hope can inspire you!

This time I mixed the Speckled Background stencil with The Giraffe-ic friends stamp and dies sets using a very fun technique to use stencils as embossing folders.

to made this technique I used the Spellbinder Platinum  six plus and all I did is  compose the embossing  sandwich and adding  the rubber  embossing mat between the basic platform and  my paper!

Specifically the sandwich is composed in this way: Basic Platform + rubber mat+ paper to emboss+stencil+embossing plate.

Really simple and cool result .. in the next days I hope to be able to show you the technique in a IG reel, so don't miss our accounts @nicolettaporcu.design and @alexsyberiadesigns.

As a first thing I embossed in this way the white base background, then I used the same stencils and a brown distress ink on a Kraft paper . As I finished using a Glitter gel pens  I added the contour on every dots.

As a following step I stamped the giraffe and the leaves from the Giraffe-ic stamps set, on a Neenah white cardstock and I colored the images with copic markers and I die cut them using the coordinates dies.

Then I started to assemble all the elements.

I glued the white embossed rectangle on a white base cardstock and over it I added, with adhesive foam pads. the piece of the Kraft paper and under this  the leaves, over the Giraffe I previously colored , and the string sentiment I stamped on a black cardstock and embossed in white.

The last touch was to add the rhinestones.

And that's it! 

Thank you for stopping by !

Ciao Ciao

mercoledì 5 aprile 2023

You have a beautiful heart.

Hello crafty friends!

I'm here today with a new card featuring the gorgeous Spring Garden Layered stencil set and the Large Thanks hot foil plate.

I hadn't used  them yet so I had to fix it,  is it not?

So no coloring here  but so much fun and relax joining with stencils.

I started by stenciling the "Modern Waves Layering Stencil set" using the Shaded Lilac and Milled Levander Distress inks applying them in a  very light way on a white cardstock. From it  I die cut  the  top panel and using  foam adhesive tape I  adhered it over a white cardstock base.

I continued  by stenciling the Spring Garden Layered stencil set using the Milled Levander, Shaded Lilac, Speckled Egg, Tumbled glass, Squeezed Lemonade, Mustard Seed, Broken China Distress inks .

After I used the Spring Garden stamp to define the edges and the flowers' details  heat embossing them in gold.

I continued hot foiling  the sentiment "Large Thanks" and die cutting it with the coordinate die and stamping and embossing in gold a string sentiment on a purple cardstock.

I add the flowers and the sentiments over the card and as a last touch  I added some lilac  rhinestones.

And that's it!


Hope my card can give you some inspiration!

Thanks for your time!

Ciao ciao

linktwin

Related Posts with Thumbnails

ShareThis