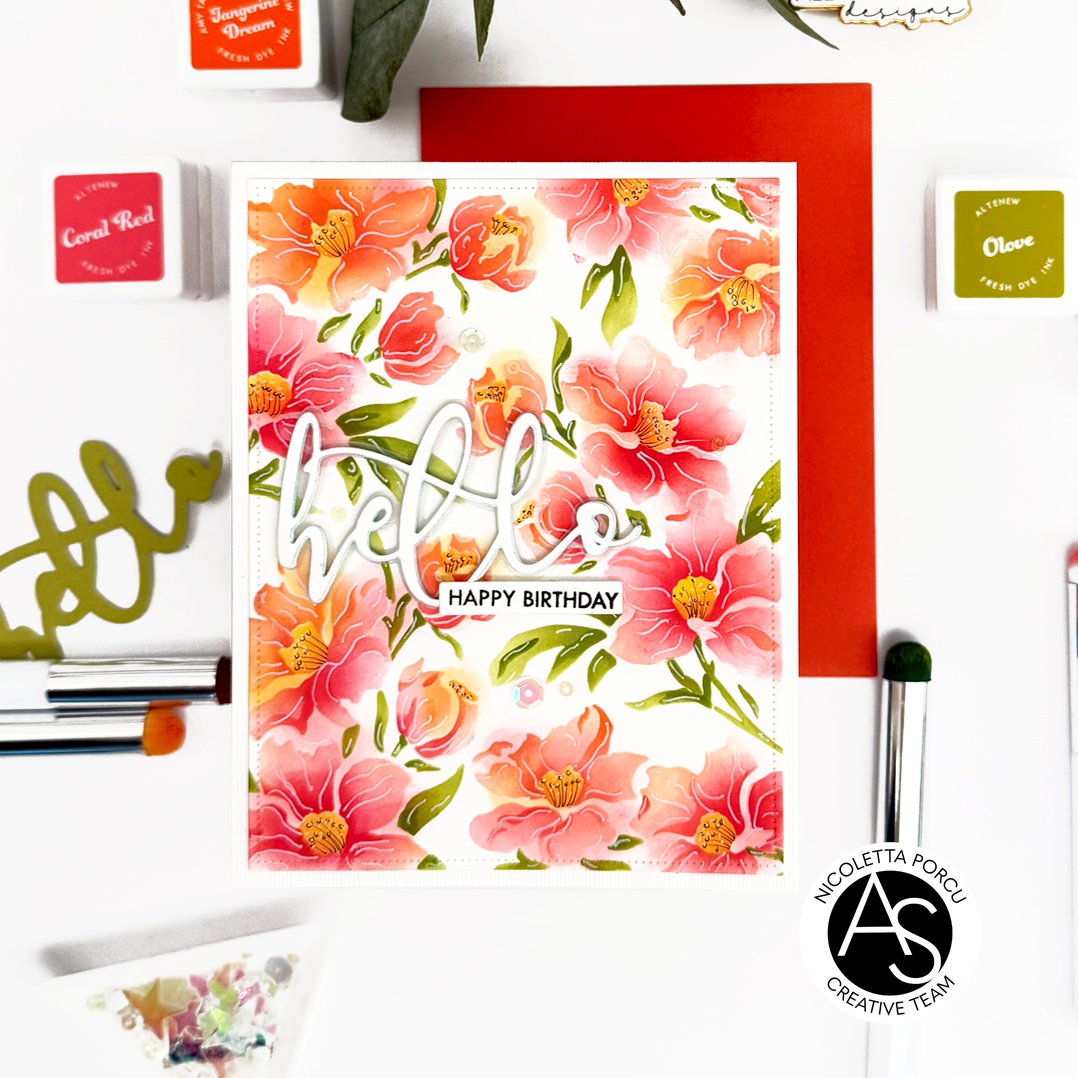
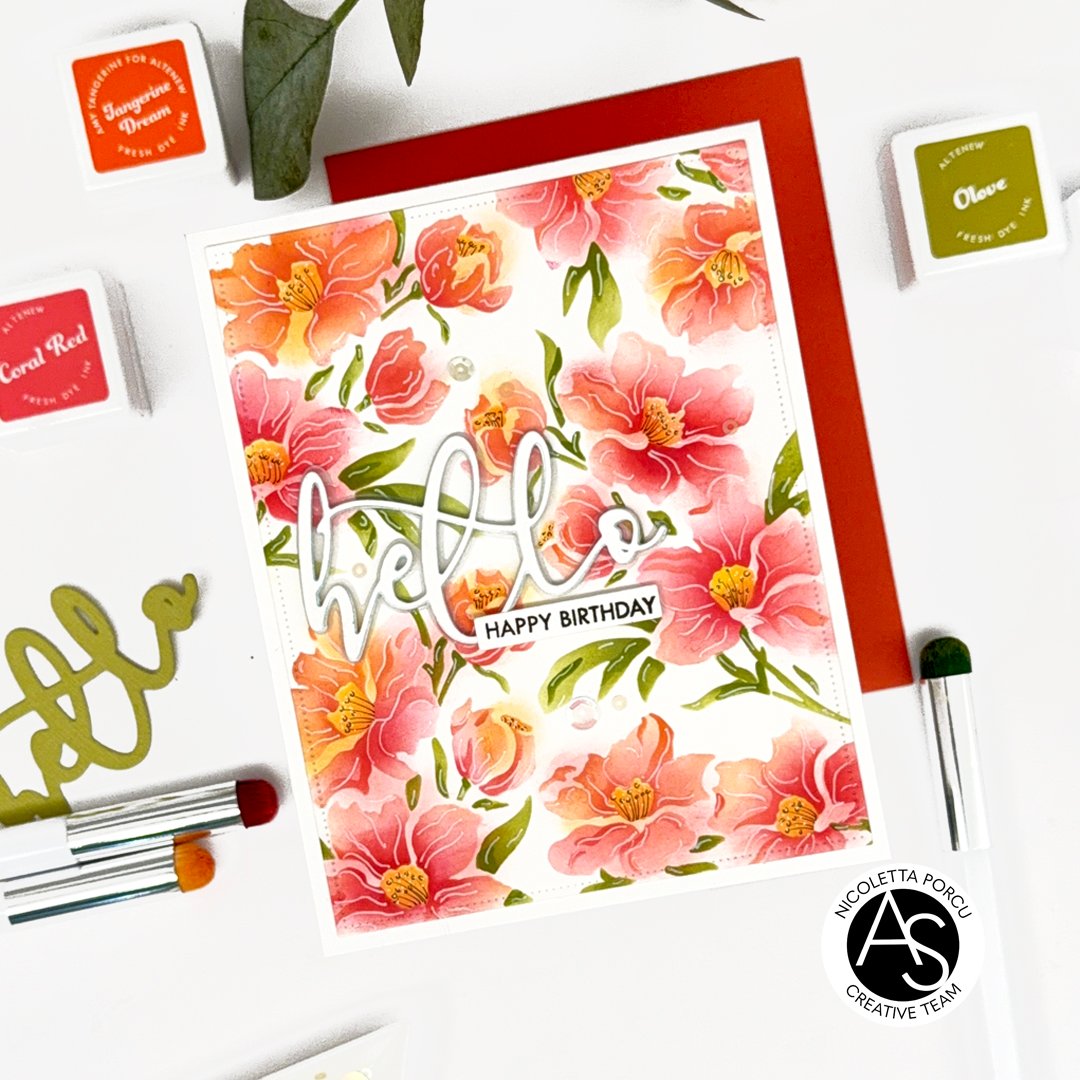
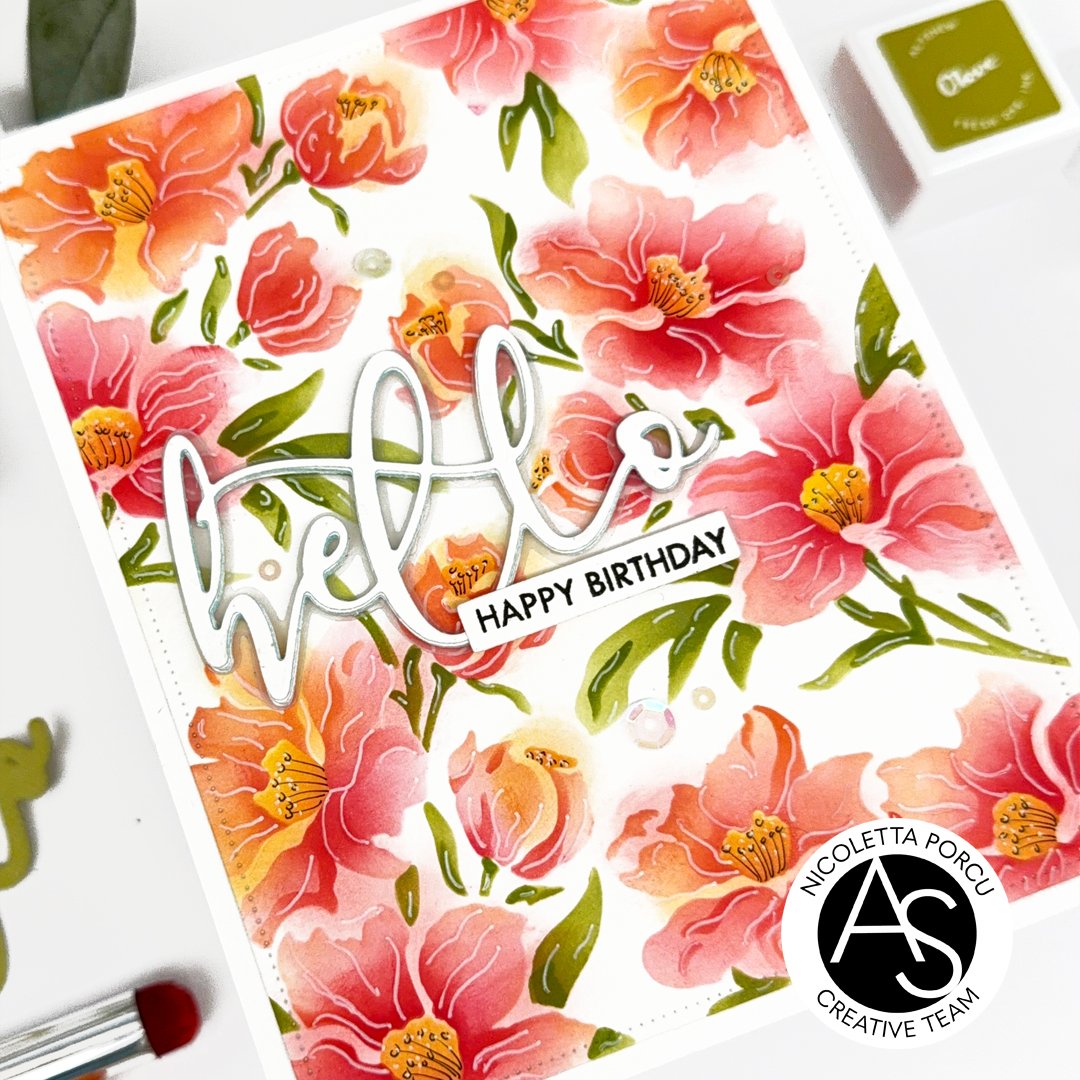
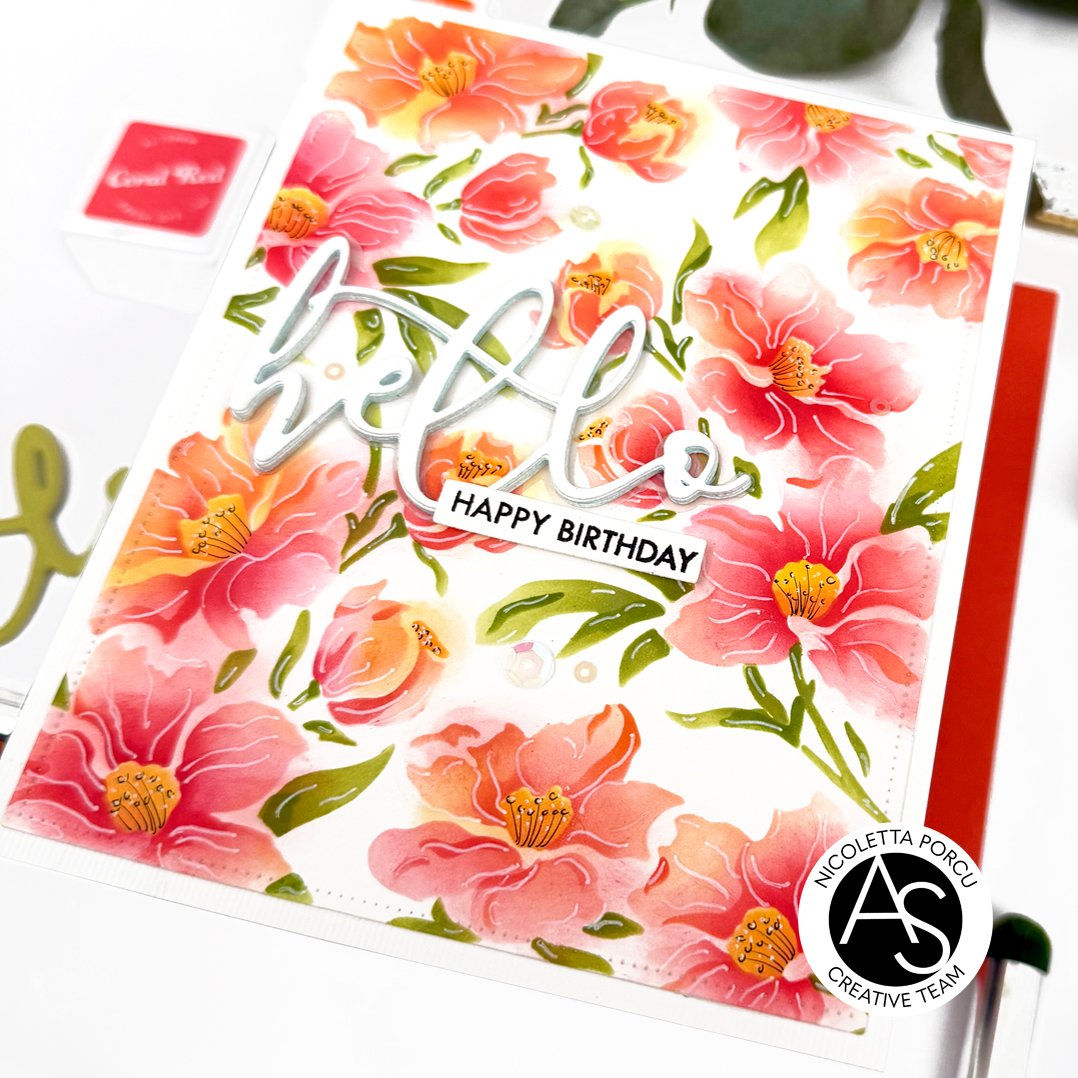
Hi crafty friends!
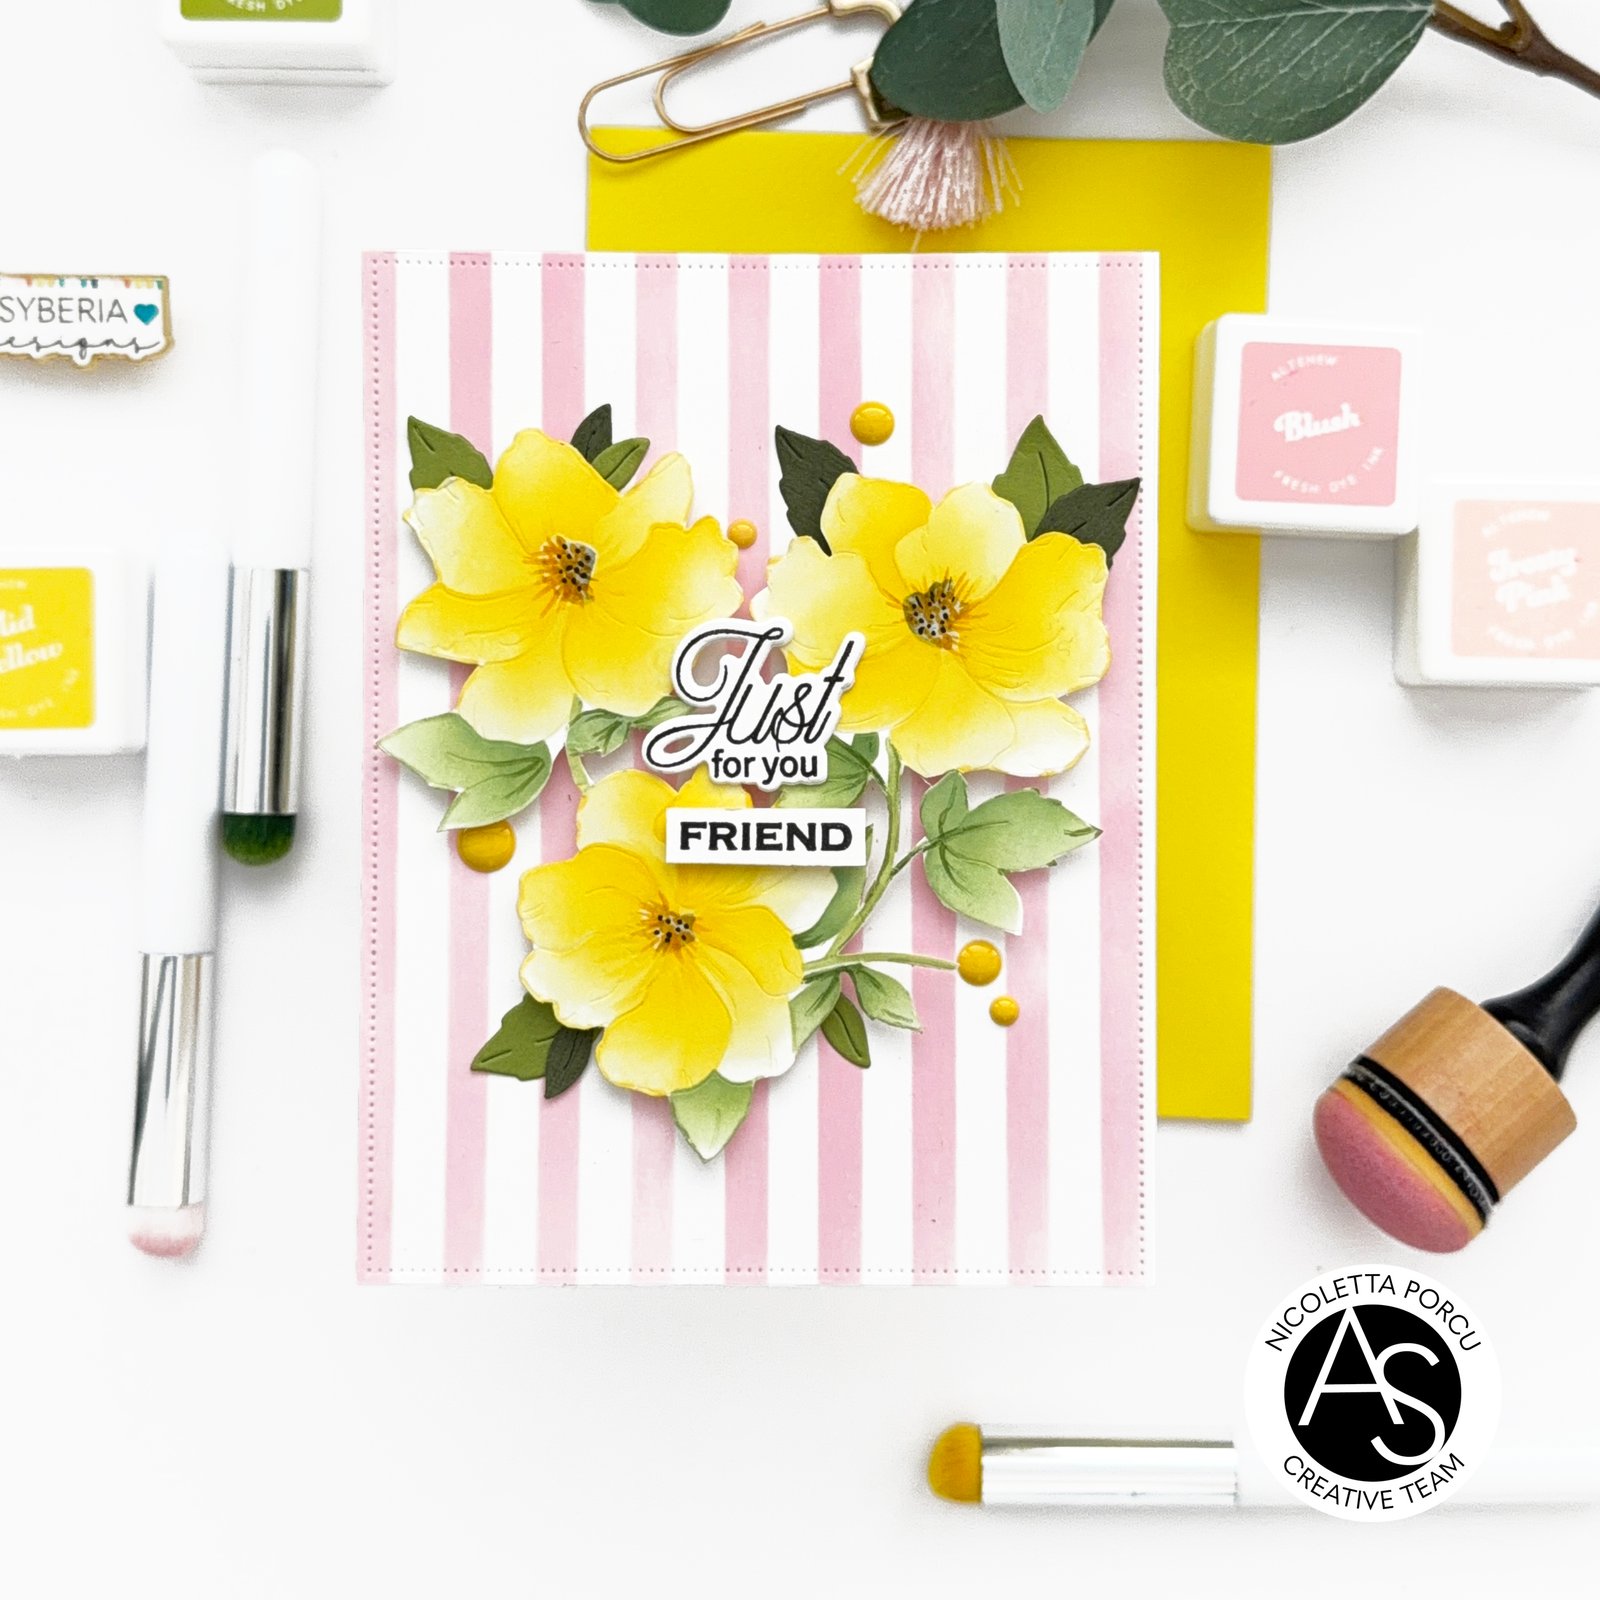
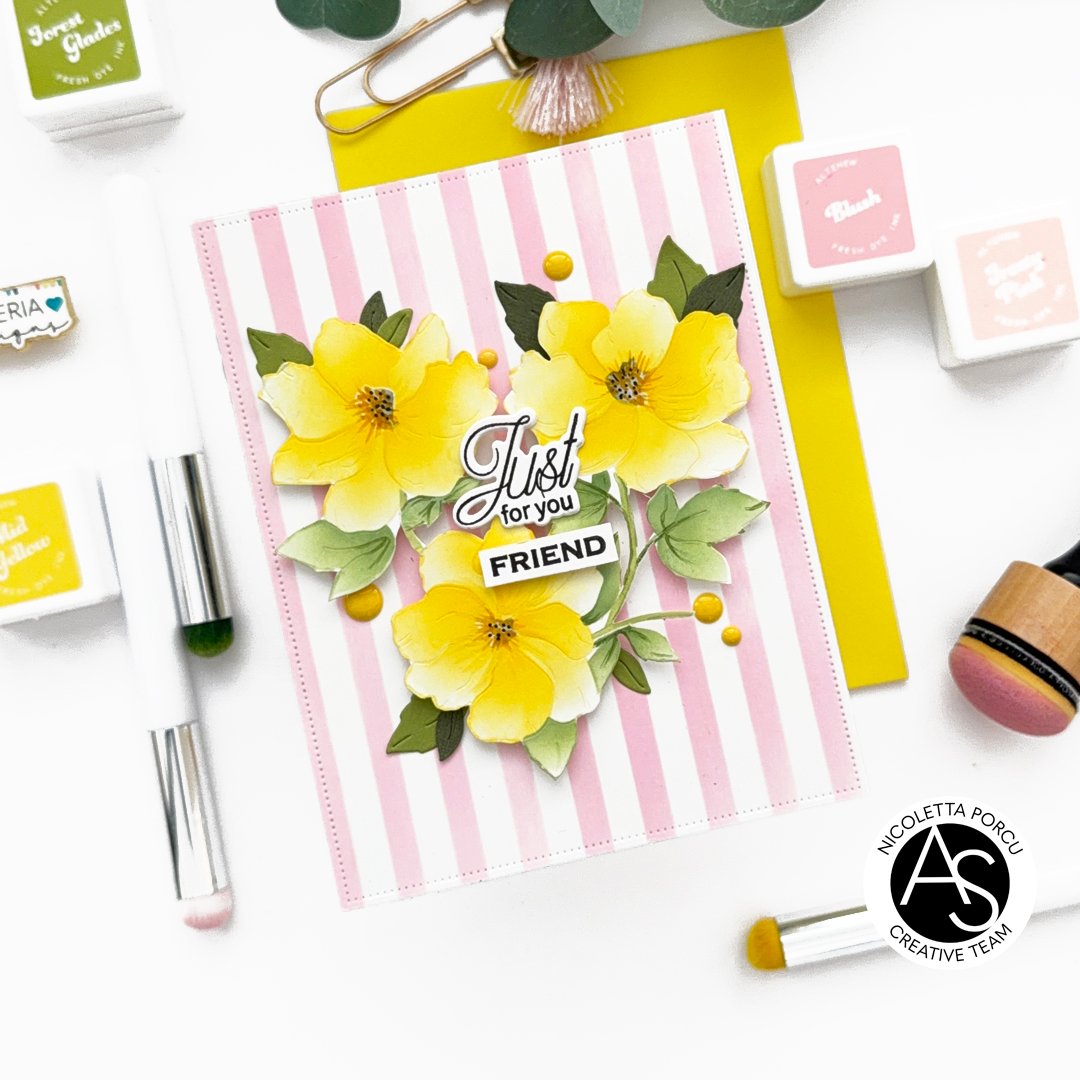
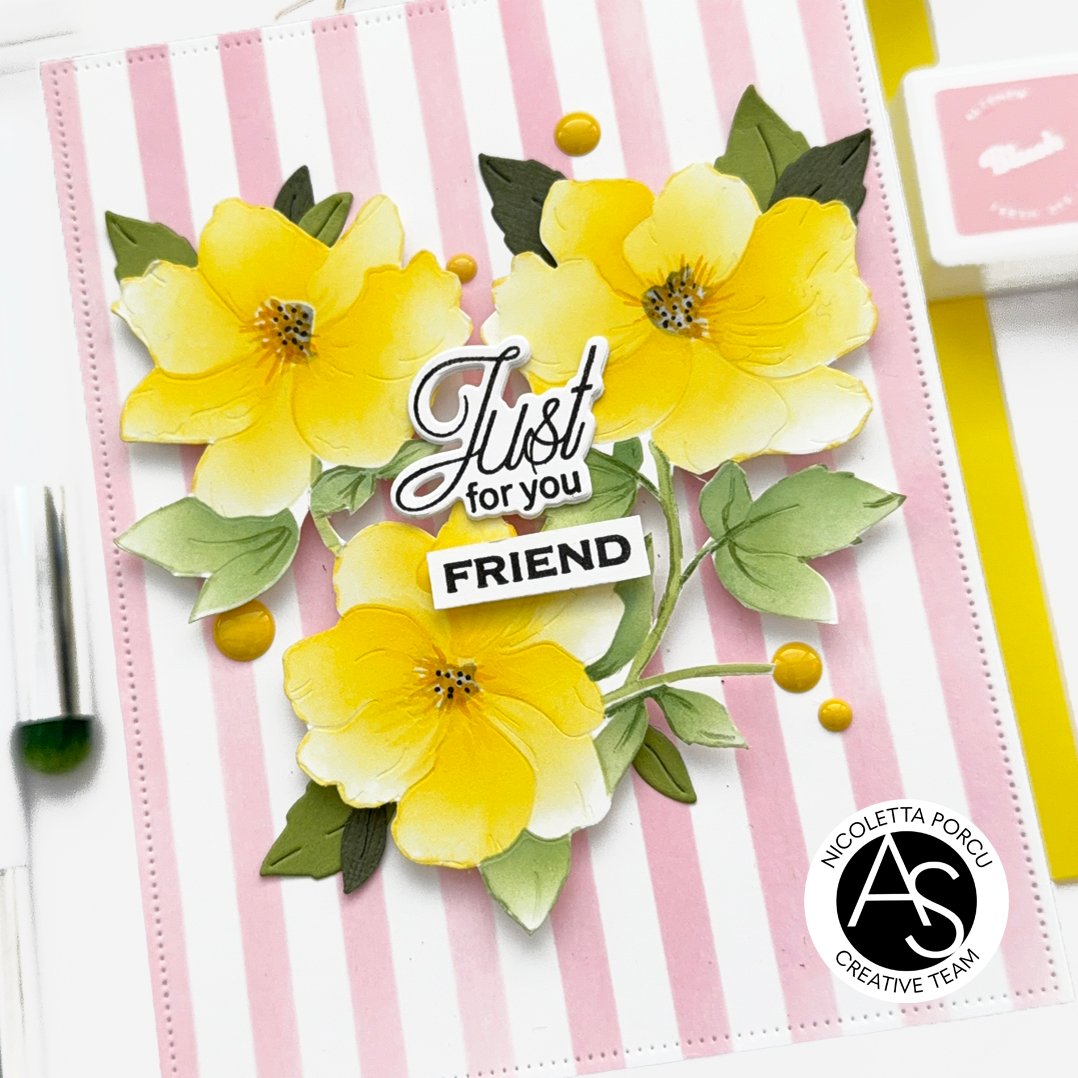
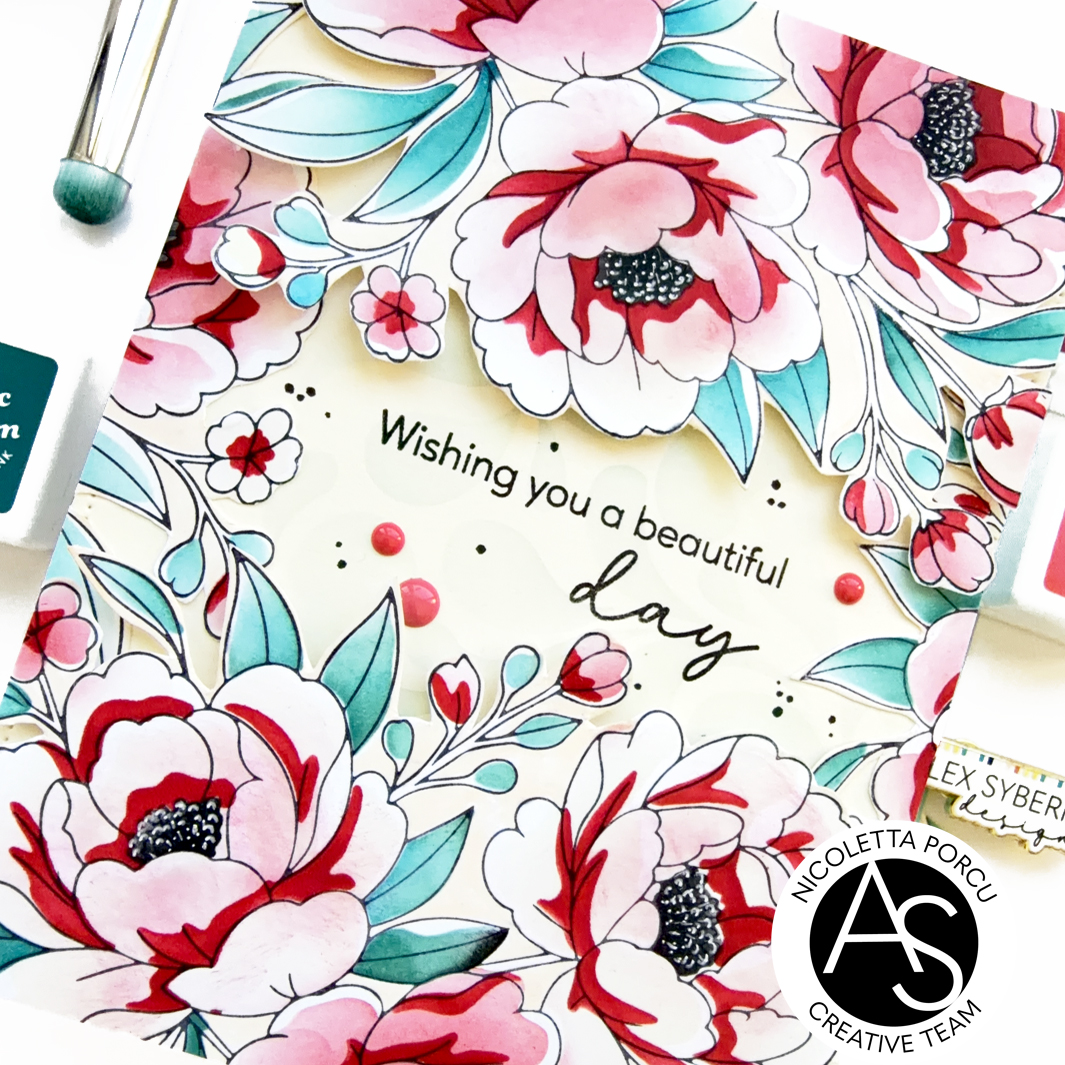
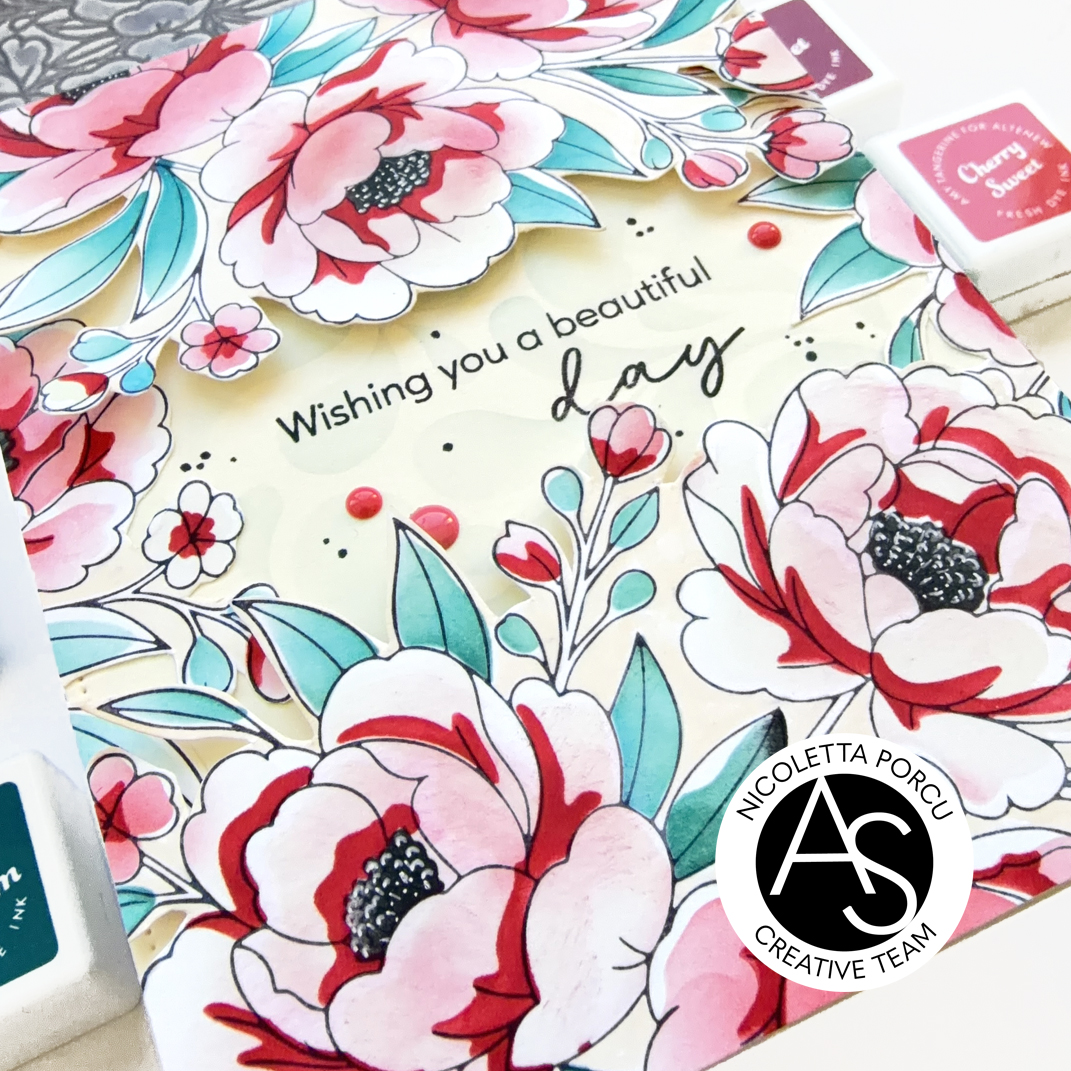
I'm here, today, sharing a new card with you, featuring the Summer Flower Press Plate and the "ghost" sentiment technique.
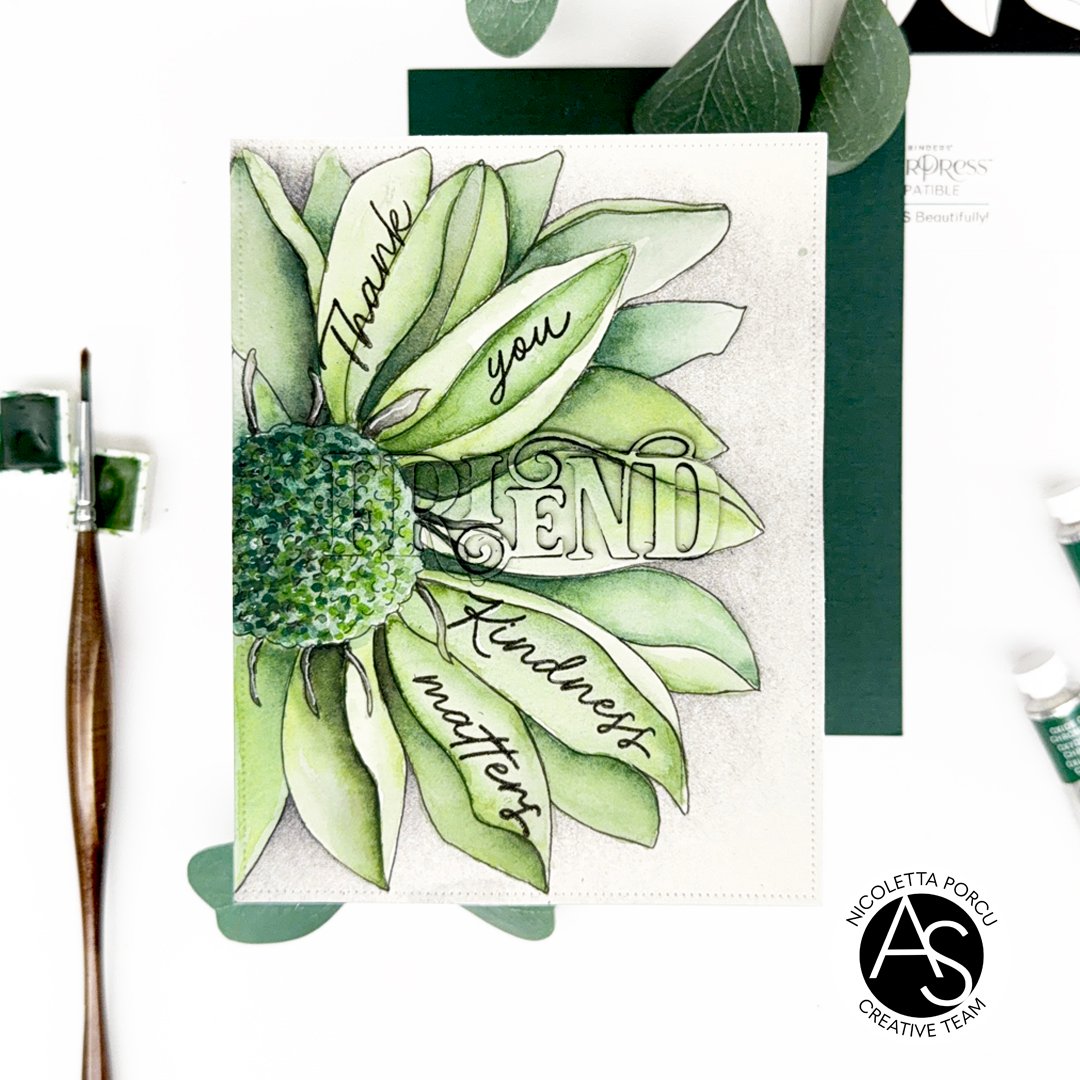
To make my card I started by placing the Summer Flower Press plate on Betterpress Letterpress system machine and lightly inking it with a black archivial ink. Then I run the Betterpress "sandwich" on my Platinum 6 die cut machine to transfer the image on the watercolour paper.
Next I watercolored the summer flowers using the Schmincke Horadam watercolours in many shades of green and I traced the floral's outline using a black pen.

Once the coloring dried I die cut the Floral image into a rectangle using the Nested Scalloped Frames die set and then I stamped the black sentiments, from the Abstract Background Stamp set, on the Summer Flower petals. I got the idea from my friend Sylvie @Kaliscard.
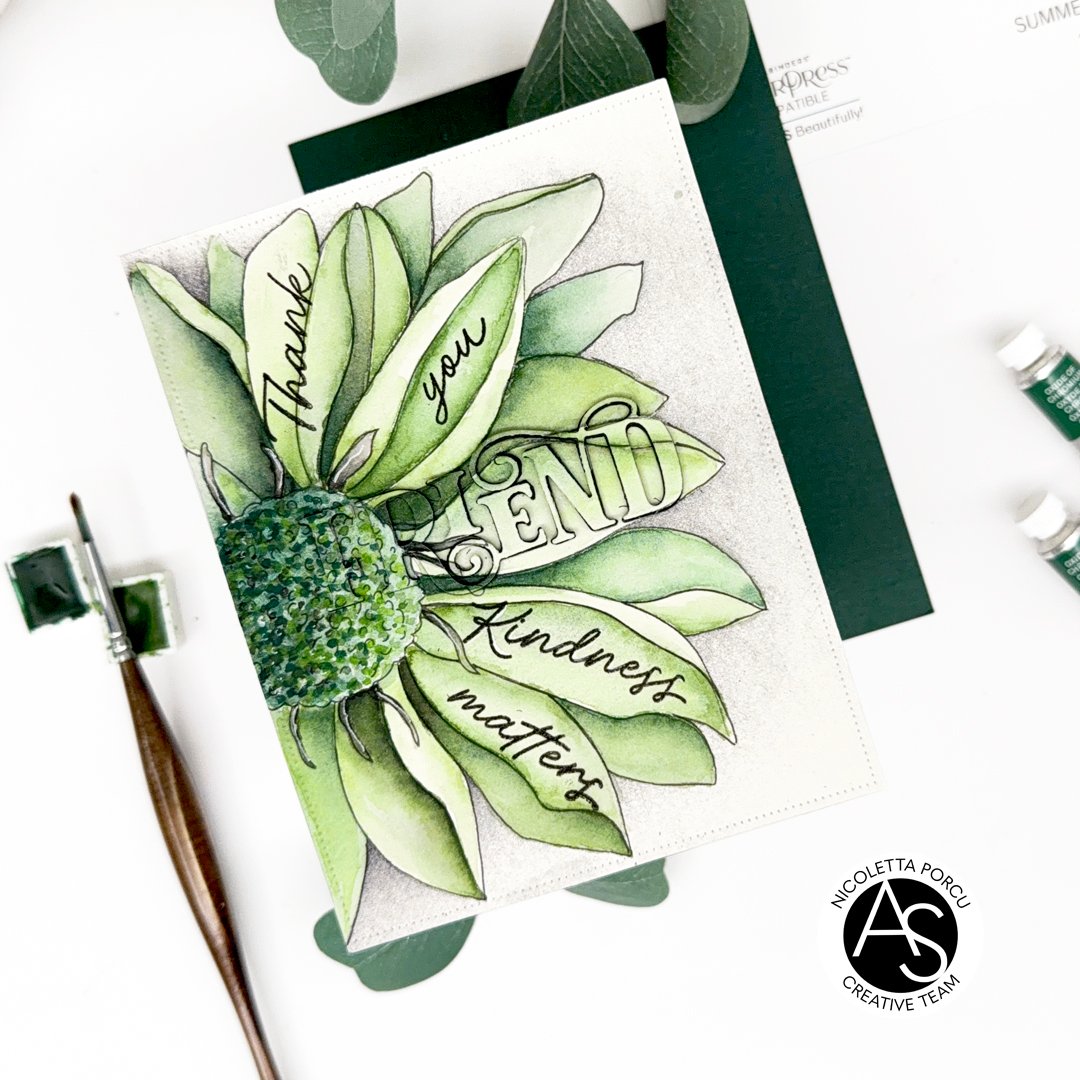
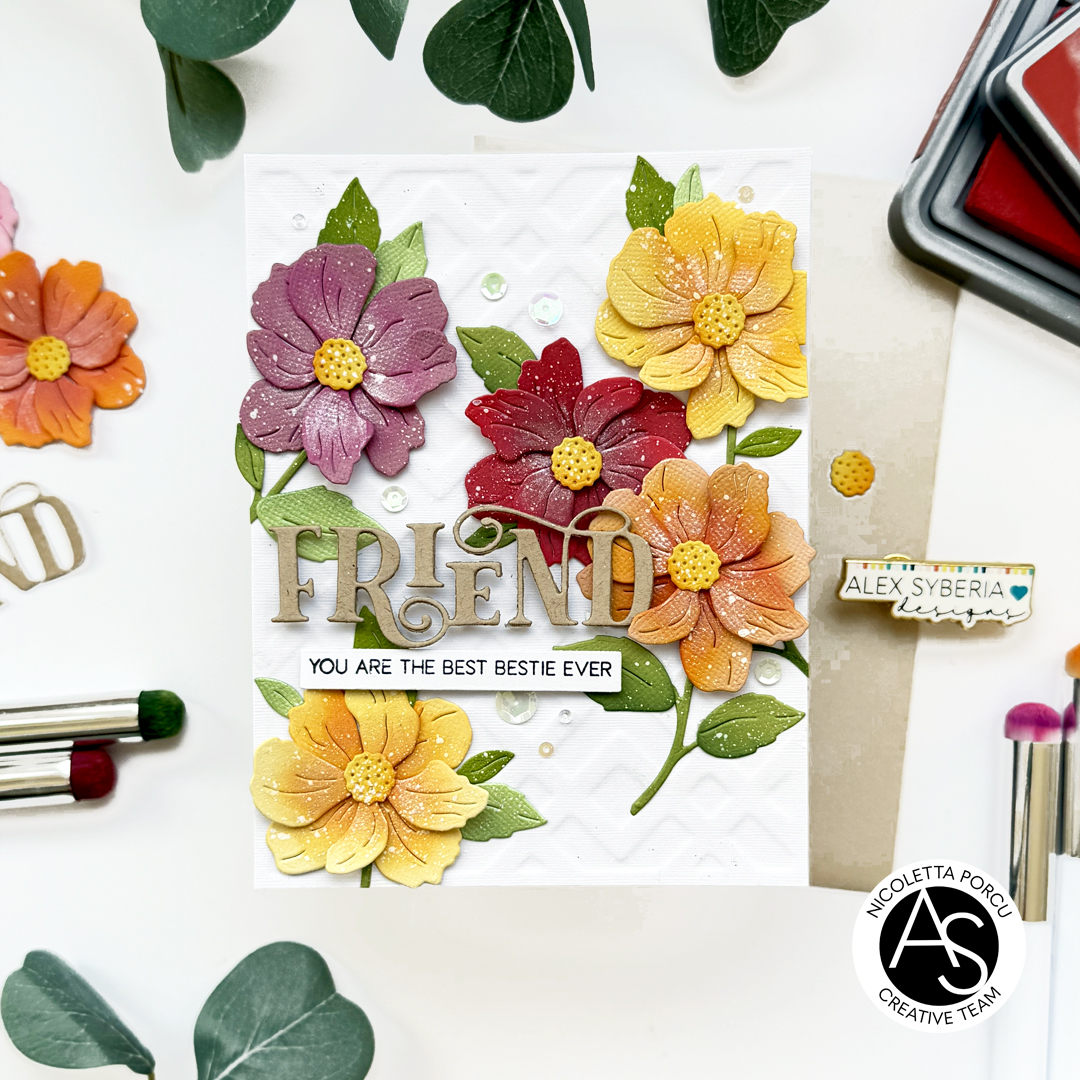
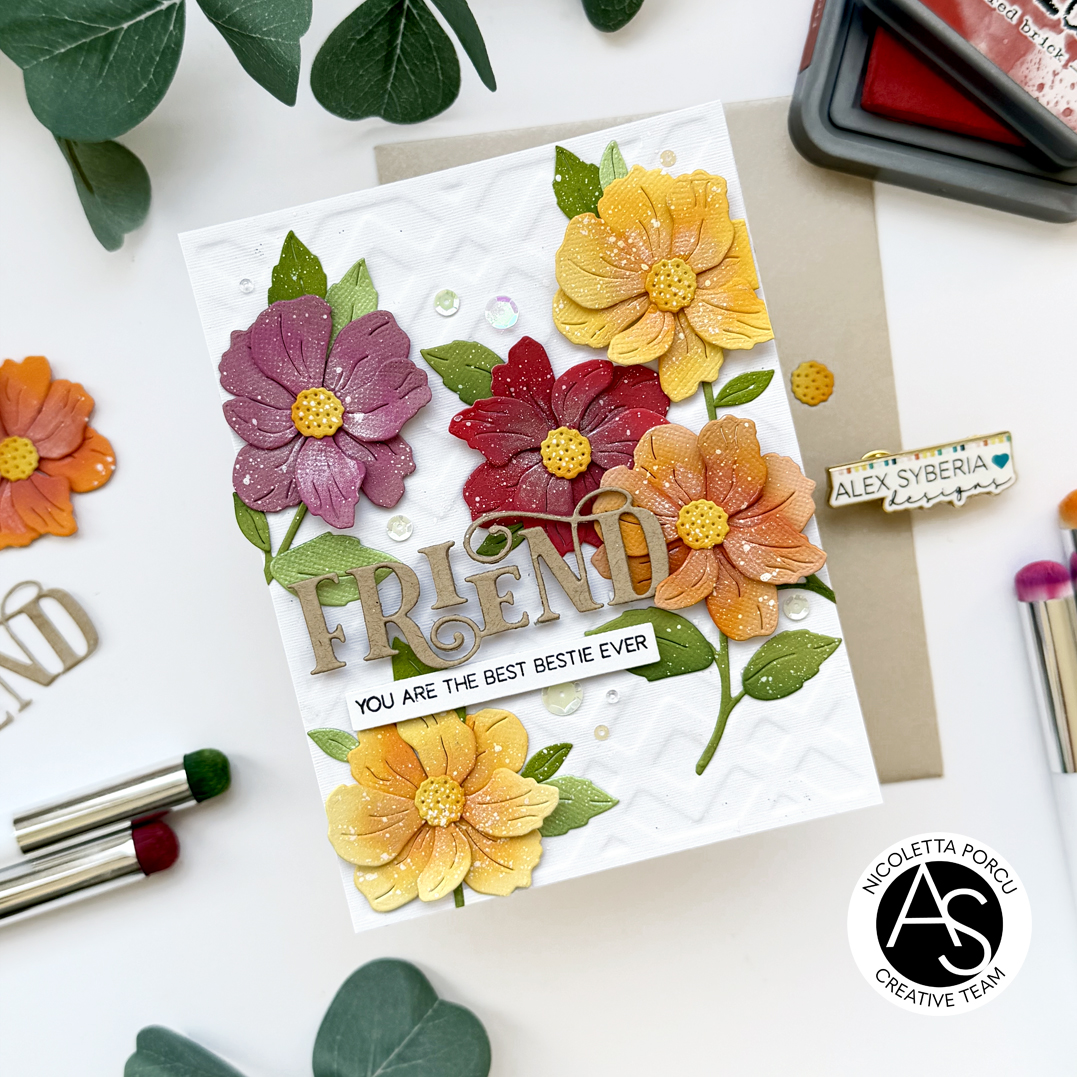
Next up I continued making the Ghost or Eclipse Sentiment!
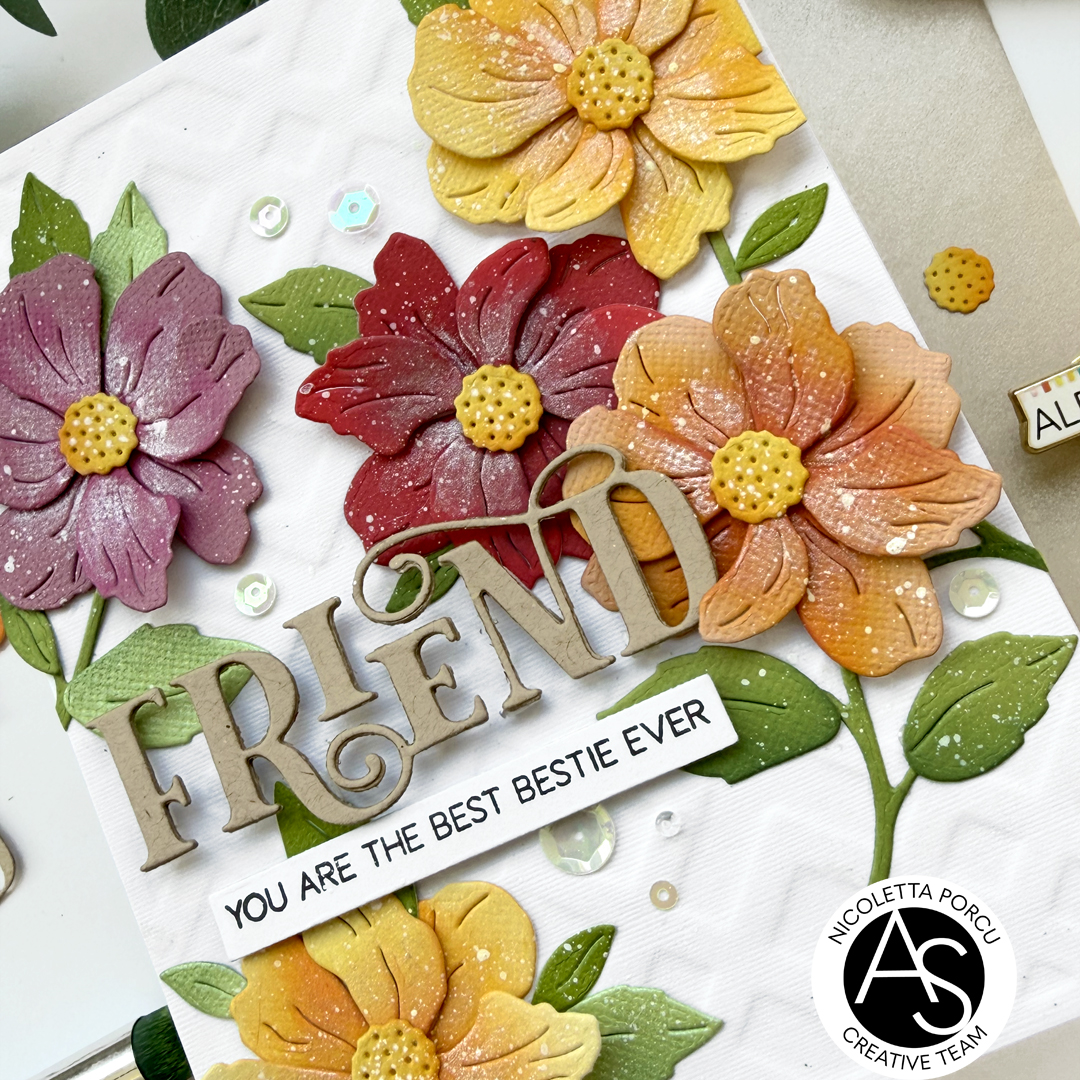
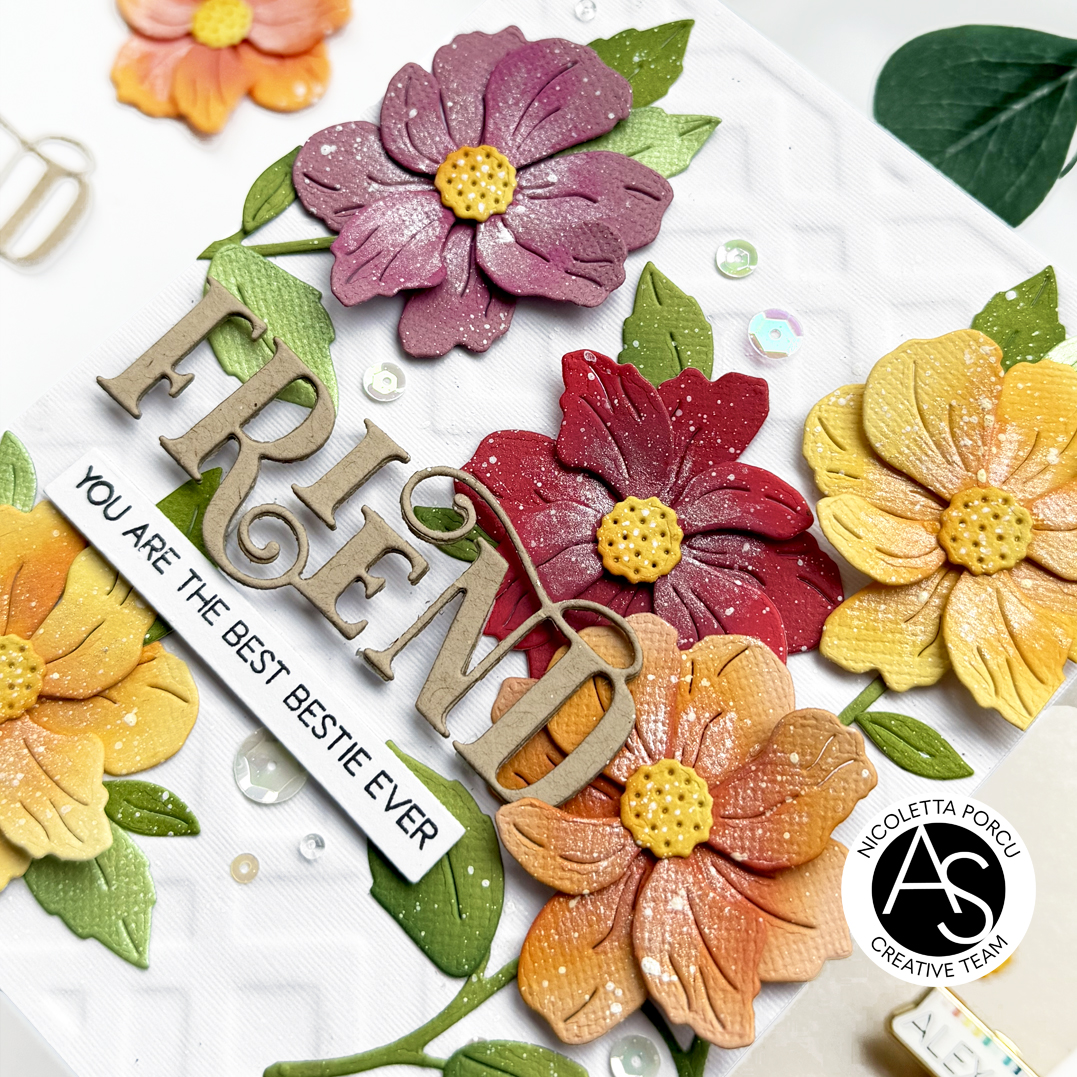
I die cut the "friend" sentimet, from the Delicate Frame & Friend die set, directly above the colored flower creating a hidden on it and I glued it on white base card. Then I die cut 4 other "friends" from a black cardstock and I glued them on the hidden spaces putting at the top the colored one I die cut from the colored flower.
In this way the die cut ghost sentiment pops out .
I added some white gel pen touch and that's it!
Below a recap of the products I used:
Nested Scalloped Frames die set
Delicate Frame & Friend die set
Betterpress Letterpress system machine
Spellbinders New & Improved Platinum Six Die Cut and Embossing machine
You could find all of them on Alex Syberia Design UK shopand on the US Alex Syberia Design shop for the American friends.

Thank you so much for stopping by!
See you soon
Ciao ciao